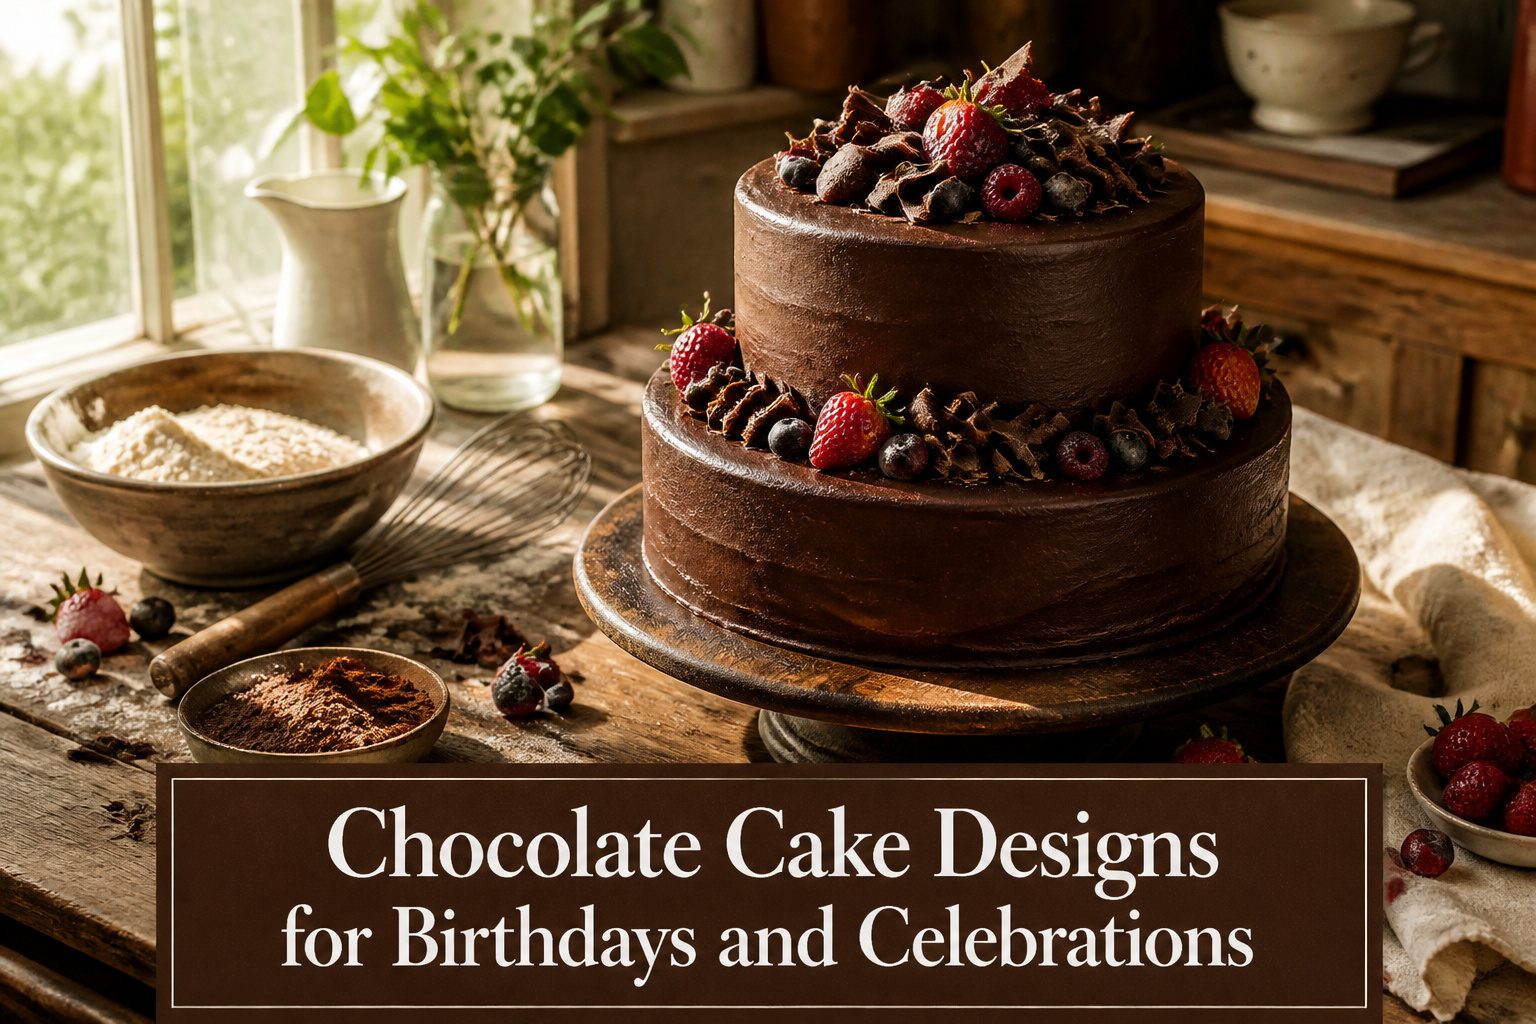
The most useful finishing move for a home baker is knowing when to stop decorating. A cold cake, a pour of ganache, and the surface levels itself while it sets.
No piping skills required, but room temperature will undo the whole design. One cup of boiling water in the chocolate batter, bloomed right, gives you the richness that lets the decoration stay minimal.
1. Vintage Chocolate Cake
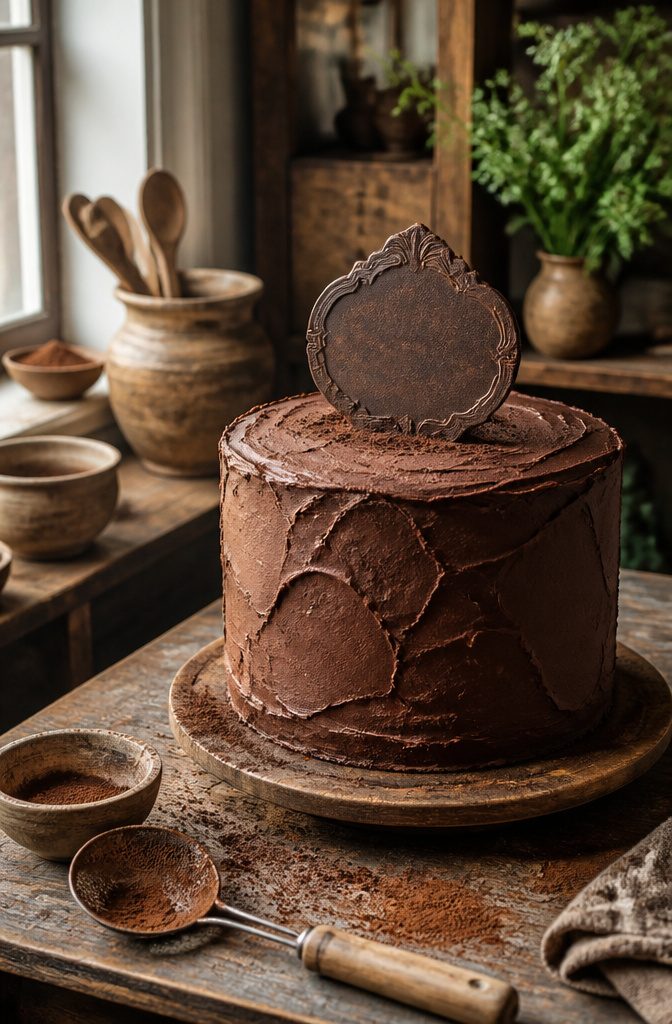
A vintage chocolate cake design starts with the right foundation. The batter uses 2 cups flour, 2 cups sugar, 3/4 cup cocoa powder, 2 teaspoons baking powder, 1.5 teaspoons baking soda, 1 teaspoon salt, and 1 teaspoon coffee powder to deepen the chocolate without adding coffee flavor.
Wet ingredients are 1 cup milk, 1/2 cup oil, 2 eggs, 2 teaspoons vanilla, and 1 cup boiling water that blooms the cocoa into something richer. Bake at 350°F for 30–35 minutes.
The vintage look comes from restraint, not skill. A simple chocolate frosting between layers and around the outside does the work.
No fondant, no piping bags, no specialty tips. The aesthetic is in the matte finish and the slight imperfections of a hand-spread coat.
A pre-purchased sugar sign printed like a vintage label finishes it. Think old whiskey bottle styling: "vintage, aged to perfection, limited edition" with the age dropped between "limited" and "edition."
White or dark chocolate for the sign depending on your color scheme and sweetness preference. The whole thing reads as intentional nostalgia rather than decorated cake, and that distinction is what makes it hold up.
2. Black Forest Gateau
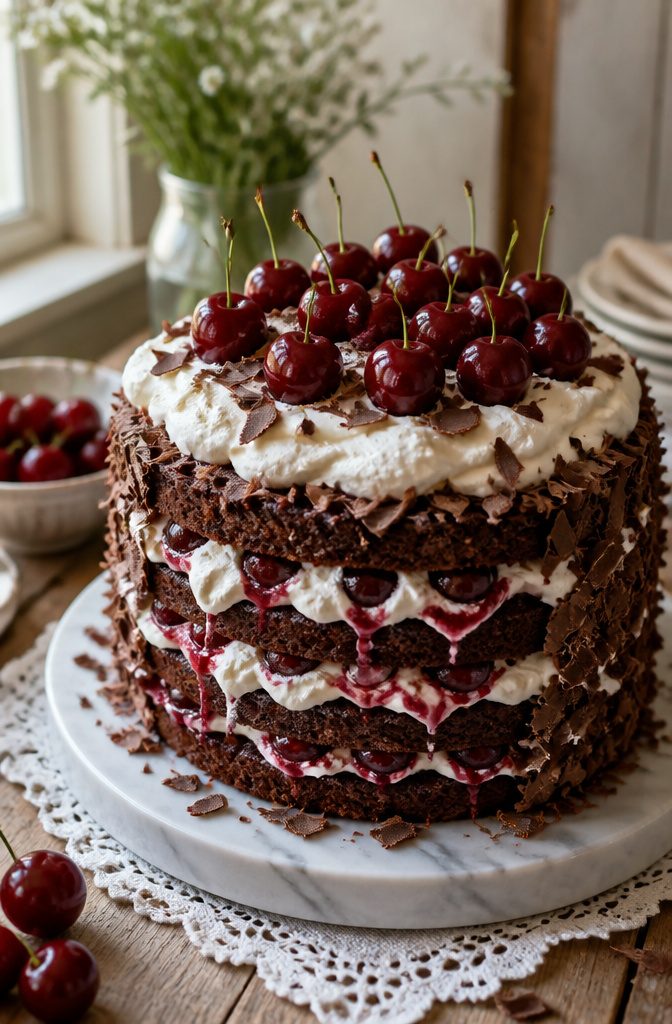
A Black Forest gateau earns its place among chocolate cake designs through height and contrast more than ornament.
The build starts with dark chocolate sponge, layered with tart cherries and barely sweetened whipped cream. Kirsch soaks the cake, though a simple syrup works for anyone keeping it family-friendly.
The visual signature comes from the tall, exposed sides of cream between cake layers, studded with morello cherries and finished with dark chocolate shavings pressed into the exterior.
That combination of pale cream, deep brown sponge, and burgundy fruit reads as celebration without requiring piping skills.
Dark chocolate dominates both the cake itself and the finish.
The shavings need to be wide enough to catch light, thin enough not to overwhelm a slice. Against the sweet cream, the tart cherries provide the balance that keeps a third piece tempting.
For home bakers, the practical challenge is stability. Cream softens at room temperature, so this cake holds its shape best when assembled no more than a few hours before serving and kept chilled until the last minute.
3. Kids Chocolate Cake
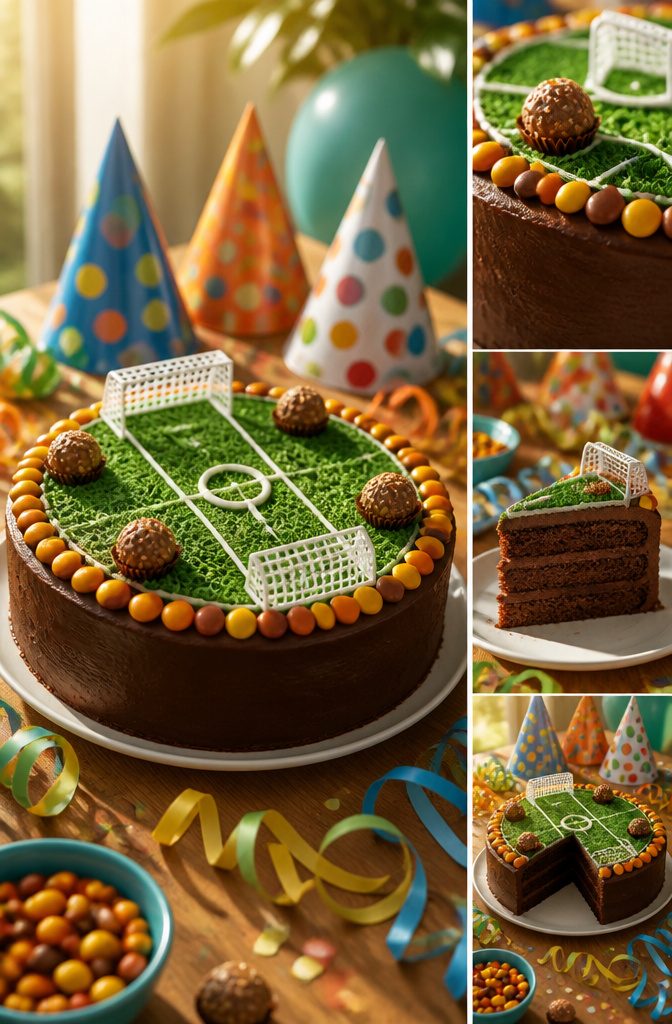
A chocolate cake for a child needs to look like it was made for fun, not for a magazine cover. That is the first thing to get right.
I reach for bright candy and grocery-store treats because they are forgiving and easy.
Ferrero Rocher gives you a gold-wrapped dome that looks expensive without effort. Kinder bars and Hershey’s Kisses come in colors now, and they press straight into soft frosting without any piping skill.
A circle of Kisses around the top edge, a cluster of Kinder pieces in the center, and the cake already looks like a party.
The shape matters too. A standard round cake works, but a rectangular sheet cake turns into a soccer field, a castle, or a robot face with almost no extra work.
The frosting does not need to be smooth. Kids notice the Reese’s Pieces spelling their name, not a slightly wavy buttercream finish.
The only rule I keep is to let the cake cool completely before decorating. Warm frosting slides, and candy melts.
Everything else is flexible. Add Flipz Pretzels for texture, write "happy birthday to the big kid" in chocolate if you want, or skip the message and add one large candle.
The design wins because the child thinks it was made for them, not because it was made perfectly.
4. Chocolate Strawberry Cake
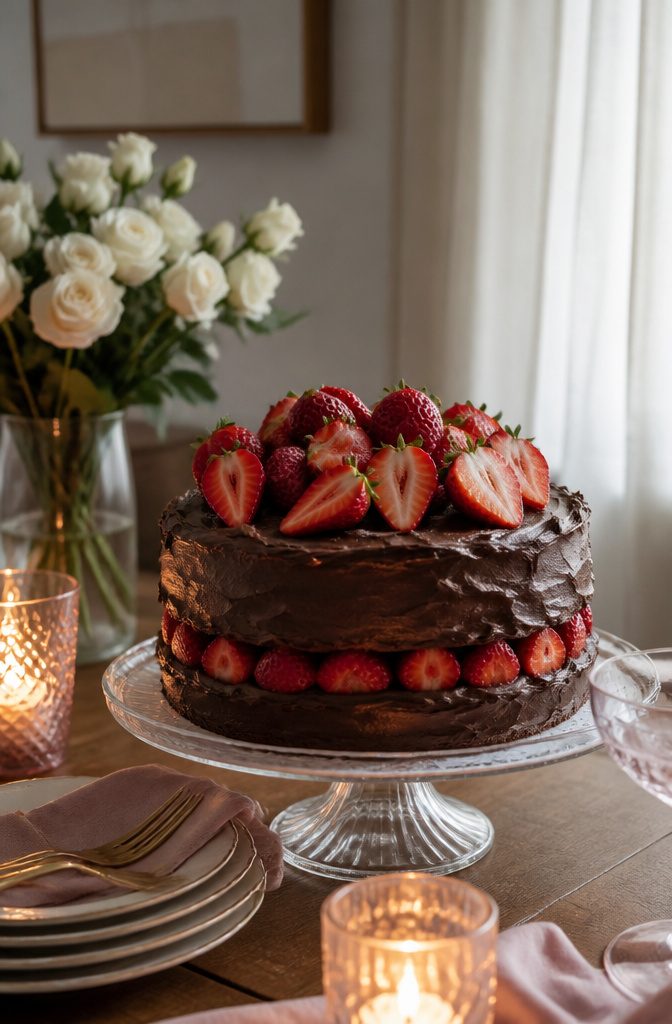
Fresh strawberries against dark chocolate frosting give this design its impact. Red reads instantly against brown, so plain slices of strawberry do the finishing work without elaborate piping.
I place whole strawberries on top for a gathering where the cake sits out briefly, or slice them between layers when the cake will be served within a couple of hours.
Add sliced strawberries no more than a few hours before serving, or their moisture seeps into the crumb and softens it.
A thin layer of buttercream on each cut surface buys a little time by sealing the cake, but it does not stop the weeping entirely.
Whole berries last longer on top because their skin stays intact. Rinse and dry them thoroughly first; any water clinging to the fruit will pool in the frosting.
For sliced layers, I look for berries that are ripe but still firm, the kind that hold their shape when halved rather than collapsing into juice.
This design suits a small birthday dinner or an anniversary where you want the cake to look considered without a day of construction. The fruit does the work.
5. Ferrero Rocher Cake
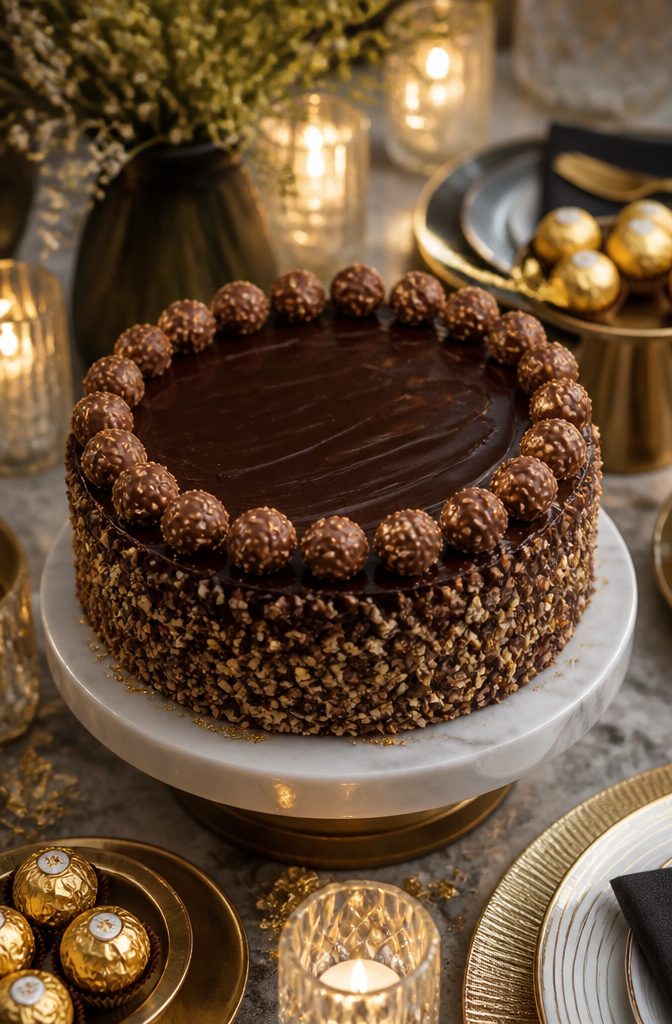
A Ferrero Rocher cake builds its whole look around the gold-wrapped hazelnut candies rather than generic chocolate shavings or frosting flowers.
The simplest version runs dark chocolate icing between layers and coats the outside with the same, keeping the finish deliberately rustic rather than perfectly smooth. From there, the design hinges on how you use the candy itself.
A ring of whole Ferrero Rocher around the top edge reads as formal without extra piping work. The gold foil catches light against the dark frosting, and the dome shapes give the cake height that flat decorations cannot.
For the sides, crushing the candies and pressing the pieces into fresh frosting adds texture that hides imperfect edges. The hazelnut bits also give guests a preview of the flavor.
Edible gold flakes extend the metallic theme if you want more flash, though they are optional. A golden sugarpaste message or a premade topper with a name or age finishes the cake without competing with the candy.
Ferrero Rocher is priced as a gift chocolate, not a baking ingredient, and a ring plus crushed sides for even a single-layer cake uses more than one might expect.
For a smaller gathering, the ring alone keeps the signature look with fewer boxes.
6. Heart-Shaped Chocolate Cake
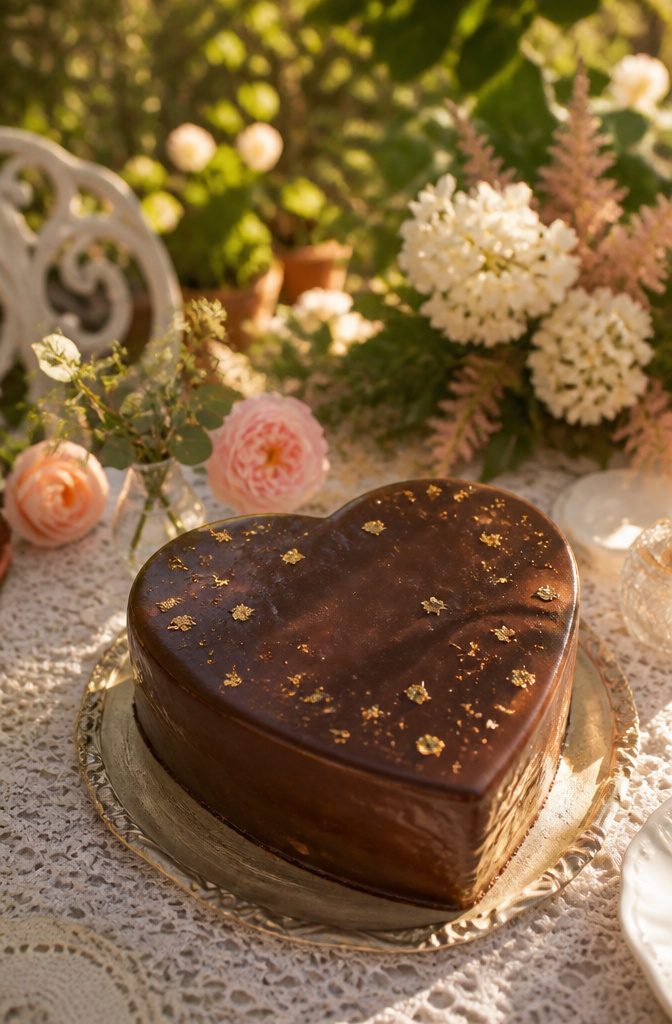
A heart-shaped chocolate cake works for anniversaries, Valentine’s Day, or any occasion that calls for something unmistakably romantic.
You have three ways to get there. A heart-shaped pan is the simplest route, though it is a single-purpose tool that sits in the cabinet eleven months of the year.
A paper template traced onto cooled round layers and cut with a serrated knife gives you the same silhouette without the storage commitment.
The third method, cutting and reassembling two round layers, is the one I would choose: bake two 9-inch rounds, halve them, and arrange the four wedges into a heart with the points meeting at the bottom and the curved sides forming the top lobes.
The angled edges and pointed bottom are where this shape fights you.
Frosting does not glide over corners the way it does flat sides, so start with a thin layer of buttercream to seal in crumbs, then chill until firm before applying the final coat.
A small offset spatula is the right tool for working into the V at the bottom and smoothing the inside curves where the lobes meet.
Dark chocolate ganache or buttercream both work here; the former sets glossier and forgives more, the latter gives you longer to smooth before it crusts.
Keep the decoration minimal. White chocolate writing, perhaps a name or short message, reads cleanly against the dark surface.
Edible gold flakes add a little luxury without cluttering the shape, and a few unsprayed rose buds set beside the cake finish the presentation without touching the frosting at all.
7. Simple Chocolate Birthday Cake Designs
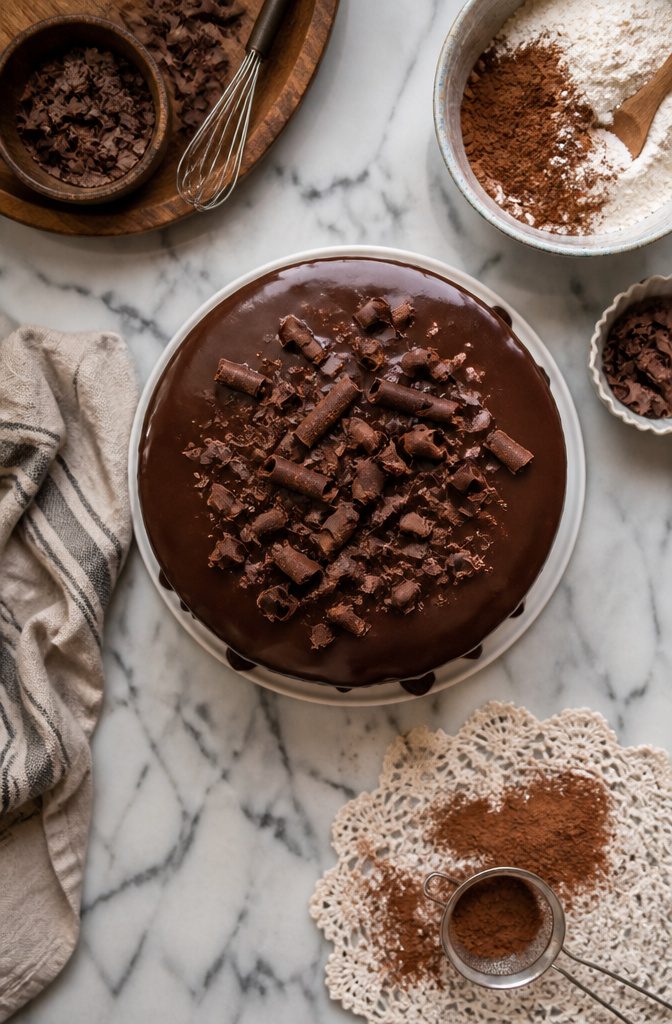
Smooth ganache is the most reliable finish for a home baker who wants the cake to look like it came from a bakery case.
Pour it warm over a chilled cake, let it drip down the sides, and the surface levels itself while it sets. No spatula artistry required.
Swirled buttercream asks even less of you. A large offset spatula and a turntable, or even an inverted dinner plate, lets you spread the frosting in loose figure-eights.
The motion hides uneven spots and reads as intentional texture. A cold cake is the only secret here; warm layers will slide the design right off.
Chocolate curls from a vegetable peeler turn a standard bar into shavings that look expensive scattered over the top.
Run the peeler along the broad side of a room-temperature bar, not the narrow edge, for wide ribbons that hold their curl.
For the absolute minimum effort, a paper doily or a cut-out stencil and a dusting of cocoa powder over white buttercream gives you a lace pattern in about ten seconds.
Tap the sieve gently; a heavy hand blobs the design. These four approaches need no piping bags, no tips, no specialty equipment at all.
8. Alternatives to a Chocolate Birthday Cake
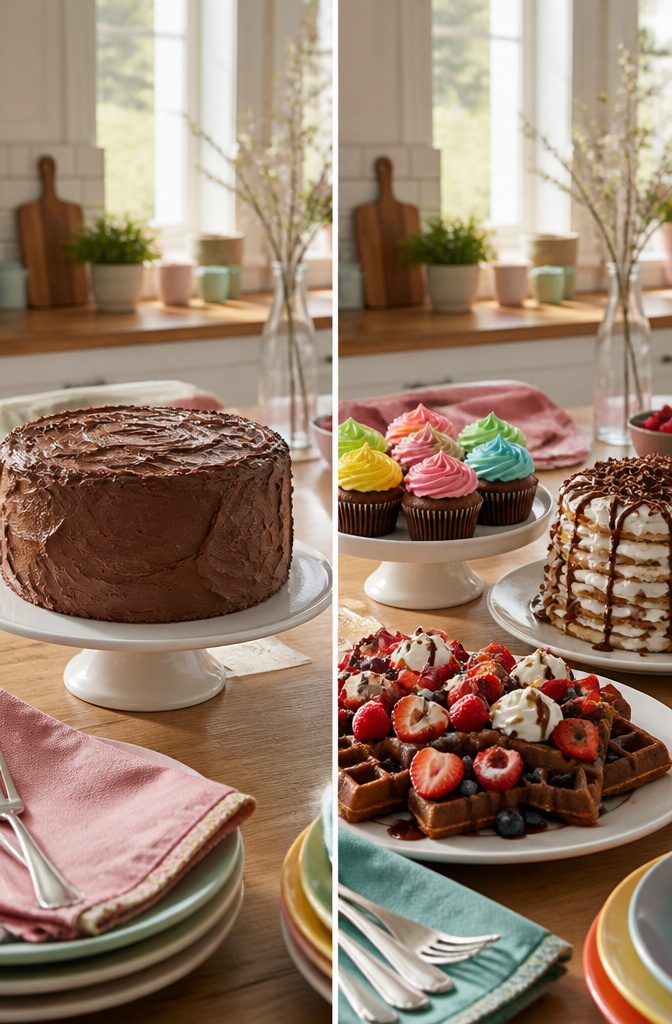
Cupcakes use the same batter as a full cake but bake faster and let you decorate each one individually.
That matters when the guest list is small or you do not want to commit to a single design. I keep the frosting simple on most and save one or two for piping practice.
Crepes and waffles stack or fold into a chocolate-forward presentation without the project of frosting a tier.
Layer crepes with whipped cream and chocolate sauce, or serve waffles warm with the same. Readymade waffles work here, warmed in an oven or toaster, which keeps kitchen time under half an hour.
A crepe stack feeds four to six quietly; waffles scale to a buffet where guests build their own.
Cupcakes split the difference: portable for a dozen, not much harder at two dozen, and no slicing or plating once they leave the kitchen.
Chocolate Types for Cake Design
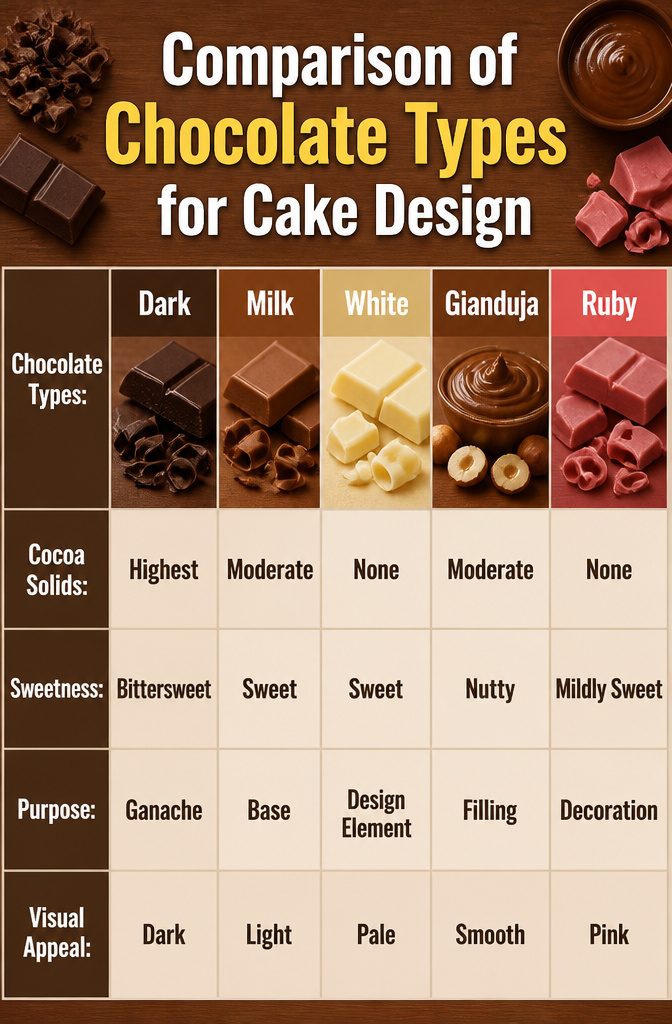
The chocolate you build with matters as much as the shape you pipe. Dark chocolate carries the highest cocoa solids, which gives it the deepest color and a bitterness that reads as sophisticated rather than sweet.
I reach for it when I want a ganache that pools like mirror glaze or shavings that curl into dramatic ribbons.
Milk chocolate is the safer bet for a crowd that includes kids or anyone who expects dessert to taste like candy.
It contains milk in powdered, liquid, or condensed form, and that sweetness plays well with buttercream or as a base for decorative candies pressed into the frosting.
White chocolate offers no cocoa solids at all, just cocoa butter, sugar, and milk, which is exactly why it works as a design element. The pale color against dark layers creates contrast without needing food dye.
Gianduja, with its hazelnut butter, behaves like a richer Nutella. I use it for fillings or thin accents where the nutty aroma can register without overwhelming the cake’s structure.
Ruby chocolate, made from Ruby cocoa beans, is still relatively new and brings a natural pink hue no other chocolate offers. That color alone makes it worth considering for decorative elements where you want visual surprise without artificial coloring.
Quality matters across all five. The better the chocolate, the cleaner your shavings break and the glossier your ganache sets, regardless of which type you choose.
Decoration Ideas That Use What You Have
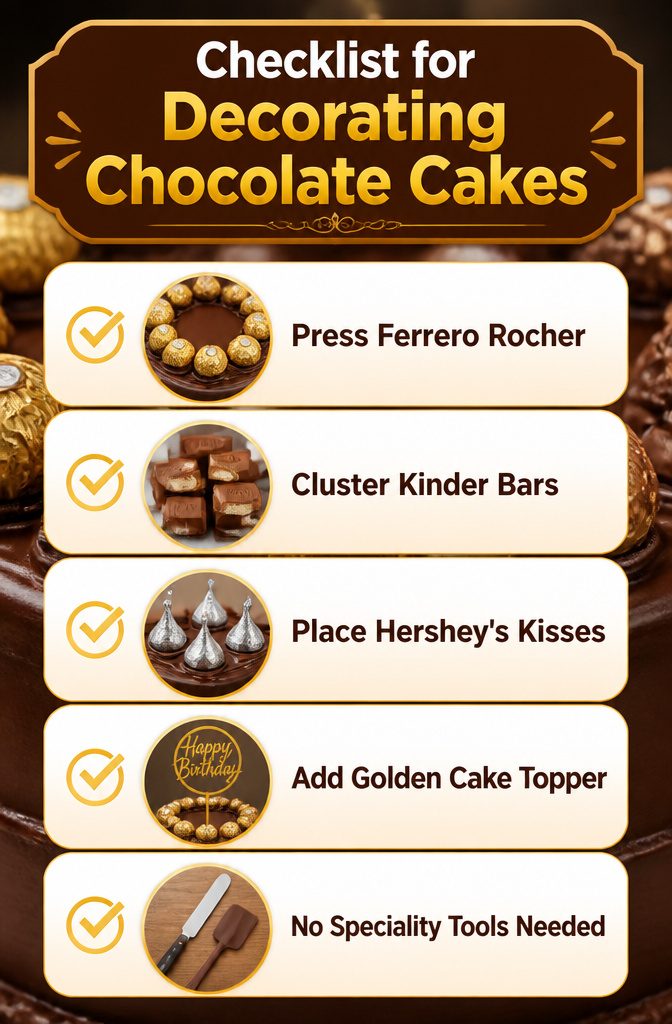
A chocolate cake frosted with dark chocolate icing needs almost nothing else to look finished, but the right candy placement turns it into something that reads as intentional design rather than afterthought.
Press Ferrero Rocher into a circle on top while the frosting is still soft so the gold wrappers catch light and the balls do not roll.
The circle matters more than the count; an incomplete ring looks accidental, but a closed one frames the cake like a centerpiece.
Kinder chocolate bars and Hershey’s Kisses work the same way.
Break the Kinder bars into uneven pieces and cluster them at one edge rather than scattering them across the whole surface; the asymmetry looks modern and keeps the chocolate from reading as clutter.
Kisses stand upright if you push their bases into fresh frosting, and they stay there once it crusts.
For a birthday, a premade golden cake topper with a name or age sits cleanly in the center of that Ferrero circle, or you can skip the message entirely and let the gold against dark chocolate do the work.
No piping bags, no fondant, no specialty tools at all.
Birthday Messages on Chocolate Cakes
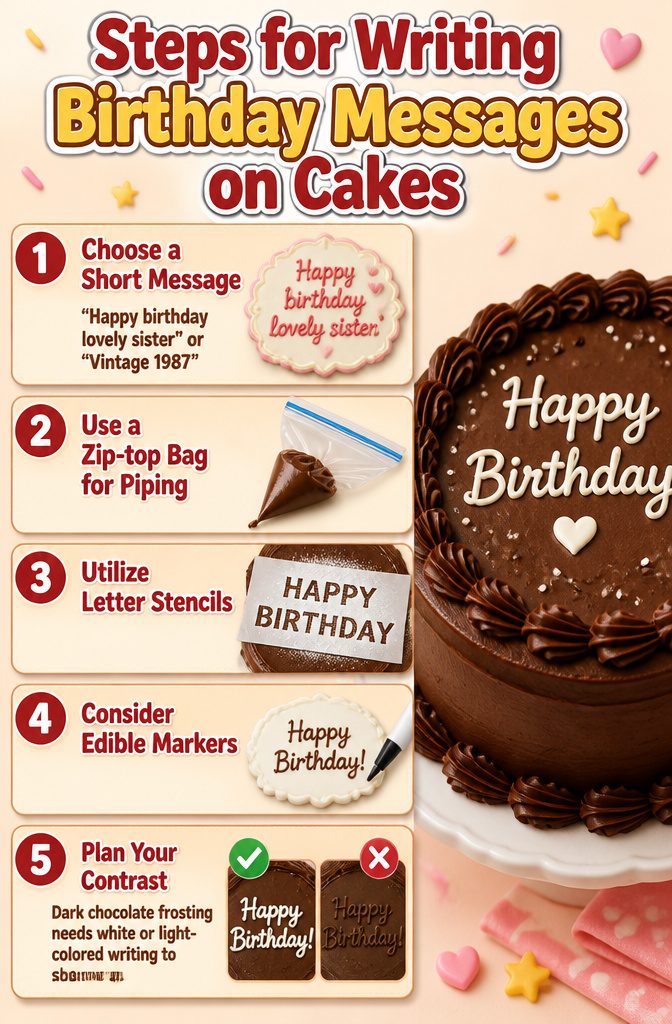
The best birthday messages stay short and personal, since a cake only holds so much space. "Happy birthday lovely sister" or "Vintage 1987" work well because they say something specific without crowding the surface.
For lettering itself, a zip-top bag with the corner snipped off handles basic piping if you already have frosting mixed.
Letter stencils laid over the cake and dusted with powdered sugar give cleaner results without any piping practice, though the effect is softer and won’t last through humidity.
Edible markers on fondant plaques let you write normally, then place the plaque where you want it; this is the safest bet for anyone who hasn’t piped before.
Dark chocolate frosting needs white or light-colored writing to show up, so plan your contrast before you start.
A message in dark brown on dark brown might look elegant in theory, but the person carrying the cake out will be the only one who can read it.
Frequently Asked Questions
What are some chocolate birthday cake ideas?
Each ranges from no-skill candy placement to more structured builds like the Black Forest gateau.
What is a basic recipe for a chocolate birthday cake?
The vintage chocolate cake recipe uses 2 cups flour, 2 cups sugar, 3/4 cup cocoa powder, 2 teaspoons baking powder, 1.5 teaspoons baking soda, 1 teaspoon salt, 1 teaspoon coffee powder, 1 cup milk, 1/2 cup oil, 2 eggs, 2 teaspoons vanilla, and 1 cup boiling water. Bake at 350°F for 30–35 minutes.
What are some alternatives to a chocolate birthday cake?
Cupcakes use the same batter but bake faster and let you decorate individually.
Crepes stack with whipped cream and chocolate sauce for four to six people. Waffles scale to a buffet where guests build their own, and readymade ones warm in under 30 minutes.
What cake designs are trending?
The common thread is doing less with more impact.
How to make a chocolate cake look fancy?
Pour warm ganache over a chilled cake and let it drip down the sides; the surface levels itself while it sets.
Chocolate curls from a vegetable peeler run along the broad side of a room-temperature bar for wide ribbons. A paper doily and cocoa powder dusting over white buttercream gives a lace pattern in about 10 seconds.
What are some different styles of chocolate cake?
Styles range from the tall, cream-exposed Black Forest gateau to the deliberately imperfect vintage cake with a hand-spread matte coat. The Ferrero Rocher cake builds around gold-wrapped candy, while the heart-shaped version works for romantic occasions with minimal decoration.
What are some creative ways to decorate a chocolate cake?
Press Ferrero Rocher into a circle on soft frosting so the gold catches light. Cluster broken Kinder bars at one edge for asymmetry.
Stand Hershey’s Kisses upright in fresh frosting. Use whole strawberries against dark chocolate frosting for instant color contrast, or add chocolate curls and edible gold flakes for texture.