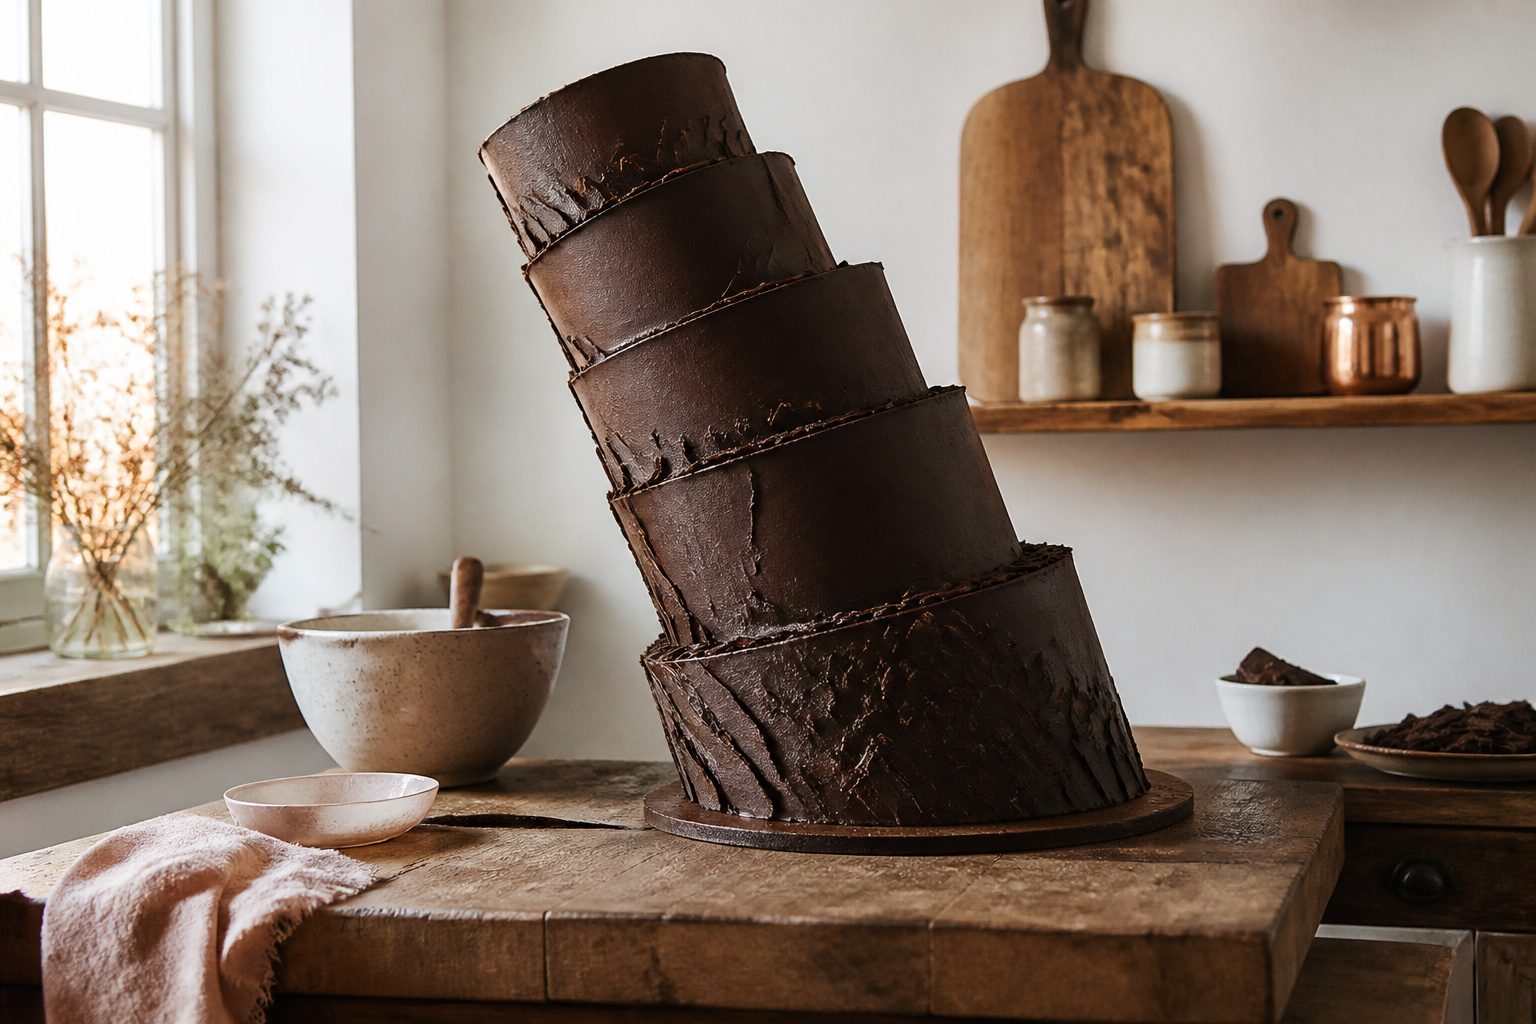
A gravity-defying cake lands somewhere between dessert and engineering project: chocolate shell, firm ganache, and the slow realization that nothing on it is actually floating.
The version here builds around a single 17-inch dowel spine and a 10-degree tilt, which reads as dramatically off-balance without pushing past what a home kitchen can support.
The dry run, 48 hours out, is when the frosting settles and that straight-looking dowel reveals where it wants to lean. Plan four hours of active work, plus a full day of watching and waiting.
What a Gravity-Defying Cake Is and When to Make One
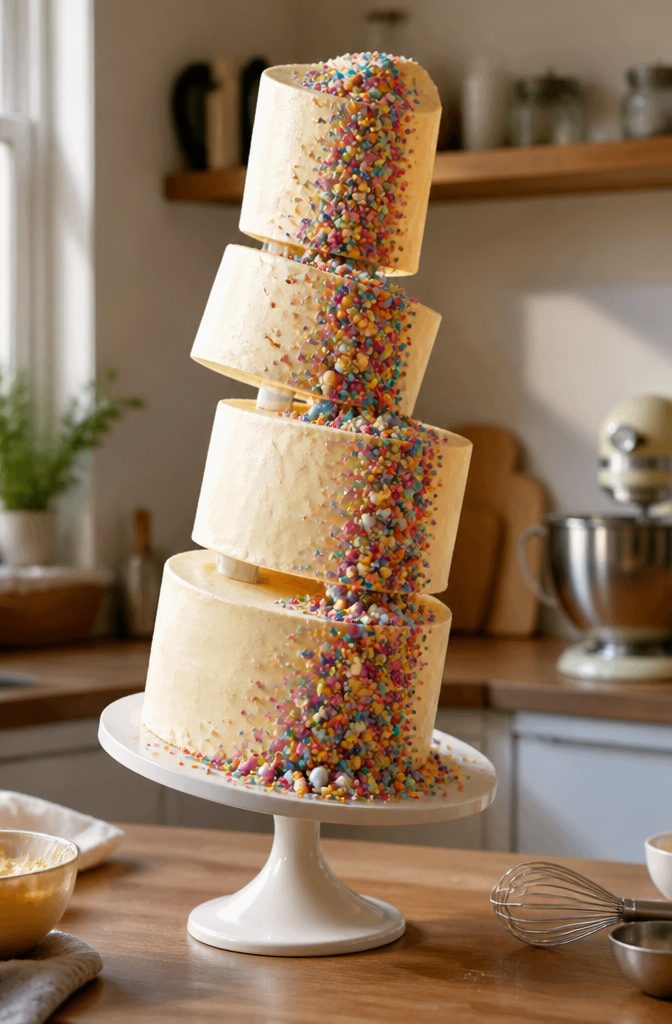
A gravity-defying cake is any design where something appears to float, pour, or balance without visible support: a watering can suspended in mid-pour, a bottle of sprinkles hovering above the tiers, a whole tiered stack tilting at an angle that should collapse but does not.
The illusion comes from hidden internal supports, typically food-safe rods, PVC, or custom frameworks buried inside the cake itself.
The skill level sits at intermediate. Most designs need planning, a dry run with a simplified version, and careful attention to food safety, since structural pieces must be sealed or disinfected before they touch cake.
Angles of about 10 degrees read as dramatically off-balance without pushing the structure past its limits; 15 degrees is the ceiling most builders accept.
These cakes earn their place at birthdays, parties, or any event where the cake itself is meant to stop conversation.
They are not weeknight projects, and they are not the design to attempt without a free afternoon and patience for troubleshooting.
Anti-gravity cakes are a great option for birthdays or parties.
What you get back is the crowd’s reaction, not a faster bake. This article walks through one complete gravity-defying cake design, start to finish, with the internal structure explained step by step.
Ingredients and Equipment
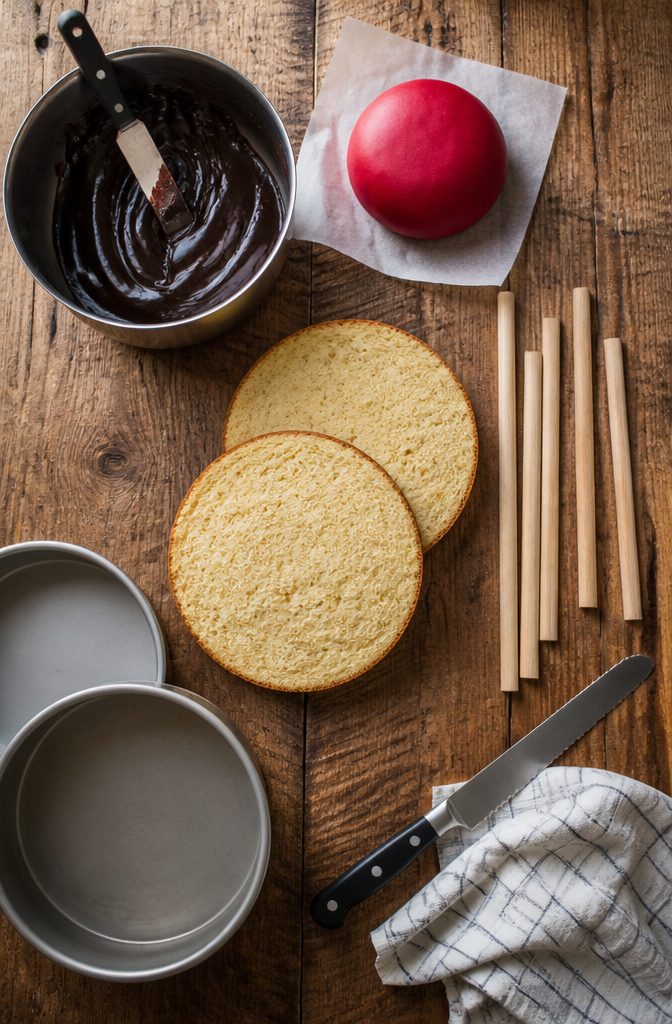
Start with two standard 8- or 9-inch round layers. Buttercream works for the crumb coat, but ganache wins underneath fondant: it sets firm and keeps steep-angled tiers from shifting.
For the structure and finish, you will need:
- ¼-inch thick wooden dowel rods, cut to 17 inches long
- Cake boards, roughly 20 x 18 inches for the base
- Skewers
- A serrated knife for leveling layers
- Fondant for building out candy decorations
- Candy or sprinkles for the gravity illusion itself
- 870g milk chocolate melts and 250ml (1 cup, 35% fat) cream if you are adding a chocolate drip element
One non-negotiable step: sanitize every non-food support before it touches the cake. Hot glue, tape, and raw dowels have no place against frosting until they have been wiped down with food-safe sanitizer.
Bake and Level the Cake Layers
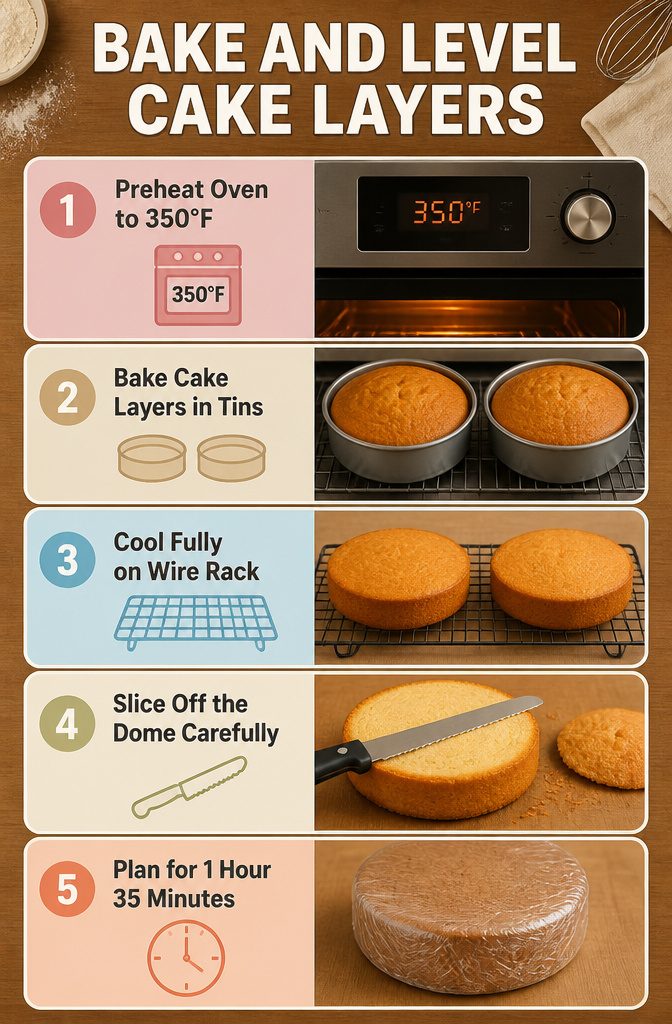
- Set your oven to 350°F and bake two cake layers in 20 cm round tins until a skewer comes out clean, about 25 to 30 minutes. The sponges need to cool fully on a wire rack before you handle them again; warmth softens the crumb and makes leveling impossible.
- Run a long serrated knife across the top of each layer, slicing off the dome until you have a true horizontal surface. Uneven layers are the first place a gravity-defying cake fails: any tilt in the base travels up the structure and throws the whole illusion off center.
- Plan for roughly 1 hour of active prep and 35 minutes of bake time, so 1 hour 35 minutes total before you even touch the internal structure. I usually bake these a day ahead and wrap them in cling film once cool; the wait improves the texture and shrinks your actual assembly day.
Build the Internal Structure
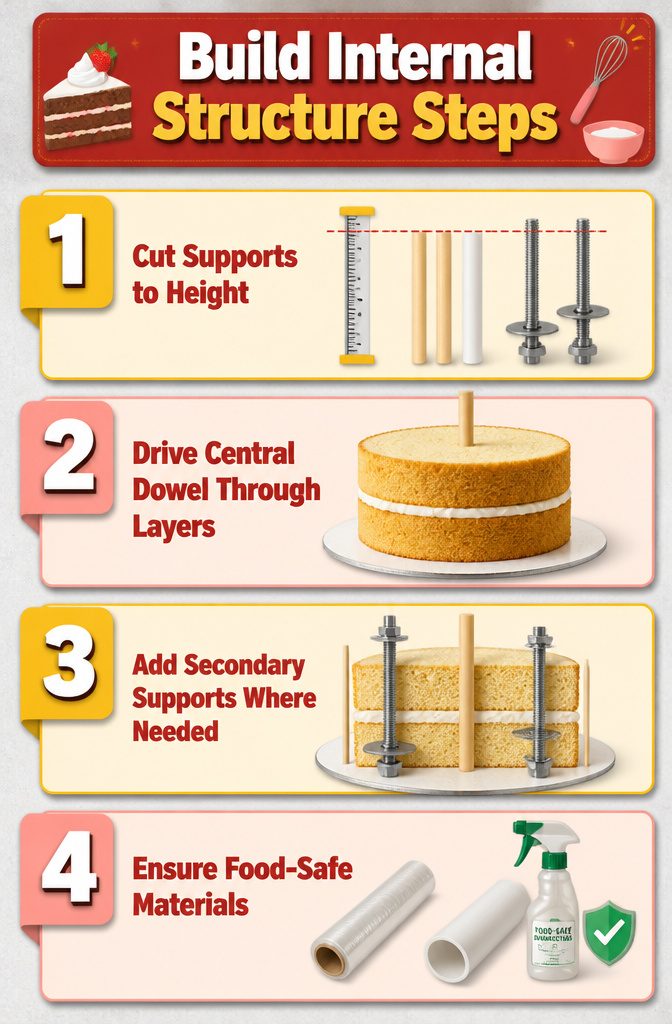
- Cut your supports to the stacked height of your cake layers plus the full extension needed for whatever will hang — a thin wooden or plastic dowel works for a small bag of candy, but heavy decorations need threaded rods with flanges, washers, and nuts.
- Drive one central dowel straight down through both layers and into the cake board beneath. This is the spine that keeps the whole structure from tilting past 10 to 15 degrees.
- Add secondary supports exactly where the weight will hang. For anything more than lightweight candy or empty wrappers, threaded rods beat wooden dowels; wooden skewers only hold their own with light candy.
- Every support that touches cake must be food-safe or wrapped in food-contact plastic. Cover plywood or MDF boards with plastic wrap, and disinfect PVC pieces before they go in.
Stack and Frost the Cake
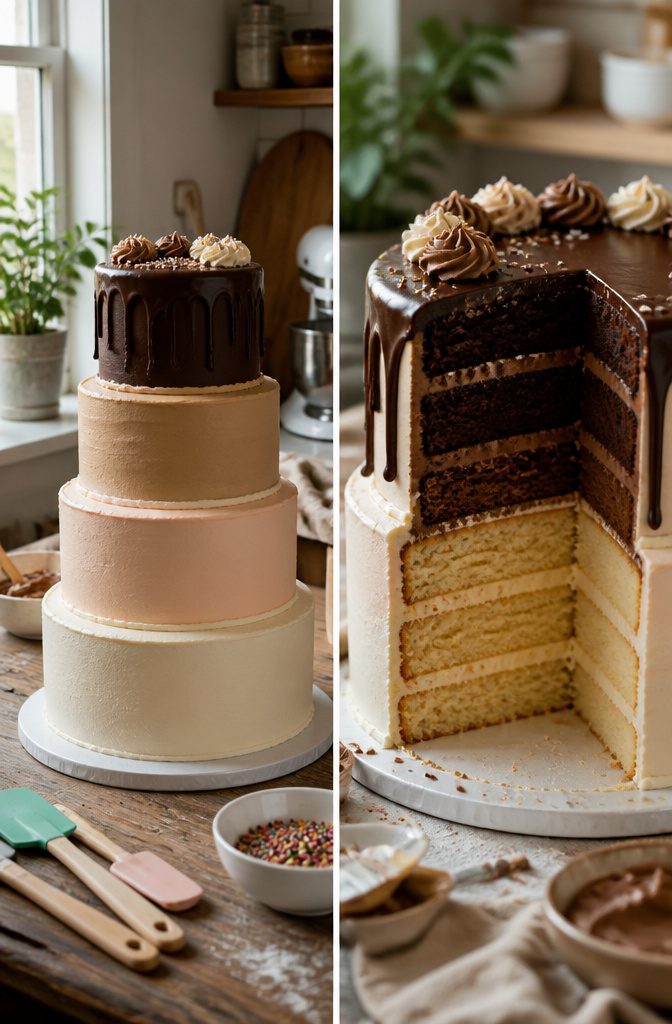
- Stack your cake layers with a thin layer of frosting between each one, pressing gently so the tiers sit flat without gaps.
- Apply a crumb coat thin enough to set quickly, then chill the cake until the frosting firms to the touch, usually 20–30 minutes in the refrigerator.
- Spread the final coat of frosting or ganache, smoothing it with a bench scraper and offset spatula while the surface is still workable.
- If you are using fondant, roll it to an even thickness and drape it over the chilled cake, smoothing from the top down with a fondant smoother to eliminate air bubbles.
- For buttercream or ganache finishes, smooth the surface with a hot spatula or scraper, then chill again until the coating is hard enough that decorations will adhere without sliding.
- Ganache sets harder than buttercream and gives you a firmer shell when supports need to pierce through the coating, so I reach for ganache on any gravity-defying build where rods or skewers enter at an angle.
Add Decorations for the Gravity Effect
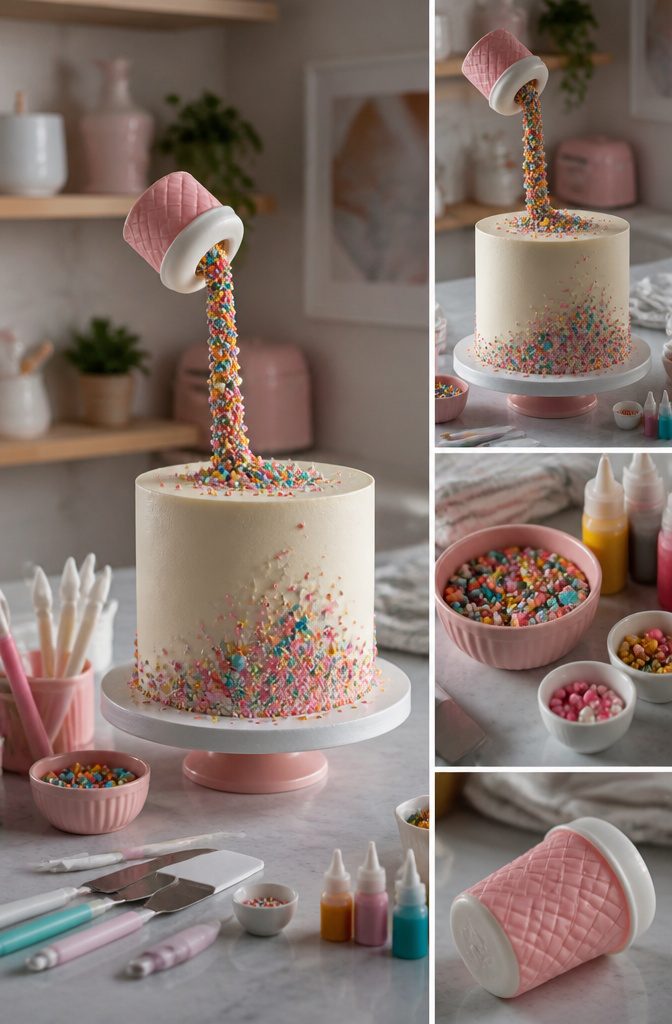
- Attach the suspended element. Thread candy, sprinkles, or chocolate onto the hidden support rod so they appear to pour through open air. Fondant forms the container, bag, or object that seems to defy gravity: a tilted "candy box" or hovering "sprinkle jar" built around the rod itself. Work from the support outward, adding weight in stages and testing stability before the next layer. 870 grams of chocolate melts thinned with cream make a controlled drip that hardens in place, giving you a frozen cascade you can shape with a spatula before it sets. I prefer ganache here over buttercream for anything on an angle; it firms into a shell that locks decorations in place without the slow slide you get from softer frosting. A thin wooden dowel handles a small bag of candy. For heavier pours, step up to metal rod with washers and nuts, or the whole illusion collapses the moment someone breathes near the table.
Secure and Finish
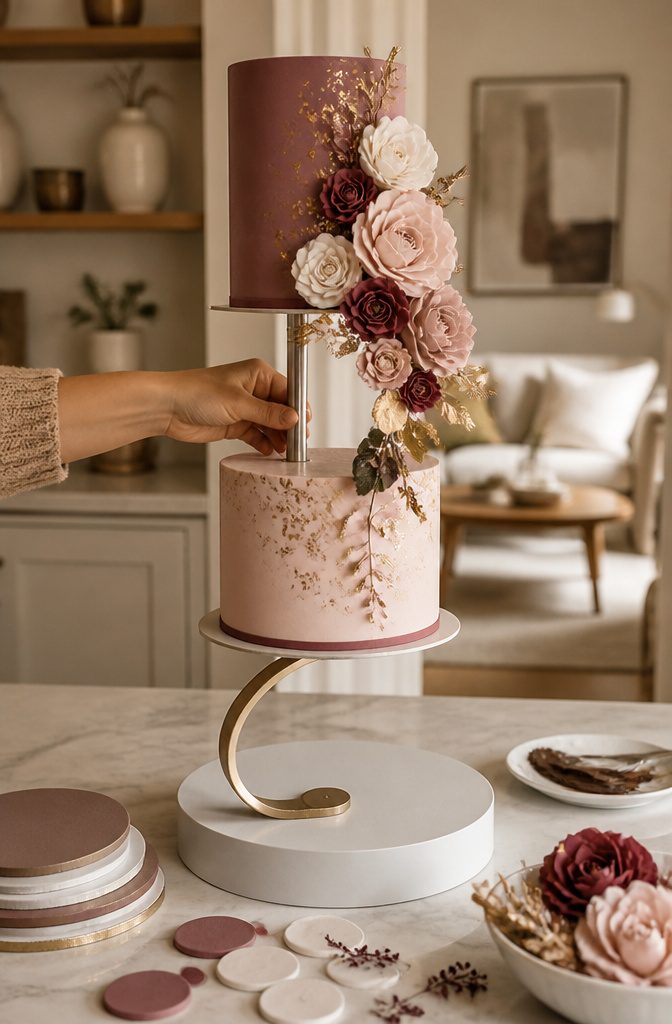
- The wiggle test comes first. I grab the main support rod at the base and give it a firm but gentle shake. Any movement between the cake board and the rod means the structure is not ready; I pull the cake apart and re-glue that joint with fresh melted chocolate or a second round of royal icing, then let it set again.
- A flexing cake board is a collapsed cake waiting to happen. I set the whole assembly on a flat counter and press down lightly at the edges. If the board bows even a little, I slide a second, identical board underneath and tape them together.
- Suspended elements get ten minutes of observation. Fondant bags, floating cups, or cascading candy that droop in that window need stiffer internal wire or a lighter fill.
- Last details hide the mechanics. A coin-sized disk of fondant pressed over a joint, a candy "spill" draped across a wire, or a piped ganache drip trailing down a support rod turns engineering into illusion.
- If ganache is the finish, the cake sits in the refrigerator for 20 minutes to harden the shell. After that, it holds at room temperature for 30 minutes before cutting. That half-hour is your display window; plan the party photo for minute five, not minute twenty-five.
Yield, Storage and Timing
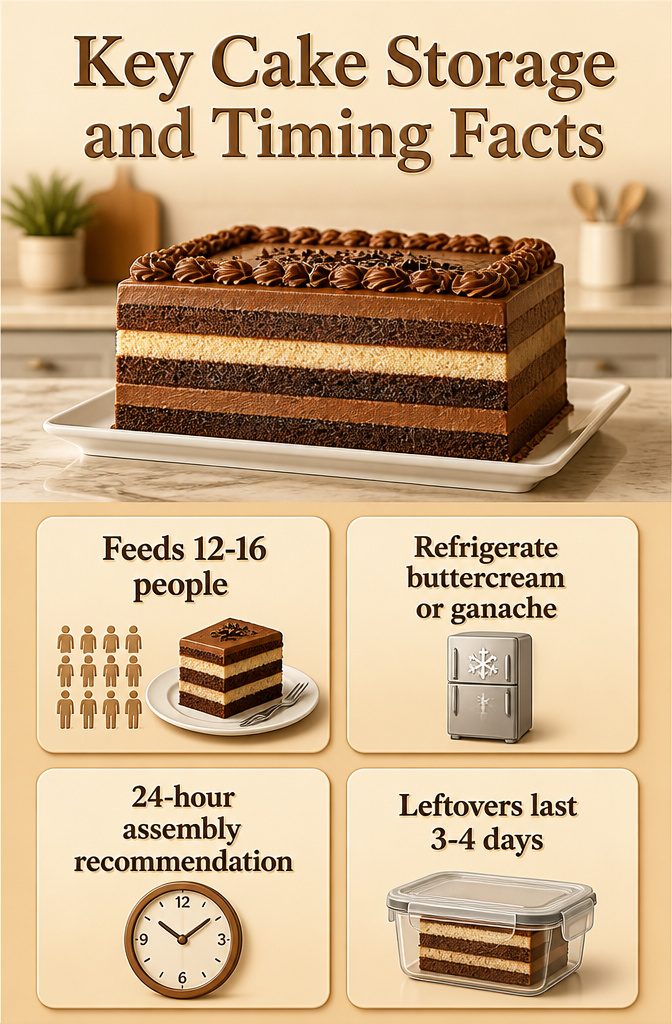
Two 8- or 9-inch layers feed twelve to sixteen people depending on how thin you slice.
Refrigerate any cake frosted with buttercream or ganache, then pull it to room temperature thirty minutes before you cut.
Fondant-covered cakes are the exception: they hold fine for two or three days at cool room temperature in an airtight box, since the sugar shell seals moisture in rather than trapping cold in.
The internal structure carries stress over time, so I would not assemble more than twenty-four hours ahead. Dowels and brackets fatigue; joints loosen.
Leftovers keep three to four days refrigerated. The cake texture holds, though gravity effects on exposed elements read less crisp after the first day.
Substitutions and Scaling
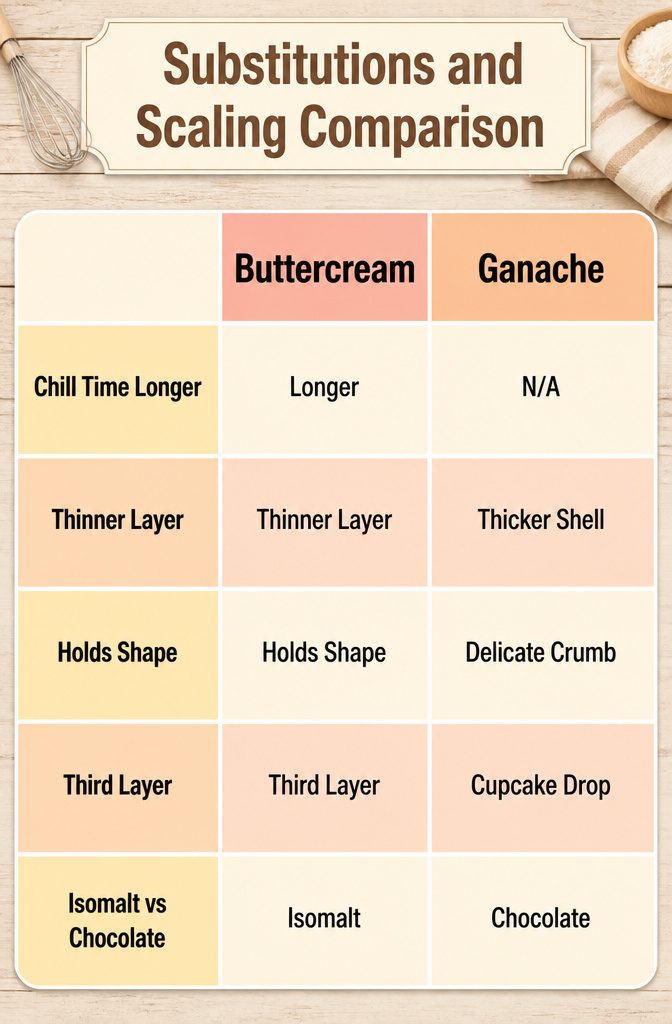
Buttercream can stand in for ganache, though the swap asks for two adjustments.
I chill the cake longer and keep the buttercream layer thinner, since buttercream softens faster under room-temperature handling than a chocolate shell does. The structure still holds, but the margin for error shrinks.
Gluten-free or vegan layers work fine if the recipe itself is sturdy.
A delicate crumb, no matter how good it tastes, will compress around the support rods and crack. I look for a cake that holds its shape when fully cooled and does not rely on a tight gluten network for structure.
Scaling up means adding a third layer and a second central dowel to keep the load vertical. Scaling down to cupcakes drops the gravity effect entirely; the illusion needs height and overhang that a standard cupcake cannot provide.
Isomalt replaces chocolate for clearer poured effects, but it requires specialized handling and a separate set of tools. For most home kitchens, chocolate remains the practical choice.
Safety and Weight Limits
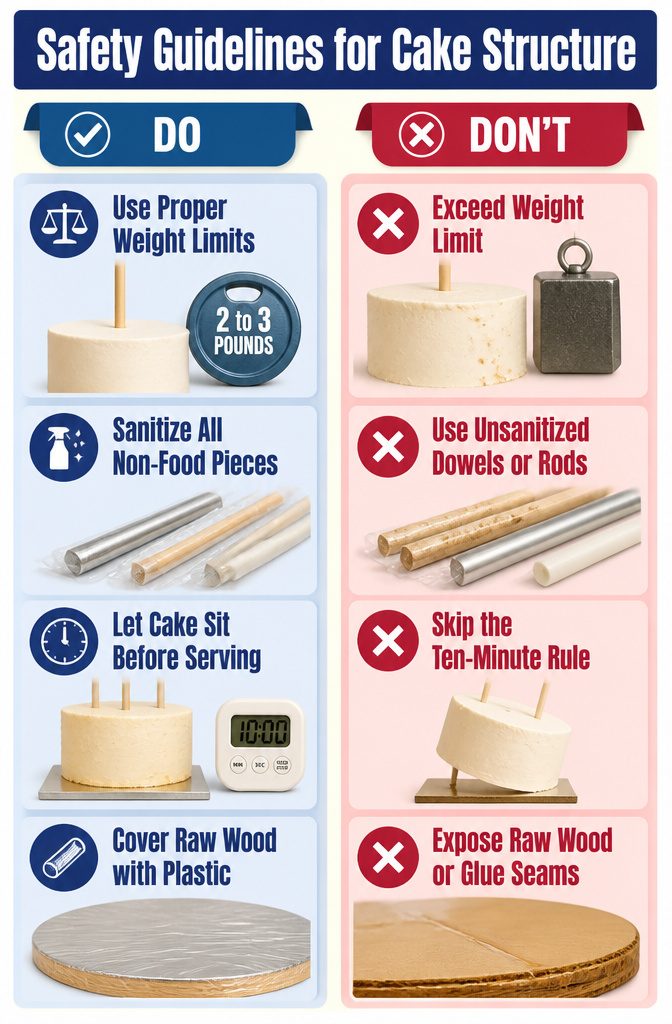
A quarter-inch wooden dowel carries about 2 to 3 pounds of decoration before it starts to compress the cake or bend under the load.
Go past that, and the whole structure pays for it. Metal rods, flanges, and PVC are the right call for heavier builds like a full-size bag of candy suspended in midair.
Every non-food piece that touches the cake needs a barrier. I sanitize dowels and rods with food-safe sanitizer, or I wrap them tightly in plastic food wrap.
Fomecore, plywood, or MDF boards work underneath tiers, but only if they are covered the same way; raw wood or glue seams have no place against buttercream.
The ten-minute rule has saved me more than once. Load the cake fully, step back, and let it sit.
If anything wobbles or settles, you want to find out in your kitchen, not on the display table. That small wait is the difference between a gravity-defying cake and a gravity-demonstrating one.
Testing and Practice
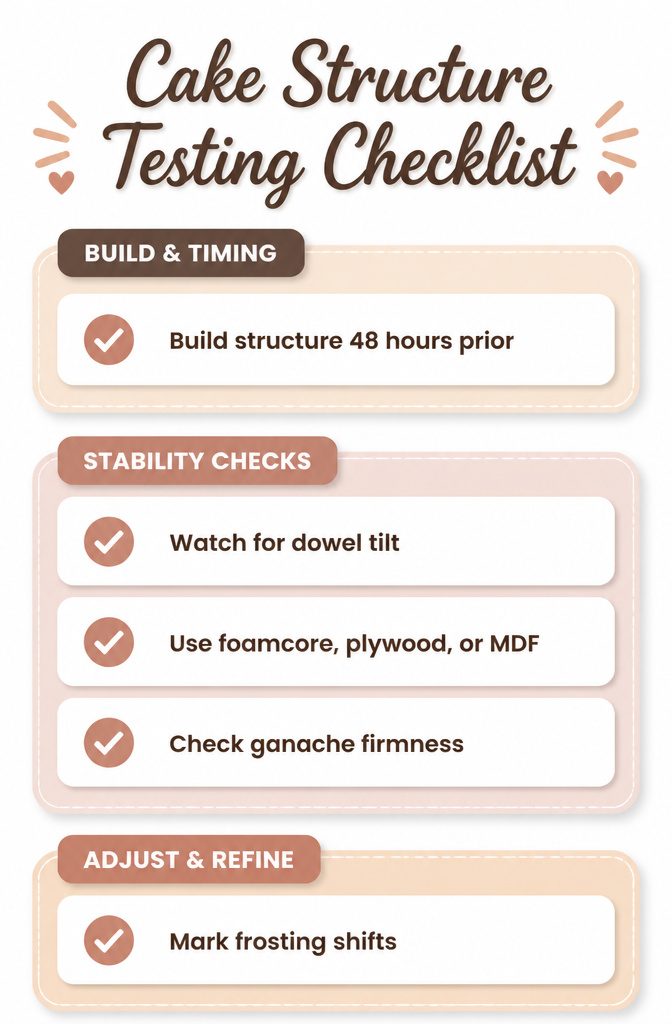
Build the full structure with your actual decorations 48 hours before the event, then watch it for a full day.
I learned this the hard way: a dowel that looks straight at noon can tilt by evening as the frosting underneath settles, and a board that felt rigid when you glued it will flex once real cake weight sits on it for hours.
Half-inch foamcore, plywood, or MDF keeps the support from bending, but you need to watch that bend happen before the party starts.
Ganache under fondant helps, yet even that firm shell can let decorations slip if the angle is steep enough. During your dry run, mark exactly where the frosting shifts or where the candy bag pulls the dowel off-center.
Disassemble the whole thing, adjust the length or the anchor point, and rebuild. The second build goes faster, and you will know the weak spots before your kitchen is full of guests.
Frequently Asked Questions
How do I make a gravity-defying cake?
Build a hidden internal framework using food-safe rods or dowels, then stack and frost your cake around that spine so decorations appear to float or pour unsupported.
Start with a dry run 48 hours before your event, keep tilt angles at 10 degrees or less, and use ganache under fondant for a firmer shell that resists shifting.
Every non-food support must be sanitized or wrapped in plastic before it touches cake.
How do I ensure my gravity-defying cake is stable?
Drive one central dowel through all layers into the board as a spine, add secondary supports exactly where weight hangs, and cap angles at 15 degrees with 10 degrees as the safer target.
A quarter-inch dowel carries 2 to 3 pounds of decoration; beyond that, switch to metal.
After full assembly, let the loaded cake sit for ten minutes and perform a wiggle test at the base rod. Any movement means rebuilding the joint with fresh chocolate or royal icing.