A vanilla cake pop should taste like actual vanilla, not just sugar, and the difference comes down to whether you bake the cake from scratch or start with a box.
Most home bakers fail at the coating, not the cake: candy melts flow smooth, but chocolate chips seize without a tablespoon of oil.
One batch needs 12 ounces of coating for a dozen pops, scaling to 2.5 pounds when you need the full 48.
Ingredients
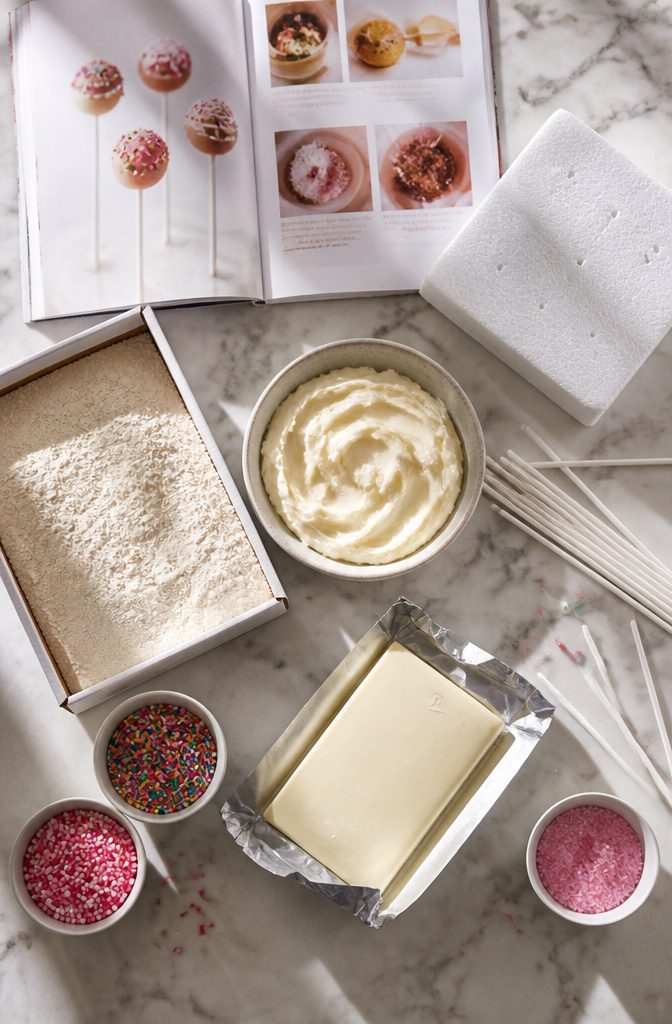
A standard batch of cake pops starts with one 18.25-ounce box of vanilla cake mix baked to package directions, or the same weight of homemade vanilla cake.
The crumbled cake needs about one cup of frosting to bind; homemade buttercream wins on flavor, though a 16-ounce container of store-bought works if you are pressed for time.
For the shell, plan on 12 ounces of candy coating for a small batch, scaling up to 2.5 pounds if you are making the full 48 pops.
Ghirardelli melting wafers are the most reliable grocery-store option I have found; they melt smooth without seizing and set with a clean snap.
You will also need:
- 48 lollipop sticks
- A block of styrofoam or a tall cup of dry rice to hold pops upright while the coating sets
- Sprinkles, nonpareils, crushed nuts, or coconut for finishing
The coating is where most home bakers trip up.
Candy melts are forgiving; chocolate chips are not. If you want a dark chocolate shell, buy coating labeled specifically for dipping, not baking chocolate.
Method
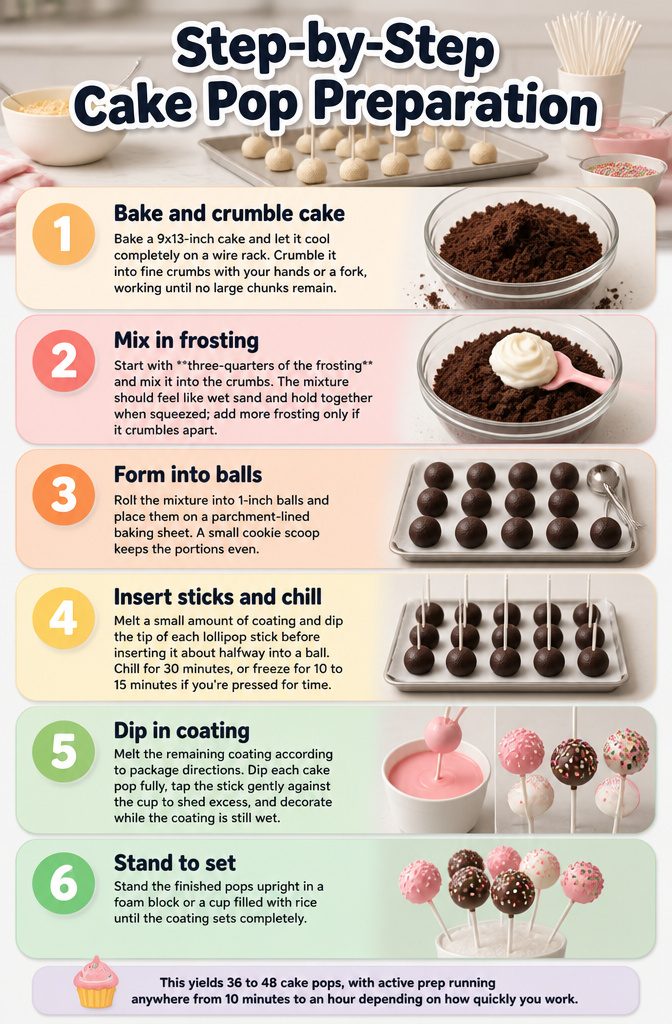
- Bake a 9×13-inch cake and let it cool completely on a wire rack. Crumble it into fine crumbs with your hands or a fork, working until no large chunks remain.
- Start with three-quarters of the frosting and mix it into the crumbs. The mixture should feel like wet sand and hold together when squeezed; add more frosting only if it crumbles apart.
- Roll the mixture into 1-inch balls and place them on a parchment-lined baking sheet. A small cookie scoop keeps the portions even.
- Melt a small amount of coating and dip the tip of each lollipop stick before inserting it about halfway into a ball. Chill for 30 minutes, or freeze for 10 to 15 minutes if you’re pressed for time.
- Melt the remaining coating according to package directions. Dip each cake pop fully, tap the stick gently against the cup to shed excess, and decorate while the coating is still wet.
- Stand the finished pops upright in a foam block or a cup filled with rice until the coating sets completely.
This yields 36 to 48 cake pops, with active prep running anywhere from 10 minutes to an hour depending on how quickly you work.
Flavor Variations
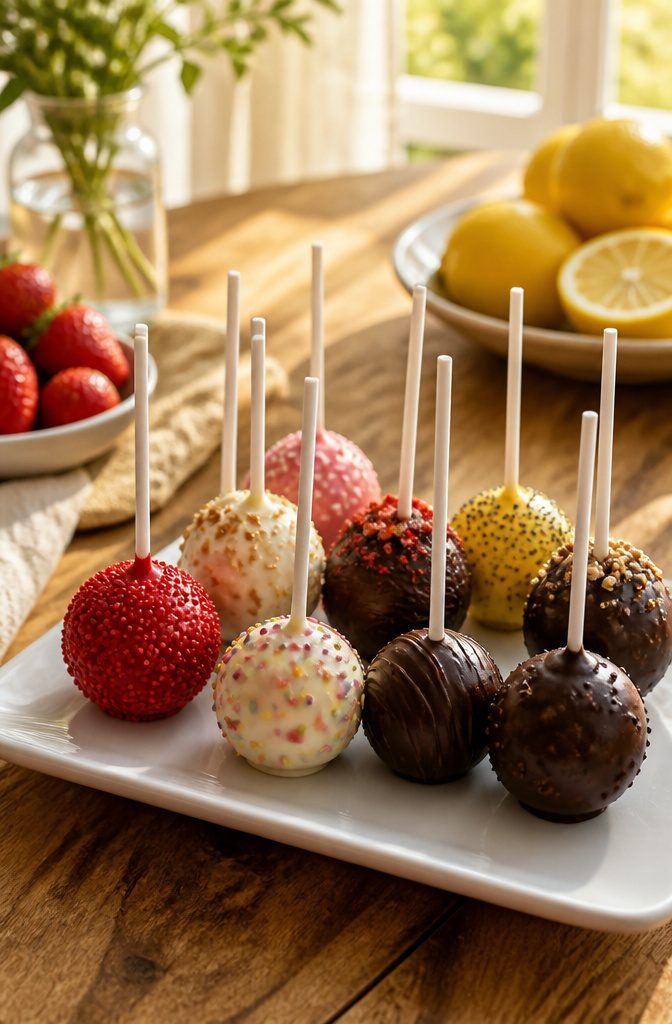
The bakeries are never wrong about what sells, and the cake pop lineup at any counter tells you which pairings have been battle-tested.
Your best move is to stick to a cake base and frosting from the same flavor family, then let the coating add contrast.
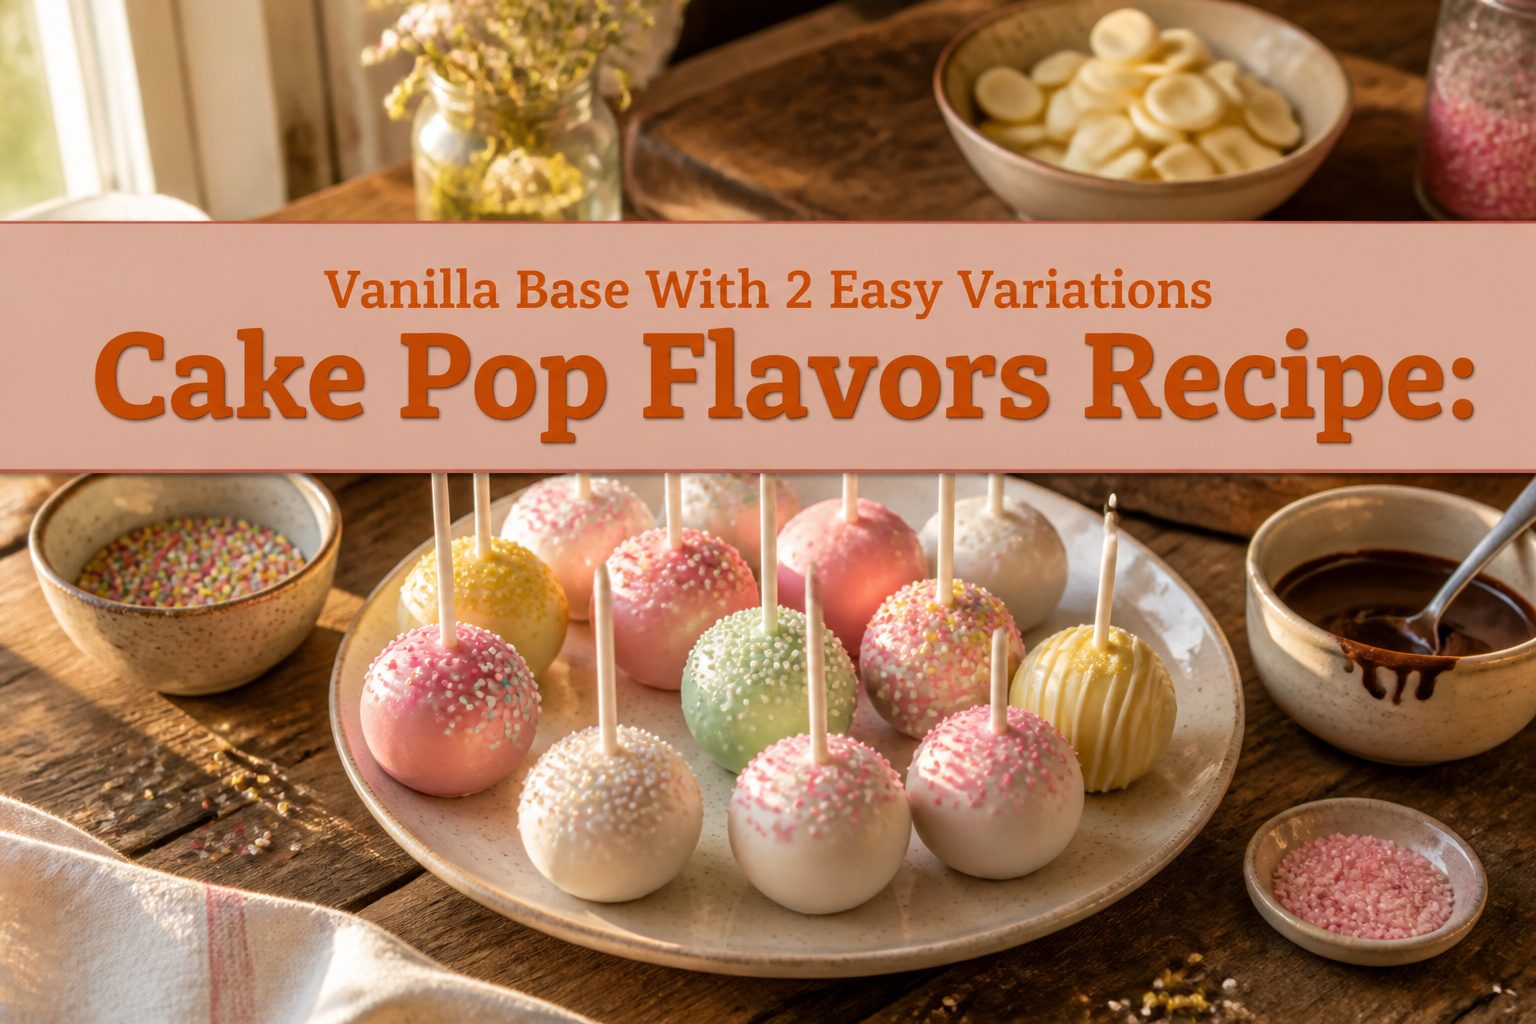
- Vanilla cake with classic buttercream is the blank canvas; dip it in white chocolate and add sprinkles for birthdays.
- Chocolate cake needs chocolate buttercream inside, but dark chocolate coating outside for a real chocolate cake pop.
- Strawberry cake pairs with strawberry or vanilla frosting; white chocolate coating keeps the color bright.
- Red velvet demands cream cheese frosting, not buttercream, and white candy coating with red sprinkles.
- Funfetti (birthday cake) works with classic buttercream and any colorful coating you want.
- Lemon cake matches lemon frosting; try vanilla frosting instead and add poppy seeds to the coating for crunch.
- Spice cake with cream cheese frosting becomes cinnamon roll when you dust the white coating with cinnamon.
- Carrot cake also wants cream cheese frosting; the coating color is your call.
- Pumpkin cake takes vanilla frosting; it shows up less often but works the same way spice cake does.
- Peanut butter and coffee stir straight into chocolate or vanilla bases; mint and coconut work too, but you will need to decide your own pairings.
- Mint chocolate builds from devil’s food cake with peppermint frosting, then dark chocolate coating rolled in crushed mint cookies.
The limitless potential for creative flavor combinations.
What that means in practice: the coating is where you flip the flavor profile. White chocolate on red velvet keeps it light; dark chocolate on mint makes it sharp.
Box Mix or Homemade Cake
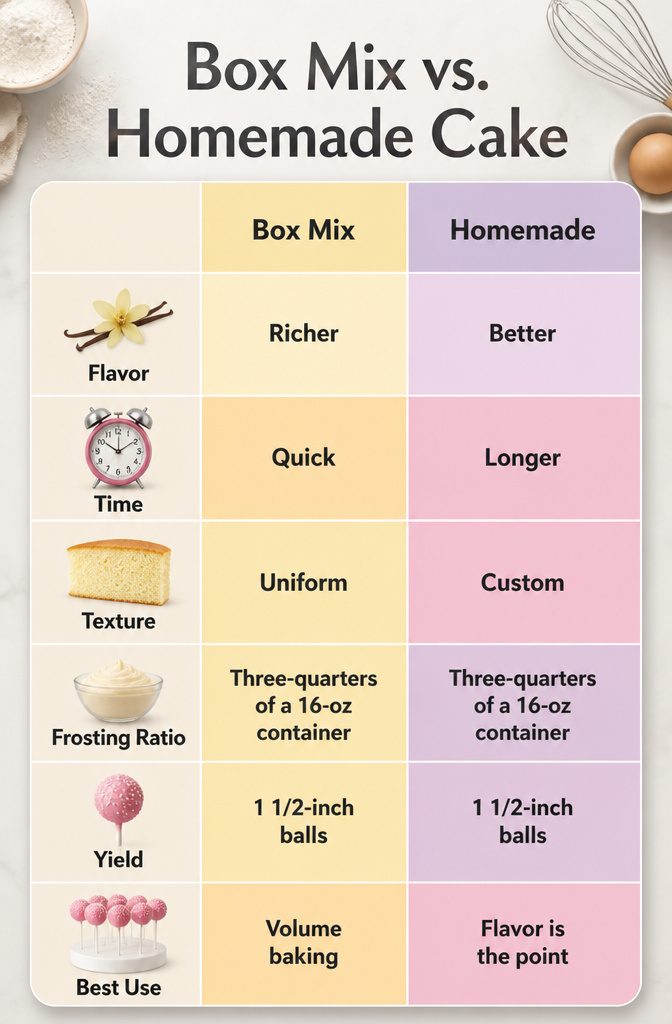
An 18.25-oz box mix bakes into the exact crumb structure cake pops need, and the time savings matter when you are already blocking out a couple of hours for crumbling, rolling, and dipping.
The standard mix yields a uniform, fine crumb that binds cleanly with three-quarters of a 16-oz container of ready-made frosting, no guesswork on hydration or fat ratios.
Homemade vanilla cake wins on flavor, no question.
A from-scratch cake with real butter and a proper creaming method tastes richer than oil-based box chemistry. A homemade base adds an extra hour of measuring, mixing, and washing bowls before you even reach the crumbling stage.
Either base works identically once you get there. Both cool completely, both break down to fine crumbs with no visible chunks, both accept the same frosting-to-cake ratio for a mixture that rolls into 1 1/2-inch balls and holds its round shape.
The candy coating does not know or care what happened before the oven.
My call: box mix for volume baking, homemade when you have leftover cake or when the flavor of the cake itself is the point.
A birthday batch of 48 pops for a classroom? The mix saves your afternoon.
A small batch of vanilla bean pops where you want the cake to taste like something? Bake the cake.
Store-Bought or Homemade Frosting
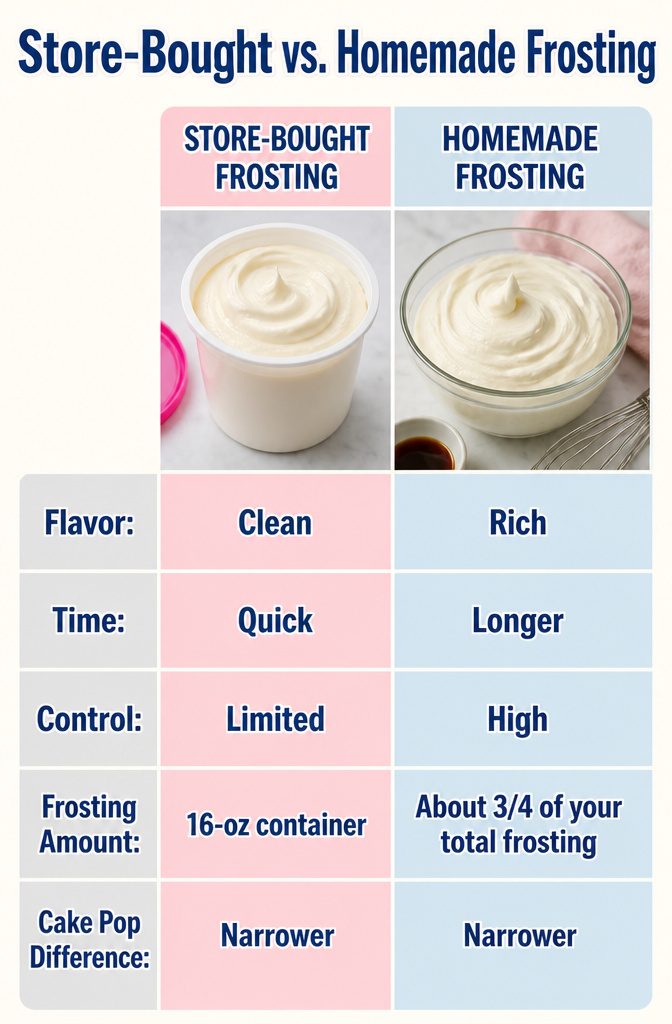
Homemade buttercream wins on flavor, no question. Whipping butter with powdered sugar, a splash of heavy cream, and vanilla gives you control over sweetness and texture, and the result tastes cleaner than anything from a shelf-stable tub.
That said, a 16-oz container of ready-made frosting saves a solid twenty minutes, and for cake pops the difference is narrower than it is on a layer cake because the frosting is mixed so thoroughly into the crumb.
Start with about 3/4 of your total frosting, whether that is 1 cup of homemade or three-quarters of the store-bought container. Mix it into the crumbled cake with the back of a large spoon until the texture is uniform.
The mixture should hold together when you squeeze it, but it should not feel wet or greasy. If it crumbles apart, add frosting a tablespoon at a time.
American buttercream or cream cheese frosting both work if you are making your own; just avoid the frosting packets that come with some box mixes, which tend to be stiffer and less flavorful than either alternative.
Save whatever frosting you do not use, chill it, and it will keep for the next batch.
Candy Melts or Chocolate Chips
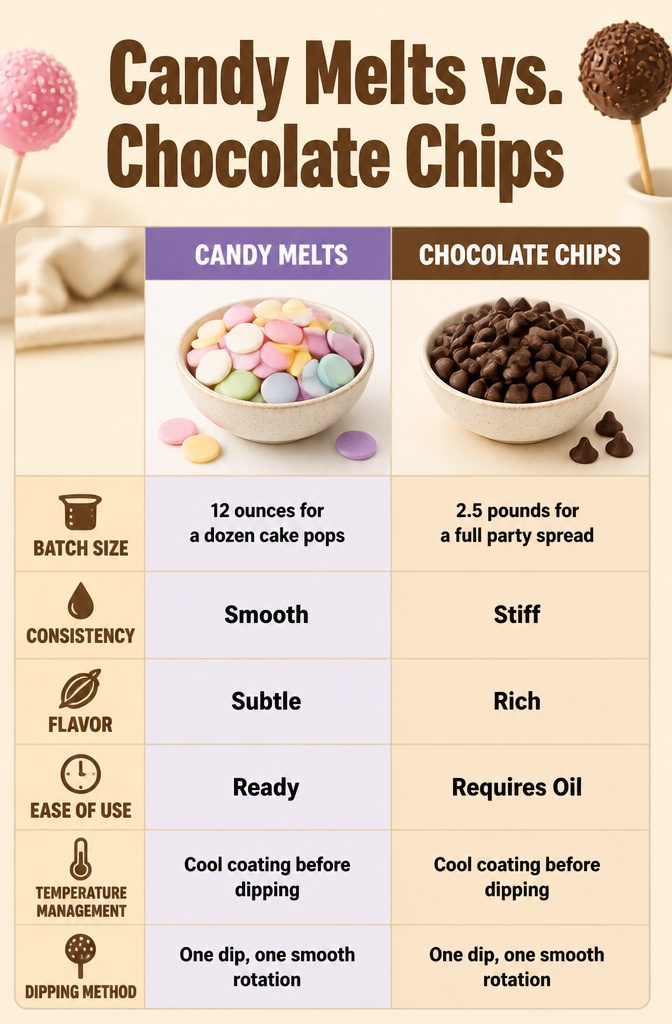
Candy melts and chocolate chips both work for coating cake pops, but they behave differently enough that I reach for one over the other depending on what I have in the pantry.
Candy melts are formulated for dipping, which means they flow smoother right out of the bag and set with a gloss that looks like you bought them from a bakery case.
Chocolate chips need a tablespoon of vegetable oil or coconut oil stirred in after melting to get that same fluid consistency; without it, the coating turns thick and drags against the cake instead of gliding over it.
The batch size determines how much coating to melt. A standard dozen cake pops needs roughly 12 ounces, while a full party spread can pull through two and a half pounds before you are done.
I prefer Ghirardelli for the chips when I go that route; the cocoa butter content runs higher than budget brands, so the melted chocolate stays workable longer and tastes less waxy once it hardens.
Temperature management keeps the shell from cracking.
Let the melted coating cool for a minute or two off the heat before you start dipping. A chilled cake ball hitting hot chocolate creates thermal shock, and that stress fractures the surface as it sets.
One dip, one smooth rotation, and let the excess drip off; double-dipping builds too thick a layer and traps the same problem underneath.
Chilling Time
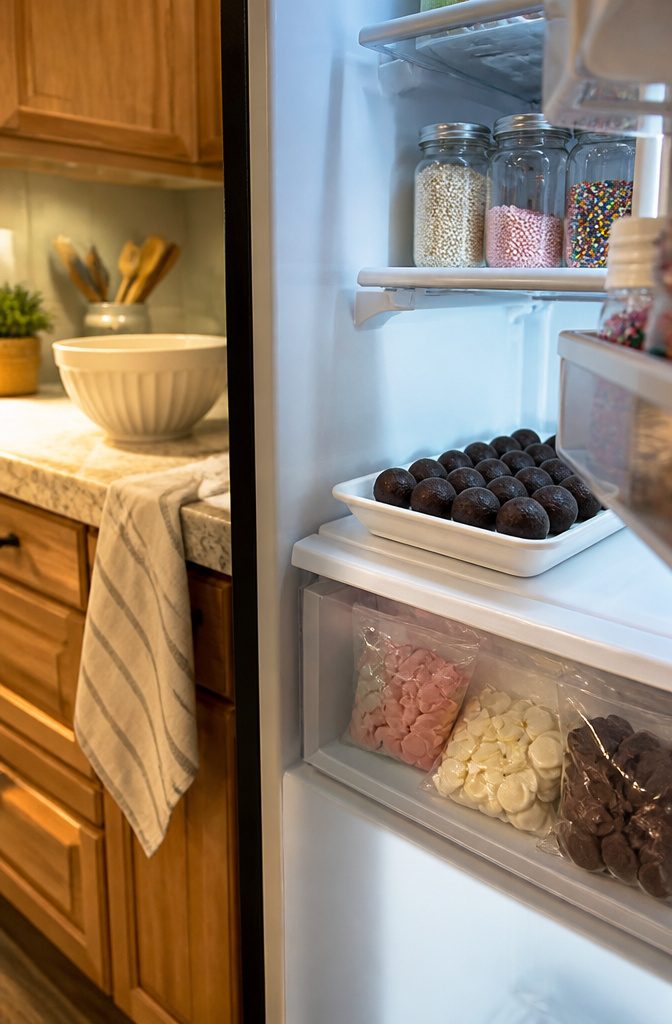
Cake balls need to be cold and firm before they meet the coating, or the warm candy melts will soften the exterior and the pop can slide right off the stick.
A stint in the refrigerator of at least 30 minutes firms the cake and sets the bond with the stick, which is the safer choice if your kitchen runs warm or you’re working in batches.
If you’re pressed for time, the freezer cuts that to 10–15 minutes and gets you to the same place faster.
Insufficient chilling is one of the main reasons cake pops end up in the coating instead of on it.
Room-temperature cake balls lose their shape quickly in warm candy, and the stick adhesion fails before the shell has a chance to set.
I reach for the freezer when I’m in a rhythm and want to keep moving, but I watch the clock; too long and the coating can set almost instantly on contact, leaving a thick, uneven shell.
Common Problems
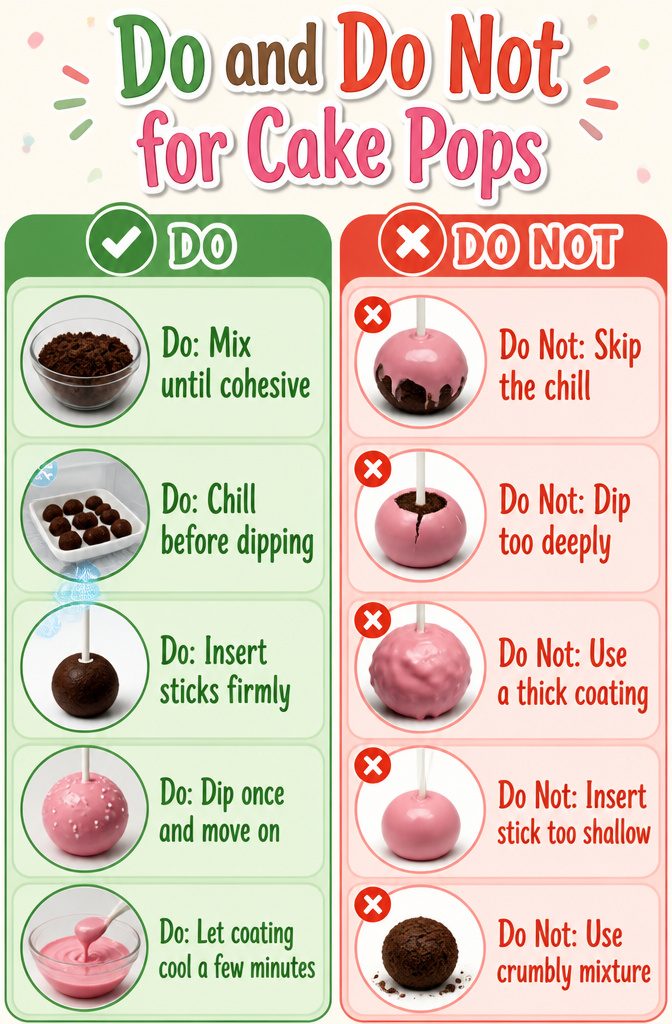
Cracked coating and loose sticks ruin more cake pops than bad flavor, and both problems trace back to temperature or texture.
The coating cracks when cold cake meets warm candy melts. Freeze the shaped balls only for the stated time; if they go longer, let them sit out 10 to 15 minutes before dipping.
Let the melted coating cool a few minutes too. A thick candy layer also cracks, so dip once and move on.
- Crumbly cake mixture won’t grip the stick. The mix should hold together when squeezed; add frosting a spoonful at a time until it does. Too much frosting makes mushy balls that slide right off, so stop when the shape holds.
- Skipping the chill is asking for trouble. Refrigerate or freeze until the balls are firm; this sets the cake and bonds it to the stick before the warm coating ever touches it.
- Insert sticks roughly halfway. Too shallow and the ball wobbles loose; too deep and the pop can split when you dip. Dip the stick end into melted coating before pushing it in, the chocolate sets into a solid anchor.
Storage
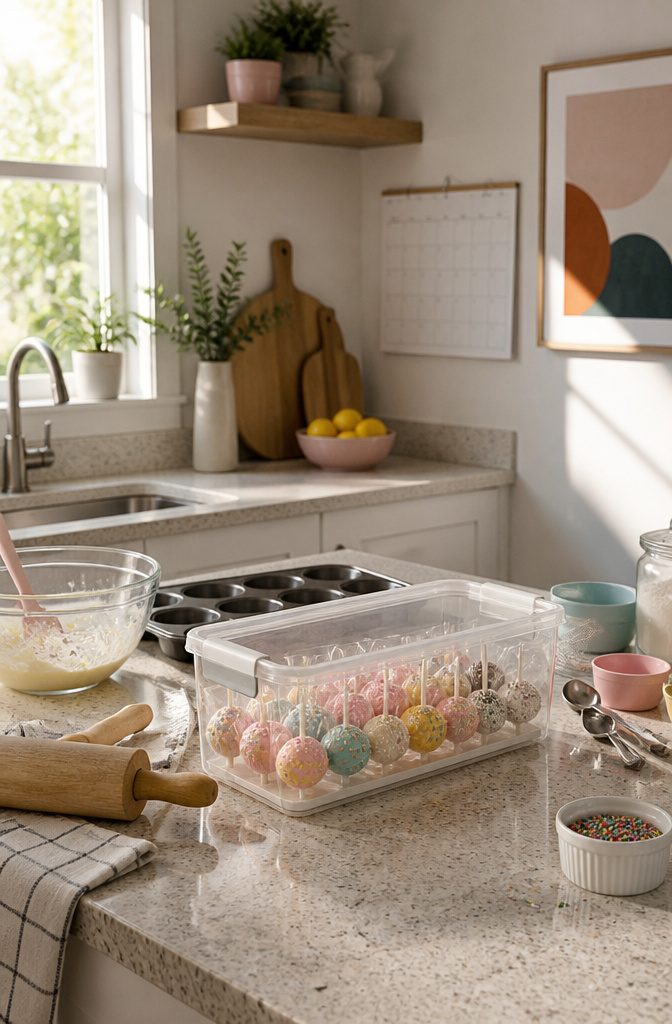
Wrapped cake pops keep in the refrigerator for up to one week, which covers most party prep timelines without any real loss in texture. For longer storage, the freezer extends that window to about two months.
Start by wrapping each pop individually in storage wrap, then tuck them into an airtight container. That extra layer blocks freezer odor and keeps the coating from picking up moisture.
Thawing is where patience pays off. Moving frozen pops straight to room temperature invites condensation on the coating, and that thin film of water turns the finish dull or slightly sticky.
Let them thaw overnight in the refrigerator still wrapped, so any moisture forms on the wrap instead of the pop itself.
Skip freezing decorated pops with sprinkles; the color tends to run during thawing, and the visual damage is not worth the saved hour.
Frequently Asked Questions
Why do my cake pops keep falling off the stick?
The mixture is either too dry or the balls are too warm.
Add frosting a tablespoon at a time until the crumb holds together when you squeeze it, and always chill the shaped pops for at least 30 minutes in the refrigerator or 10–15 minutes in the freezer before dipping.
Cold cake firms up and bonds with the stick so the weight of the coating does not pull everything apart.
What type of chocolate is best for cake pops?
Chocolate candy melts are the safest choice because they are formulated to flow smoothly and set with a gloss.
If you use chocolate chips instead, stir in 1 tablespoon of vegetable oil or coconut oil after melting so the coating stays fluid enough to dip.
Ghirardelli melting wafers are the most reliable grocery-store option for a smooth shell that sets with a clean snap.
How long do cake pops last?
Wrapped cake pops keep in the refrigerator for up to 1 week and in the freezer for about 2 months.
For freezer storage, wrap each pop individually before placing it in an airtight container. Thaw overnight in the refrigerator still wrapped so condensation forms on the wrap, not on the coating.
What can I dip cake pops into?
Candy coating or melted chocolate are the standard shells. Candy melts come in many colors and are the easiest to work with; chocolate chips need a little oil for smoothness.
You can also drizzle a second color over the base coat, or roll the wet coating in sprinkles, nonpareils, crushed nuts, coconut, or cookie crumbs before it sets.
What are the 10 most popular cake flavors for cake pops?
The flavors that show up most often in bakery cases are vanilla, chocolate, strawberry, red velvet, Funfetti, lemon, spice, carrot, pumpkin, and mint chocolate.
The best approach is to match the cake and frosting within the same flavor family, then use the coating for contrast: dark chocolate on mint, white chocolate on red velvet, or colorful melts on Funfetti.
Can you freeze cake pops?
Yes, for up to 2 months if they are wrapped well.
Freeze undecorated pops or pops with simple coatings; skip freezing anything with sprinkle decorations because the colors can run during thawing. Thaw overnight in the refrigerator while still wrapped to protect the finish from moisture.
How do you make cake pops with Betty Crocker cake mix?
Bake one 18.25-ounce box of vanilla cake mix in a 9×13-inch pan, let it cool completely, then crumble it into fine crumbs.
Mix in about 3/4 of a 16-ounce container of ready-made frosting until the texture resembles wet sand and holds together when squeezed. Roll into 1-inch balls, chill, insert sticks with a dab of melted coating, chill again, then dip and decorate.