Pull-apart cupcake cake designs span from a ten-cupcake caterpillar to a forty-cupcake fish, but the real question is how much assembly patience you actually have.
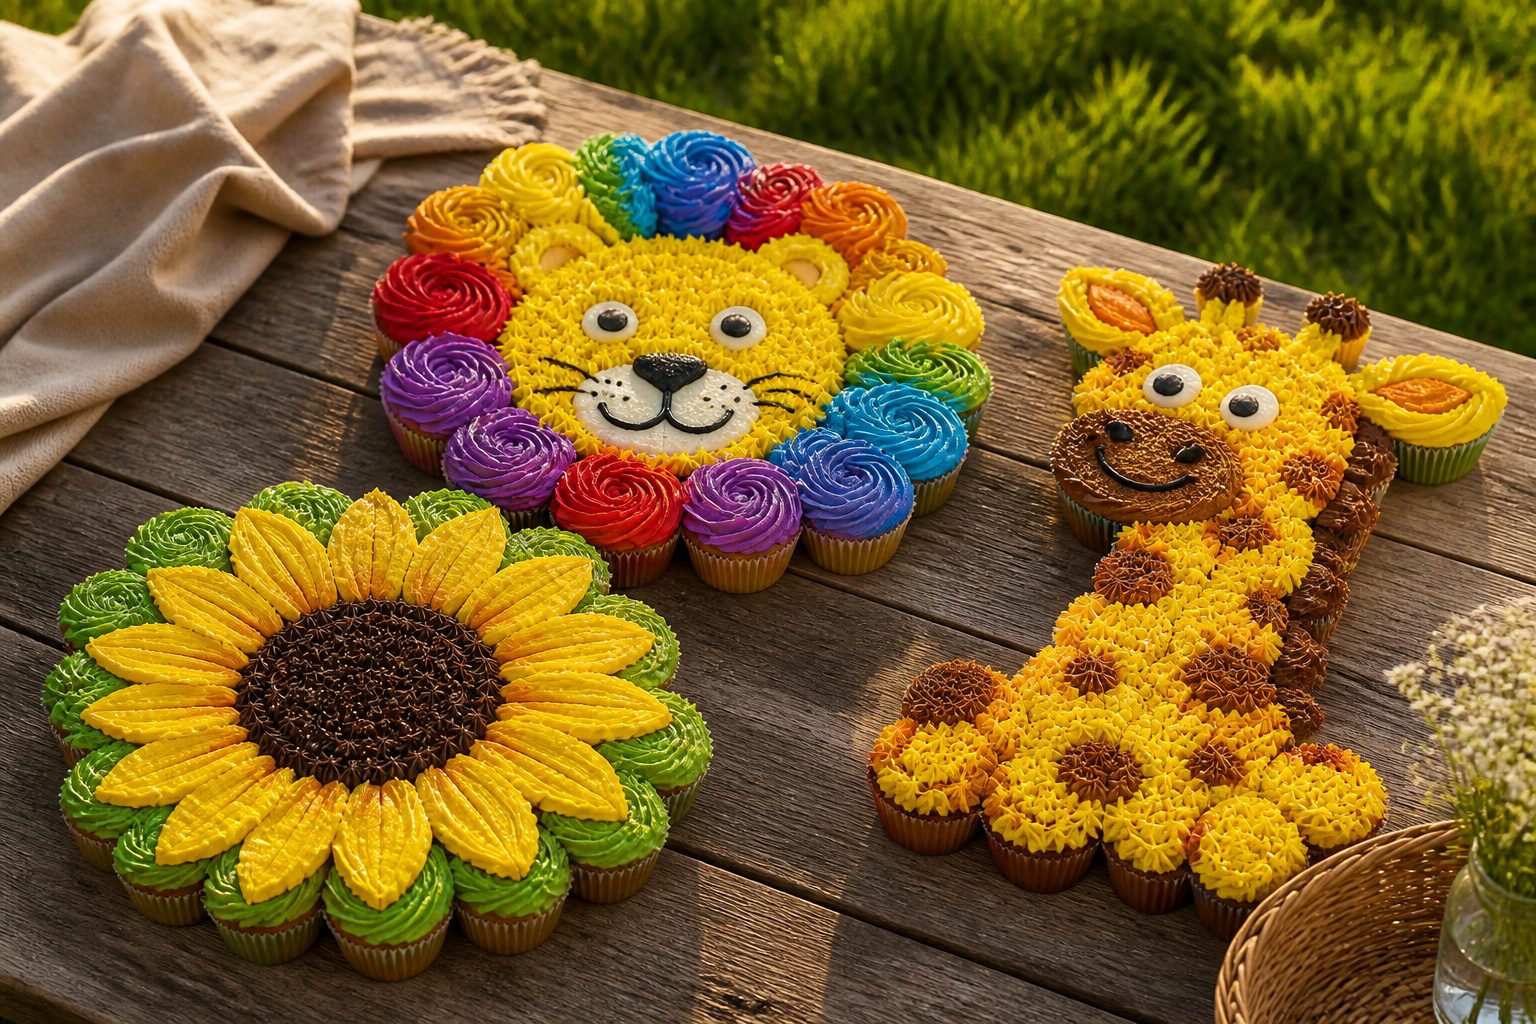
The sunflower, the lion, and the giraffe all hide their seams in frosting texture or bold color blocks, while the beehive and the ranunculus demand you pipe across every cupcake gap like the surface were one continuous cake.
The Cookie Monster build is the forgiving exception: his grass-tip fur texture, done with a #233 tip and stiff buttercream, turns a rough oval of 15 to 18 cupcakes into a coherent face without a perfect grid underneath.
1. Fish Pull-Apart Cupcake Cake
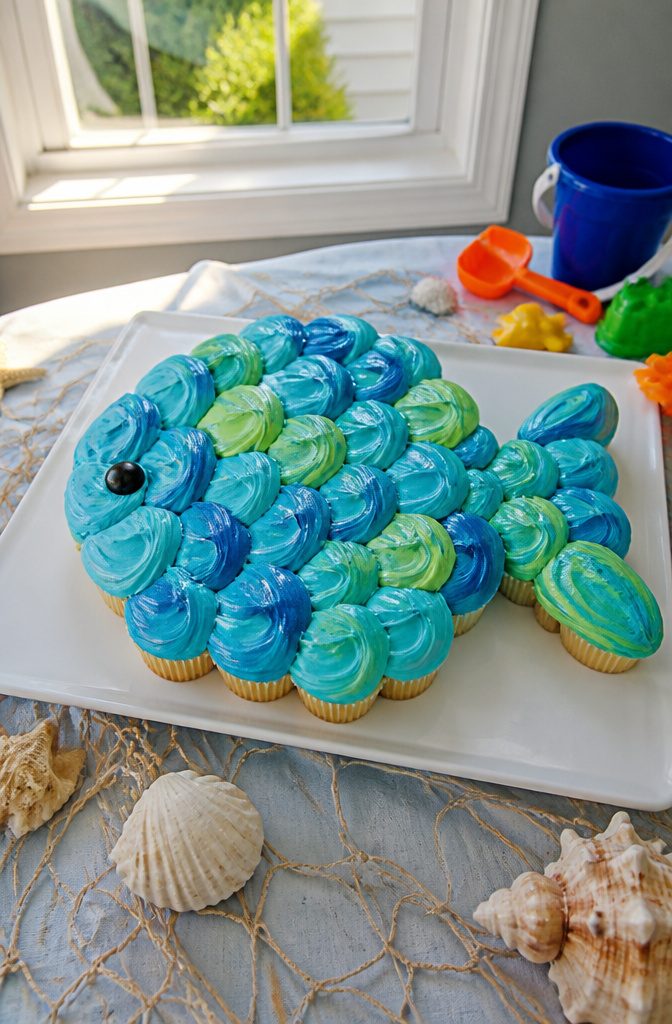
A fish pull-apart cupcake cake reads instantly at pool parties, luaus, and beach themes because the shape is simple and the frosting does the work.
Arrange the cupcakes in a rounded body with a triangular tail fan; the gap between body and tail is where you place one or two cupcakes for the fin so the silhouette stays clear from across the room.
Frost the whole arrangement as one continuous surface, not cupcake by cupcake. A crusting buttercream holds the smooth look and lets you smooth the body with a scraper before the buttercream sets.
Pipe scales in overlapping rows with a small round tip, working from tail to head so each row overlaps the one below it.
A single black dot or piped candy eye on the front cupcake finishes the face without extra pieces to attach.
The color scheme carries most of the personality. Ocean blues and greens read tropical; orange and yellow with white piping turn it into a clownfish.
The design has stayed popular because it scales up or down with your cupcake count and still looks like a fish whether you use 24 cupcakes or 40.
2. Sunflower Cupcake Cake
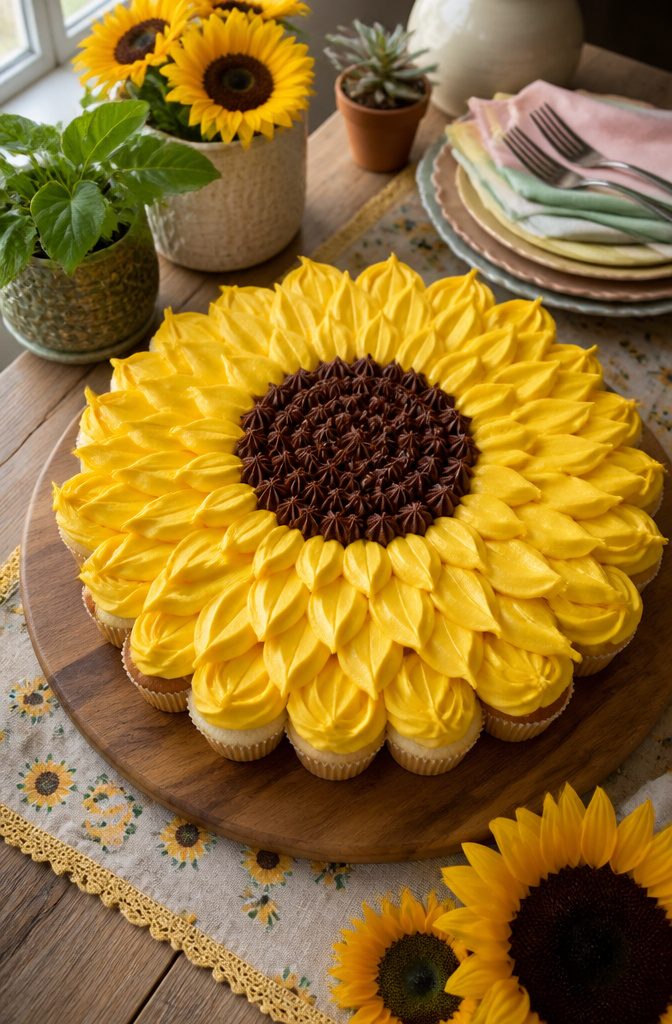
Yellow frosting on the outer ring of cupcakes and chocolate brown in the center is what turns a simple flower shape into a recognizable sunflower.
The color contrast does the real work here; without it, the eye reads a generic blob instead of petals radiating from a disk.
Arrange the cupcakes in tight circles, pushed close enough that the frosting bridges the gaps and reads as one surface.
A contrasting center cupcake in deep brown buttercream locks the sunflower shape in place, though some builds frost a single central area instead.
Either way works; the cupcake version gives guests a clear "center piece" to pull first, while a frosted center is faster to execute and leaves more room for petal detail.
This design fits spring birthdays and garden parties, and it scales well.
A small version uses a single ring of eight to ten cupcakes around one center. Larger builds add a second outer ring and lengthen the petals with pull-apart ease.
Kids can help frost the individual cupcakes with rosettes or stars, but the finished look stays polished enough for adults when the circles are tight and the color boundary is sharp.
3. Owl Cupcake Cake
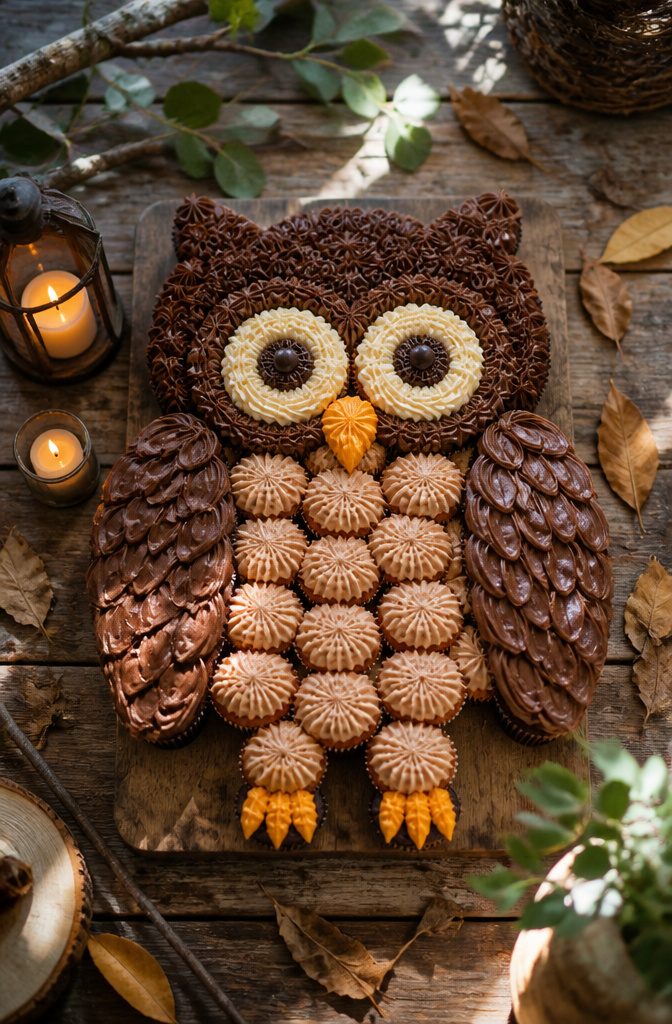
An owl design works because the face already maps onto a grid: two wide-set circles for eyes, a triangle for the beak, and the rest fills in as feather texture.
The eyes are the detail that makes or breaks the whole thing, so they need to sit on cupcakes pushed flush together with no gap, frosted as one continuous surface so the pupils read as level and alert.
I would build the eyes from two tight clusters of cupcakes, maybe four each, with the beak as a single central cupcake or a small diamond of three.
The feather pattern spreads across the remaining cupcakes in concentric arcs, using a petal tip to pipe overlapping rows that read as plumage from a distance.
The face details render across multiple cupcakes by necessity, since each eye is too large for one, but the beak can stay compact and central if you keep that cluster small.
Brown and tan buttercream handle the body, with a warm orange or yellow for the beak and stark white disks behind dark chocolate pupils.
A toothpick dragged through the white before it sets gives that quick catch-light that makes the owl look alive.
Piping individual feather textures across twenty-plus cupcakes takes longer than a smooth face, but that extra time buys you something: the texture hides any slight unevenness in cupcake height.
4. Ice Cream Sundae Cupcake Cake
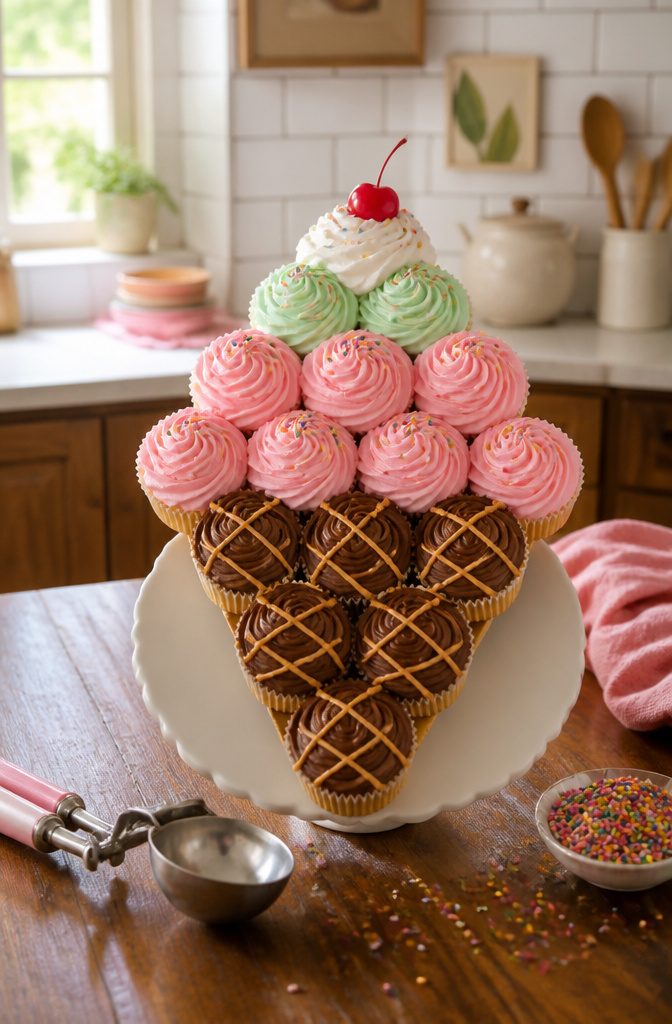
An ice cream sundae cupcake cake works because the vertical stack sells the illusion faster than any frosting detail.
Arrange the cupcakes in a tight triangle or bowl curve, with the bottom rows forming the cone and the upper rows rising like scoops.
The source design frosts the base layer brown for the waffle cone, then switches to pastel pinks, mint greens, or butter yellow for the "scoops" above.
The gap between cupcakes is what breaks the illusion, so push them close enough to share a continuous frosting surface. A dot of buttercream underneath each cupcake anchors it to the board without sliding.
For the sauce drip, a thinned ganache or tinted piping gel running down the stacked edges reads as hot fudge or strawberry topping far better than thick buttercream would.
Sprinkles, chopped nuts, or a fondant cherry on the peak cupcake finish the joke. The whole arrangement stays easier to serve than a carved cake, and guests pick their scoop without a knife.
What you trade is the perfectly round cake silhouette: viewed from the side, the cupcake ridges still show. Face the display toward the room, not the wall, and the effect holds.
5. Giraffe Cupcake Cake
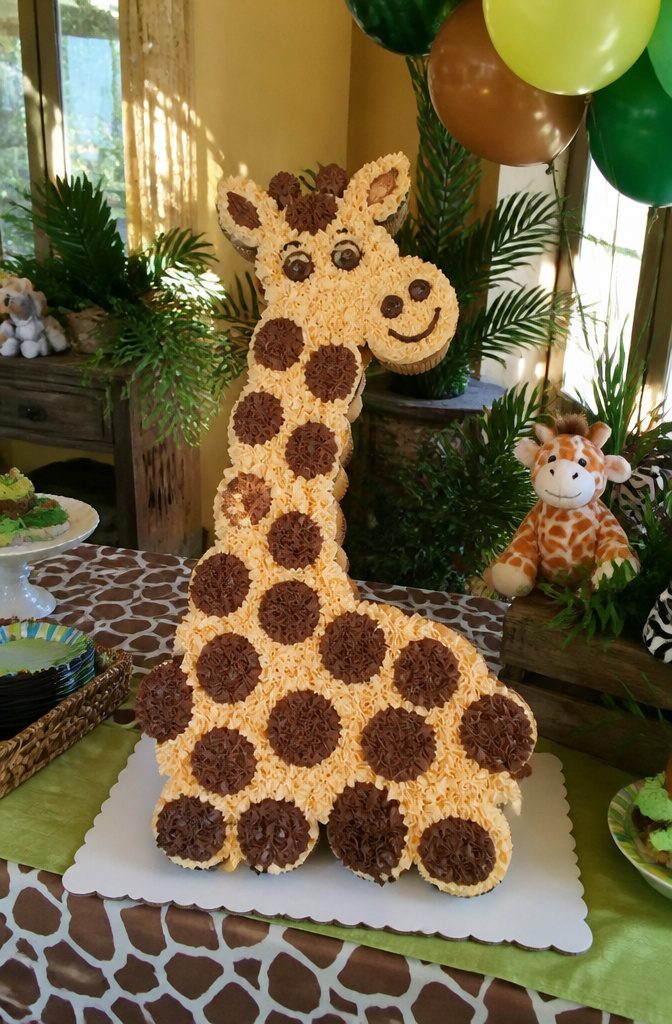
A giraffe cupcake cake works because the shape is already friendly to a grid of cupcakes.
The neck runs in a single elongated row, usually 8 to 10 cupcakes end-to-end, with a wider cluster at the base for the body and a slight bump of two or three cupcakes for the head.
What sells the design is the spot pattern, and that is where most home bakers trip up.
The spots need to read as random, but they also have to cross cupcake boundaries cleanly so the finished cake does not look like a spotted checkerboard.
I pipe each spot as one continuous shape across the gap between two cupcakes, using the frosting itself to bridge the seam, rather than stopping at every edge.
The color palette is narrower than you might expect. The base coat is a warm tan, not yellow, which reads as hide rather than cartoon.
For the spots, a milk chocolate brown has enough contrast without going so dark that you lose the giraffe’s lanky, light look. I skip the black outline entirely; it turns the animal into a logo.
A small tuft of darker frosting at the crown and two sugar-cookie ears complete the head, though I have seen versions with piped eyes that look more surprised than sweet.
The neck’s height makes this a natural centerpiece, but it also means transporting it requires a tray with a lip, or that single row of neck cupcakes will slide apart in the car.
6. Lion Pull-Apart Cupcake Cake
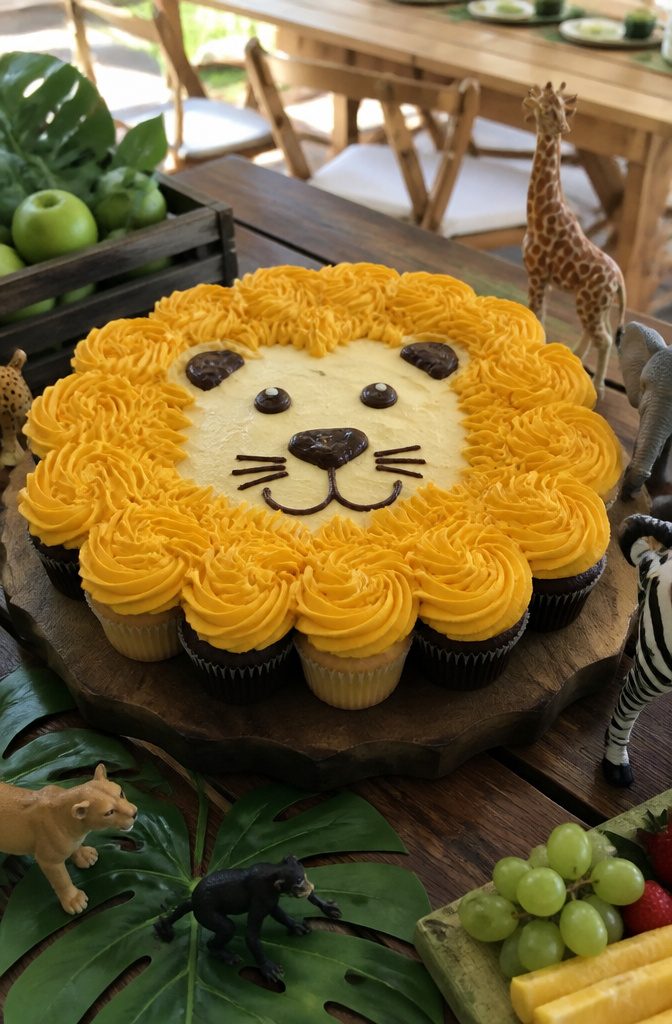
A pull-apart lion works because the radial arrangement does the heavy lifting for you.
Cupcakes fan outward from a center point, and that natural spoke pattern reads instantly as volume, the way a real mane flares around a face. The eye fills in what frosting alone would struggle to build.
The distinction between mane and muzzle is where this design earns its keep.
I would use a stiff, piped buttercream with a star tip for the mane, working outward in overlapping rows so the texture catches light and casts tiny shadows.
The center face sits flat by comparison, smoothed with an offset spatula and tinted a shade lighter to push it forward visually. A few darker dots for the nose and eyes, and the contrast does the rest.
Color helps too. A warm golden base for the face, with the mane shifted slightly amber or even a soft brown, reinforces the separation without needing perfect piping skill.
The radial layout forgives a lot. Each cupcake is its own small canvas, so a wobble in one star only matters to that cupcake, not the whole illusion.
7. Beach-Themed Cupcake Cake
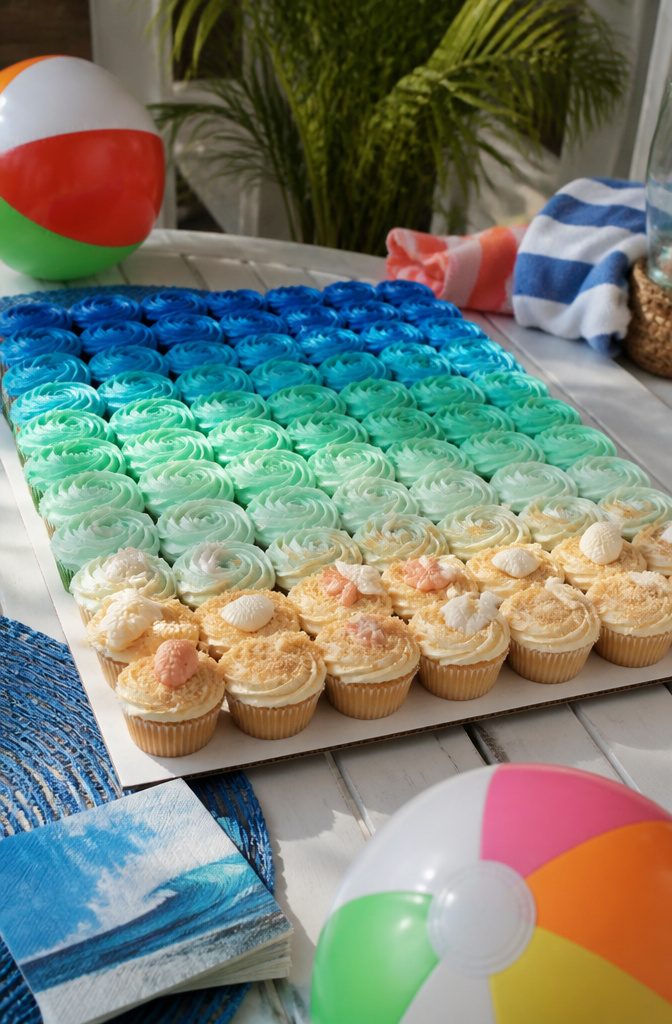
A beach-themed cupcake cake works best when the design reads as one continuous shoreline rather than individual decorated cupcakes.
The grid itself becomes the scene: the back rows carry deep blue frosting that lightens to turquoise and then white as you move toward the front, where crushed graham crackers or vanilla wafers stand in for sand.
Some bakers add a thin line of piping gel along the water’s edge to suggest wet sand catching the light.
The shore elements need deliberate placement. Shell-shaped candies or small fondant starfish belong only on the sand rows, never drifting into the water, or the illusion breaks.
A single cupcake at the corner can hold a paper umbrella, but keep it small; the pull-apart format already fights cohesion, and too many freestanding props turn the cake into a collection rather than a view.
For the gradient, I prefer working in three distinct color stages rather than a smooth ombré. The abrupt bands read better from a distance, which is how most people see a cupcake cake at a party.
The sand layer should extend slightly up the sides of the front-row cupcakes, not just across their tops, or the transition looks pasted on rather than grounded.
8. Ranunculus Cupcake Cake
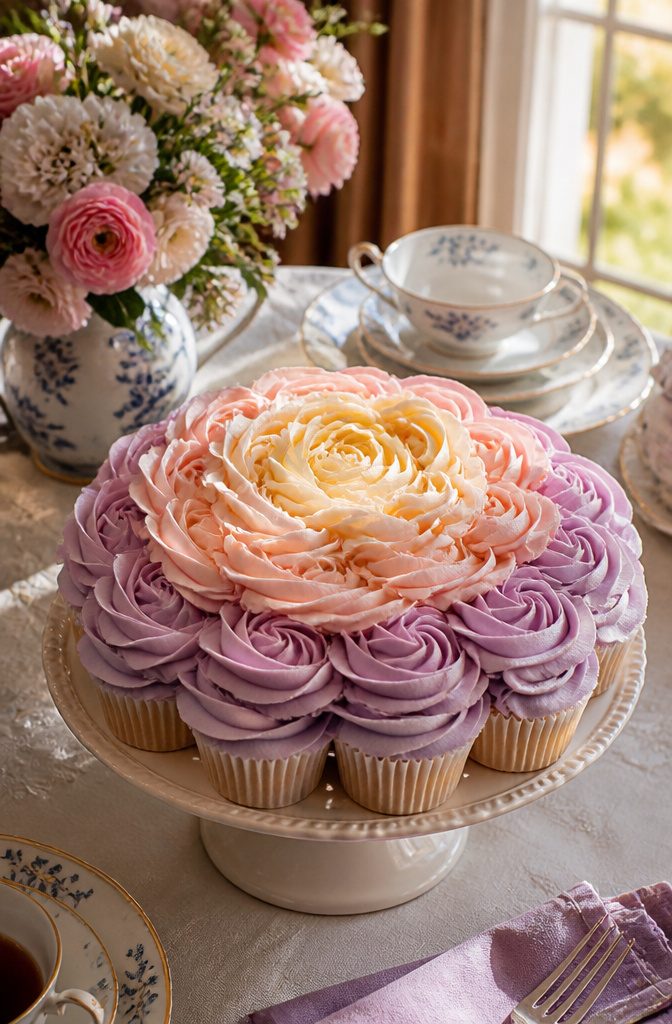
A ranunculus cupcake cake asks for patience, but what you get is a centerpiece that looks like a living bouquet.
Arrange your cupcakes in tight concentric circles on a board, then frost across the gaps so the surface reads as one continuous bloom rather than individual cakes.
For the petals, a round pastry tip pipes the dense, spiraled layers that define a ranunculus.
You will build from the outer edge inward, each row tucked slightly under the last, with four graduated shades of buttercream creating the depth that sells the illusion.
Leave one batch of frosting plain white for the innermost cup where the petals are tightest and palest, then work outward through successively deeper tones of your chosen color.
This tone-on-tone technique adds high style without being over-the-top.
That restraint matters here.
A ranunculus already reads as elaborate; keeping the color shifts subtle keeps it elegant rather than gaudy. The concentric piping also means no single cupcake needs to be perfect, since the eye reads the whole surface.
9. UP-Themed Cupcake Cake
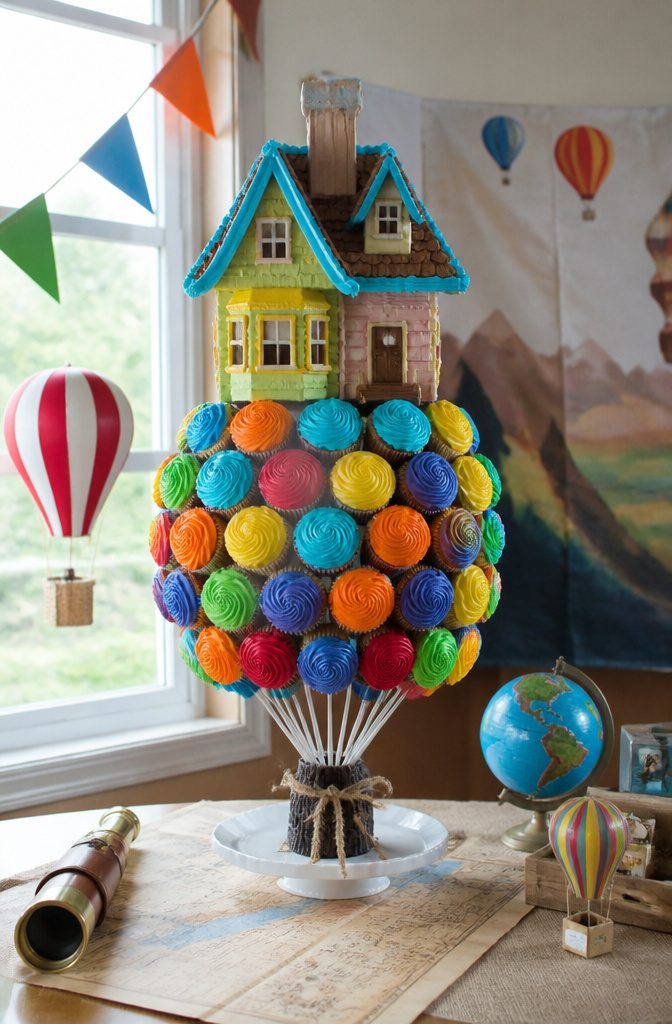
The house shape sits in the center of the arrangement, built from cupcakes frosted in muted siding tones, with a gabled roofline you shape by stepping the cupcakes back in tiers.
Around it, the balloons are the color story that sells the whole reference: cluster the bright reds, blues, and yellows in a dense mass above the chimney, tapering them out toward the edges so the bunch reads as lifting off.
I would keep the balloon colors saturated; pastels lose the Pixar punch against the house’s quieter palette.
The recognizability comes from two specific choices. One is the silhouette, the cross-gabled roof and rectangular body that even simplified still scans as that particular house.
The other is the asymmetry of the balloon cluster, heavier on one side, which mirrors the film’s visual of uneven lift. Without that off-balance weight, it becomes generic party balloons.
For frosting, buttercream holds the architecture and pipes clean balloon circles fast.
Fondant balloons look sharper but slow you down for a design that disappears in minutes at a party. I would skip the fondant unless the event is small and the display time matters more than the eating.
10. Golf Course Cupcake Cake
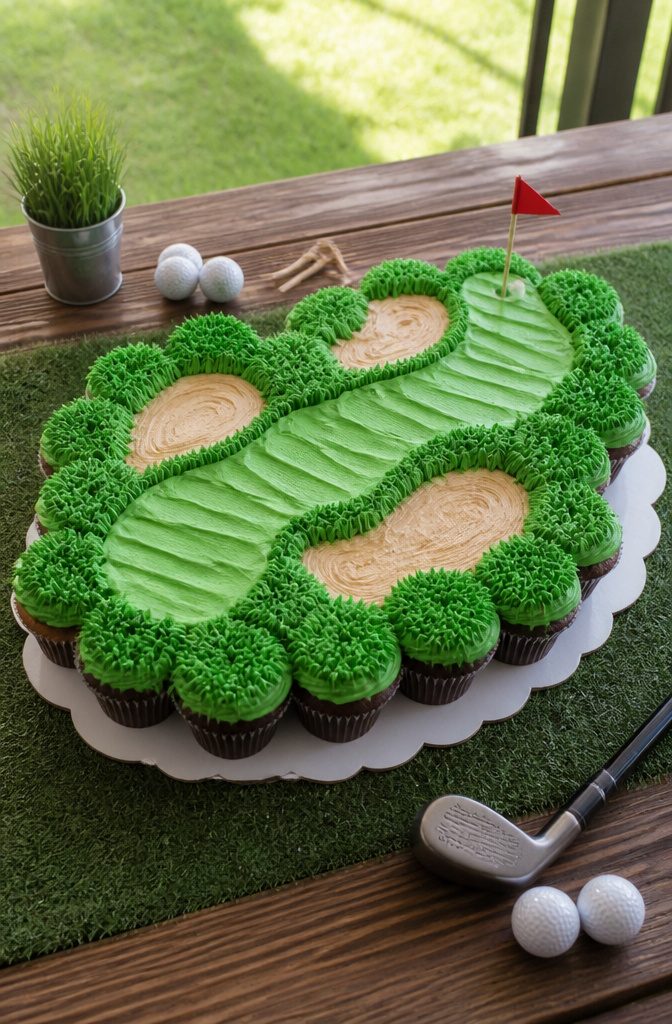
A sports scene cupcake cake design reads best when you commit to either bird’s-eye view or ground-level perspective, not both.
The fairway reads as a fairway because the green stays smooth while the rough gets texture, and that contrast only works if the scale stays consistent across the whole arrangement.
For the grass, a multi-opening grass tip on a piping bag gives you controlled texture without the fondant work that most home bakers want to skip.
The sand trap needs the opposite treatment: a flat spread of pale tan frosting, maybe dragged with a small offset spatula for that raked-bunker look.
The flag itself is where I’d break out a toothpick and a triangle of stiff paper, since a full fondant flagpole looks overscaled on cupcakes.
The real choice is how many cupcakes sit under that green.
Too few and the fairway breaks apart when someone pulls a cupcake; too many and the design goes flat because you’ve lost the individual cup shapes that make this read as a cupcake cake at all.
I like a tight grid where the cups nearly touch but still read as separate.
11. Princess Dress Cupcake Cake
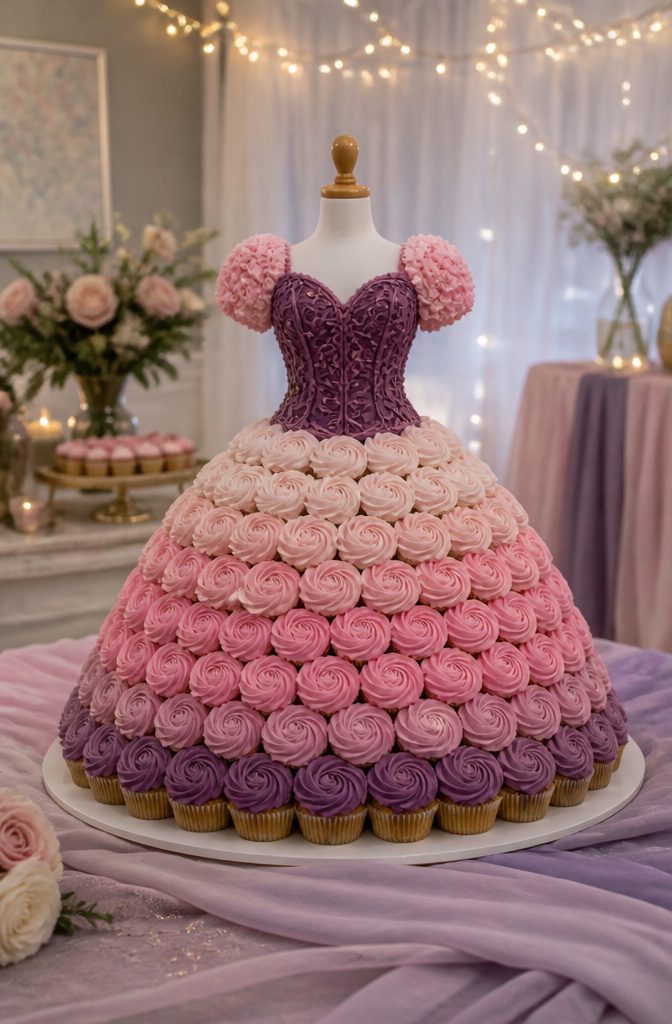
A princess dress cupcake cake builds its shape from cupcake placement alone, no carving required.
The skirt spreads wide with concentric rings of cupcakes, each row slightly closer to the center than the last, so the silhouette flares naturally from waist to hem.
I count about 24 cupcakes for a full skirt, fewer if you want a slimmer gown profile.
The bodice sits at the center top, usually 4 to 6 cupcakes arranged in a tight rectangle or slight taper.
Piped buttercream in a deeper shade than the skirt gives the waist definition, and a piping bag with a small round tip adds the sleeve caps or sweetheart neckline detail in minutes.
Candy pearls pressed into the bodice while the frosting is fresh read as buttons or a jeweled sash without any fondant work.
The gap between skirt and bodice cupcakes fills with frosting dragged smooth, or you can leave it as negative space for a two-piece effect.
I prefer the continuous look, one color flowing from bodice into skirt, because the eye reads the whole shape faster at a party table where guests are grabbing and going.
For height without a tiered stand, set the center cupcakes on a lifted round, a canister lid wrapped in matching paper, anything that raises the bodice half an inch above the skirt’s inner ring.
That small lift sells the dress illusion more than any piped detail below it.
12. Lightsaber and Stormtrooper Cupcake Cake
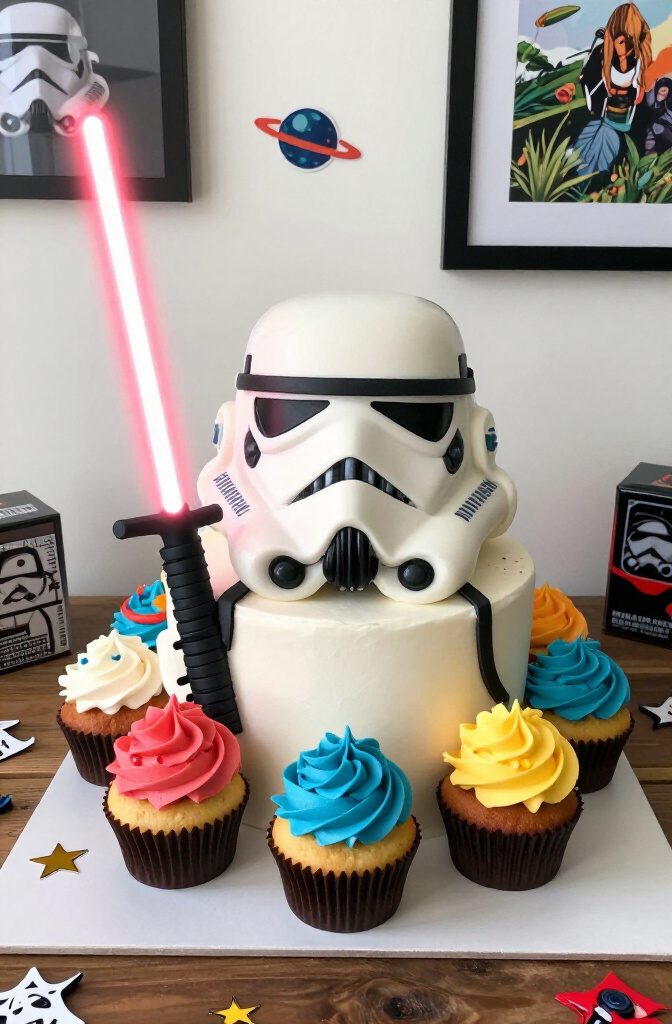
A Star Wars cupcake cake works best when you split the design into two clear zones rather than blending everything together.
The lightsaber stands vertical at the center, built from a column of cupcakes with bright white frosting and that colored blade streak running up one side.
Around it, the stormtrooper helmet spreads in a wide oval, the white base frosting broken only by the black eye slots and mouth grille piped on individual cupcakes.
The contrast does the heavy lifting here. That saturated blade color, electric blue or searing red, pops hard against the helmet’s clean white, so plain piping sells the theme without extra work.
I would keep the lightsaber hilt in silver-gray buttercream with a few black lines for grip detail, nothing more.
Arrangement matters for serving. The vertical saber breaks the helmet’s symmetry, which sounds like a problem but actually helps guests spot their cupcake without dismantling the shape.
Place the saber slightly off-center, closer to the helmet’s left edge, so the overall form reads as one composed image rather than two designs colliding.
For the helmet’s curve, set cupcakes in staggered rows so the outer edge stays rounded, not stair-stepped. Black decorating gel from the grocery store handles the visor; a small round tip gives you control for the frown lines.
Skip the fondant unless you already own the tools. Buttercream holds up better at room temperature anyway, and this design depends on bold blocks of color, not smooth sculpted surfaces.
13. Beehive Cupcake Cake
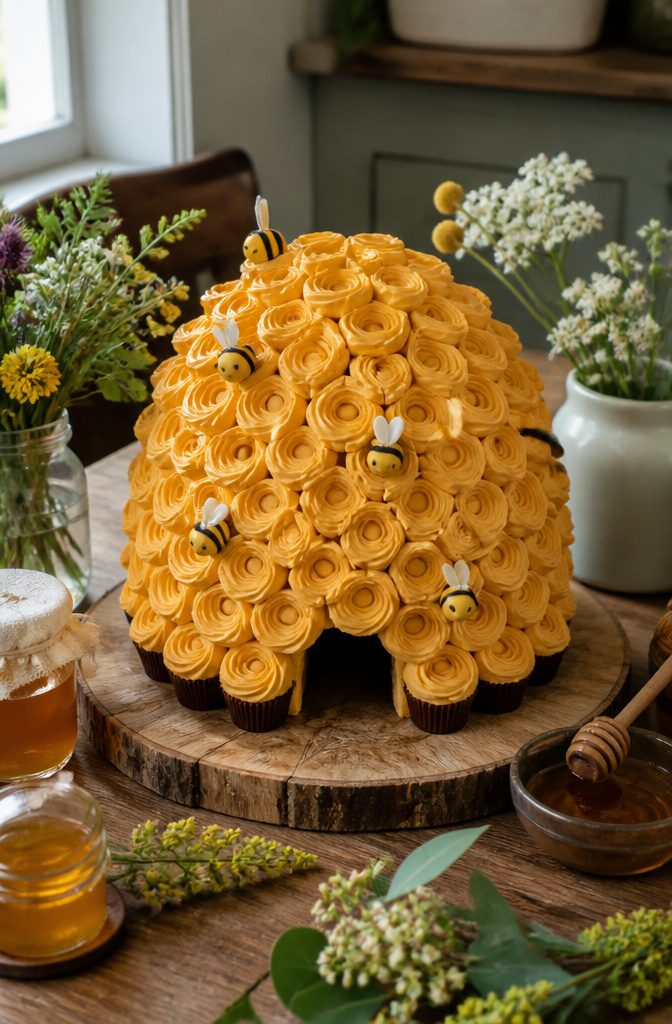
A beehive cupcake cake reads best as a tall cylinder or rounded dome, which means building upward rather than spreading flat.
I would stack cupcakes in concentric circles on a tiered board or a deep cake plate, each ring smaller than the one below, so the whole thing tapers like a skep.
Some bakers use a foam cone form underneath for insurance, but a tight pack of cupcakes will hold its own shape once the frosting sets.
The honeycomb pattern is where this design earns its keep. Tint your buttercream a warm amber, then pipe hexagons in overlapping rows across every surface.
A small round tip works, though I have seen people trace a hexagon template onto parchment first and pipe over the lines. Keep the cells roughly uniform; irregular ones still read as honeycomb, but lopsided ones just look messy.
Add fondant bees at the seams between cells, or skip them and let the geometry do the talking. The pattern carries enough information on its own.
14. Butterfly Cupcake Cake
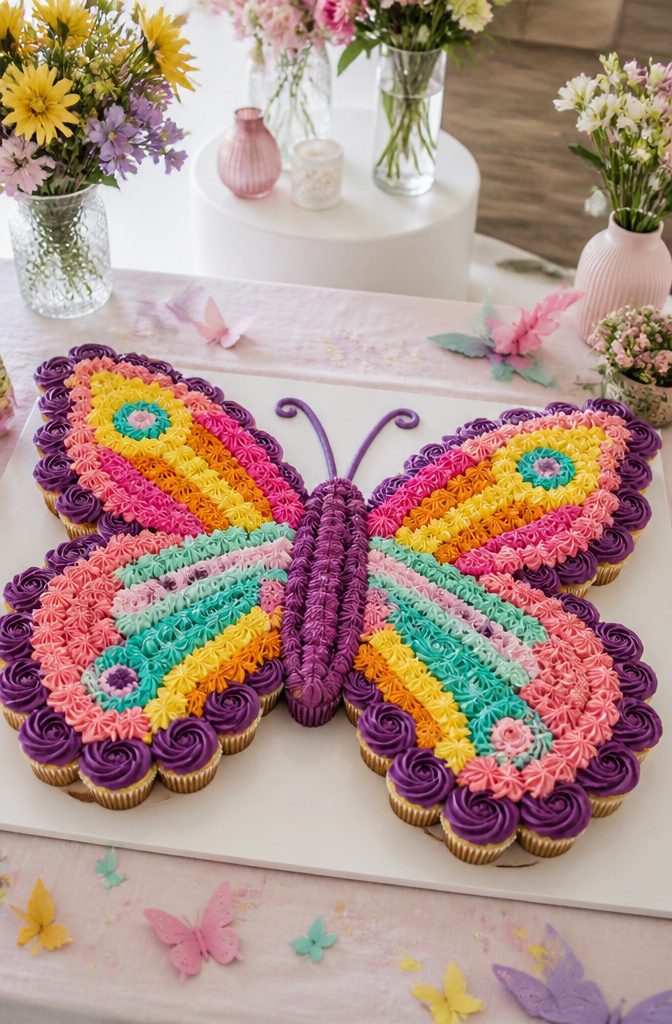
A butterfly cupcake cake reads from across the room when you mirror the wings in exact halves, color for color.
I arrange the cupcakes in two symmetrical shapes first, then frost each section in bright, clean hues that sit opposite each other.
The body runs down the center in a contrasting shade, and two thin lines of frosting or piped candy form the antennae.
Frost before arranging if you want cleaner edges; frost after if you want the wings to curve more naturally.
One approach has you secure each cupcake to the board with a dot of buttercream, push them close enough to touch, then frost across the tops as one surface.
The other frosts sections after placement. I land with arrange first, frost after: you can nudge the cupcakes into true symmetry while they are still dry, and the frosting stays cleaner when you are not shifting wet cupcakes into place.
Spring birthdays and garden themes suit this shape, though bug-themed parties work too.
The design lives or dies on the mirror image. A wing that is slightly off throws the whole thing askew, so I count cupcakes per side before I start.
15. Very Hungry Caterpillar Cupcake Cake
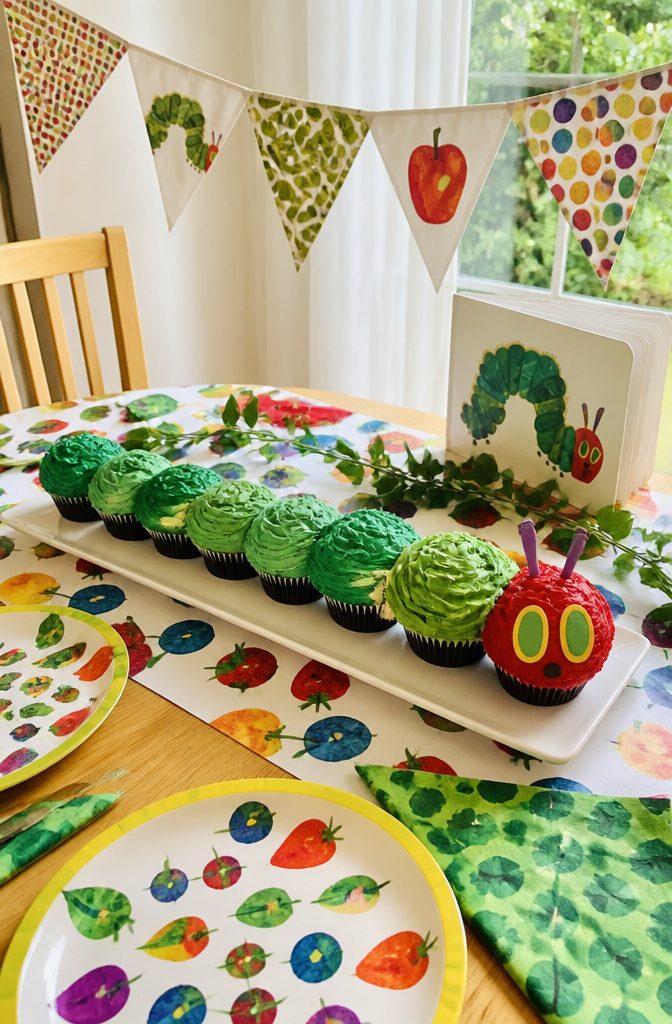
A Very Hungry Caterpillar cupcake cake works best in a straight line, head to tail, with each body segment sitting on its own cupcake.
The linear arrangement matters more than the exact count; what sells the design is the clear break between sections.
I would build the body from cupcakes frosted in the book’s familiar greens and reds, each color block covering two or three cupcakes before switching to the next.
The head at one end gets its own color, usually the brighter green, with two small fondant or candy eyes and a short nose piped in black. Two tiny antennae, maybe striped paper straws or piped frosting, complete the face.
Define the segments clearly without letting them blur together.
A thin line of darker frosting piped between color blocks, or a short gap of exposed cupcake liner showing through, does more than any face detail to make this read as caterpillar rather than snake.
I have seen versions where the whole thing curves in a gentle C shape on the board; it photographs better, but the straight line is easier to assemble and easier for small hands to pull apart without toppling the head.
For a first attempt, keep the body to eight or ten cupcakes total. More than that and the proportions get unwieldy on a standard half-sheet board, and the caterpillar starts to look more like a snake that ate too well.
16. Cookie Monster Cupcake Cake
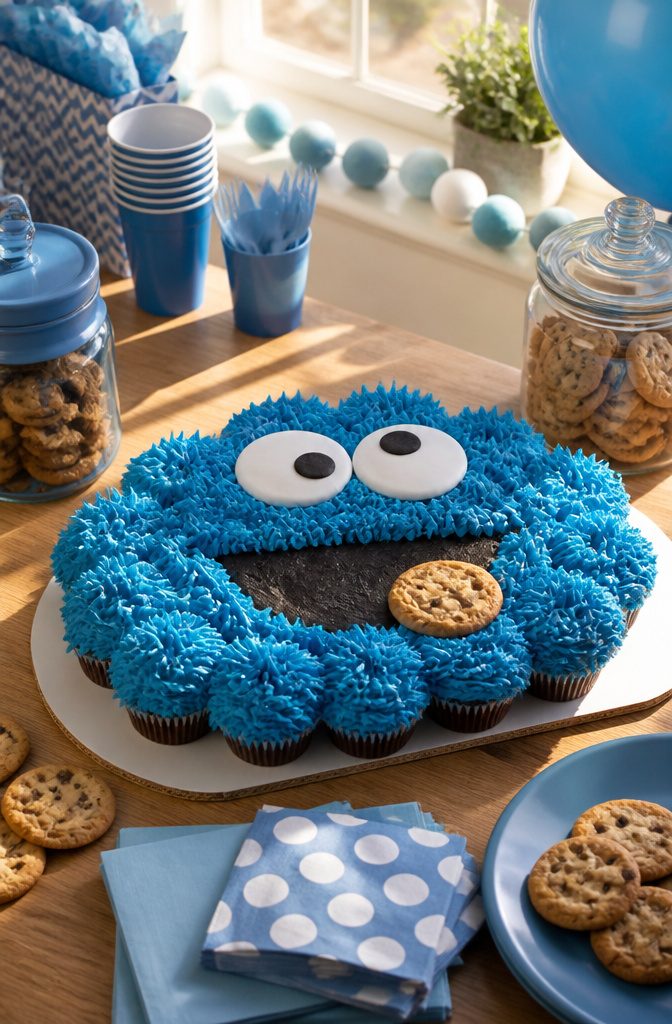
A Cookie Monster cupcake cake works because the face is already cartoon-simple. The blue fur texture hides every seam between cupcakes, so a perfect grid is not required.
I place the cupcakes in a rough oval, maybe 15 to 18 for a party-size cake, and frost the gaps along with the tops so the surface reads as one continuous piece.
The fur comes from stiff buttercream and a grass tip. I use a #233 or similar multi-opening tip, hold it perpendicular, and squeeze until the frosting stands up in a short spike.
I do not drag; I lift straight off and start the next spike close enough that the bases touch. The coverage looks like fur because the peaks catch light differently than a smooth surface would.
For the eyes, two jumbo cupcakes or a pair of cupcakes pulled forward from the arrangement become the white of the eye.
I frost those smooth, add black fondant circles or piped pupils, and attach them so they sit slightly above the fur line.
The mouth is an open half-moon of unfrosted space or chocolate frosting, with a single cookie, usually a chocolate chip, placed at the edge like he is mid-bite.
The features are large enough that scaling them across multiple cupcakes is forgiving; an eye can span two cupcakes without looking wrong.
The trade-off is time.
That grass-tip texture takes patience, and a full cake needs several hundred spikes. I find it easier to pipe in sections, chilling the buttercream firm between rounds so I do not smear my work.
17. Monkey in a Tree Cupcake Cake
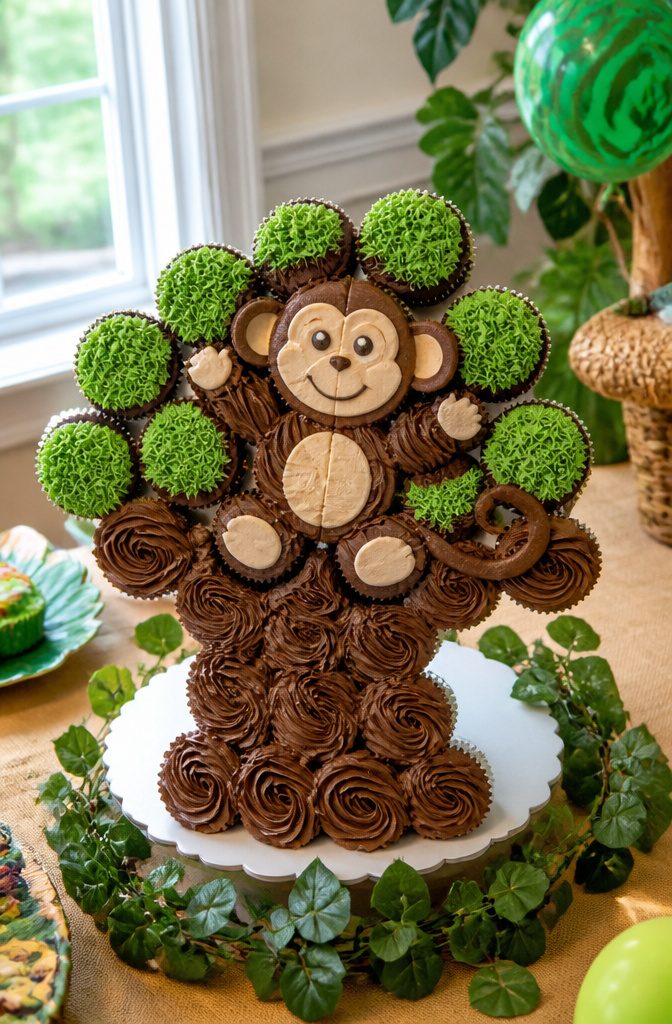
A monkey in a tree cupcake cake works because the two elements share the same structural trick: both the animal and the branch are built from cupcakes pushed tight together and frosted across as one surface.
The tree trunk and extended branch use chocolate or brown-tinted buttercream, with the grain of the frosting applied in upward strokes or a bark texture.
The monkey sits on the branch, formed from a smaller cluster of cupcakes at center, with the face piped in lighter tan frosting and the limbs reaching to grip the branch below.
Marshmallows stuffed between cupcakes keep the buttercream from sinking into gaps, a tip from decorators who want an even canvas before they start piping.
I would use this on both the branch and the monkey sections, since the design only reads as a single scene if the surface is flat enough to treat as one cake.
The leaves, if you add them, are frosting leaves piped at the branch tips or arranged around the base, not more cupcakes.
That keeps the monkey as the clear focal point and avoids a shape that reads as broccoli instead of foliage.
For the face details, a round piping tip gives the snout definition, while the eyes and mouth need the smaller opening of a writing tip or a careful hand with a toothpick.
The tail curls down the trunk in a thin rope of frosting, connecting the two elements so the eye reads them as one piece rather than a monkey placed on top of a separate tree.
18. Dinosaur Cupcake Cake
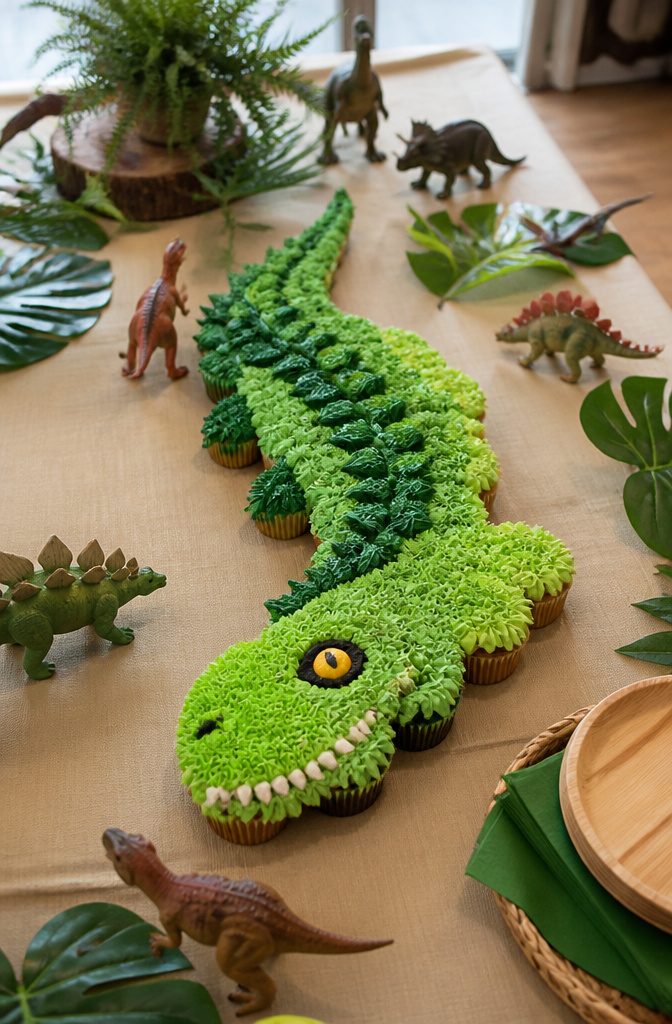
A dinosaur cupcake cake works because the silhouette does the heavy lifting. An elongated body, tapering tail, and small head on a raised neck read instantly as prehistoric, even before the frosting gets detailed.
The outline matters more than the texture, so I would sketch the shape first with cupcakes on the board, adjusting the tail curve until the species looks right from across the room.
Color palette separates the playful from the realistic. Bright lime or forest green reads friendly for a young kid’s party, while dusty olive with brown accents lands older.
The scaly detail comes from a small offset spatula or the back of a spoon pressed into buttercream in overlapping rows. That texture also hides the seams between cupcakes, which is where this design forgives more than most.
The trade-off is time against impact. The body fills fast, but the head and tail need single cupcakes placed with care to keep the outline clean.
I would budget extra minutes there and not rush the spine ridge, usually a piped line of darker frosting running neck to tail. Skip it and the shape goes flat.
19. Rainbow Cupcake Cake
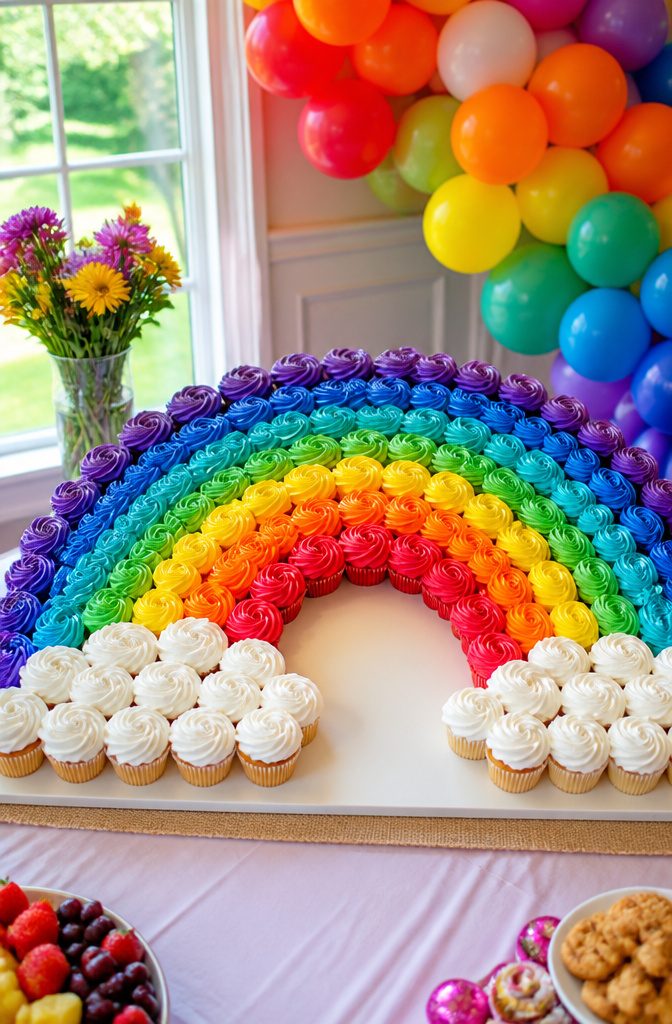
A rainbow cupcake cake builds its arc from cupcakes arranged in rows on a cake board, widest at the base and tapering to a single cupcake at the top, then frosted as one continuous surface.
The color sequence follows classic rainbow order: red, orange, yellow, green, blue, indigo, violet.
In one video walkthrough, the decorator found that sticking to this order matters for a smooth blend, especially if you are using a color-changing piping technique where a trace of the previous shade carries into the next band.
You have two ways to handle the frosting itself. A banded approach pipes each color in clean horizontal stripes across the arc, which reads as graphic and bold.
A gradient approach lets the colors bleed slightly at the edges, so the transition from band to band softens. The banded look wins for clarity at a distance; the gradient reads softer up close but takes more control.
Cloud elements at the base ends are usually piped in white buttercream with a large round tip, piled to hide where the outermost cupcakes meet the board.
Some decorators tuck mini marshmallows between cupcakes before frosting to fill gaps and keep the surface even, which also gives anyone pulling a cupcake from the edge a little extra treat.
20. Unicorn Cupcake Cake
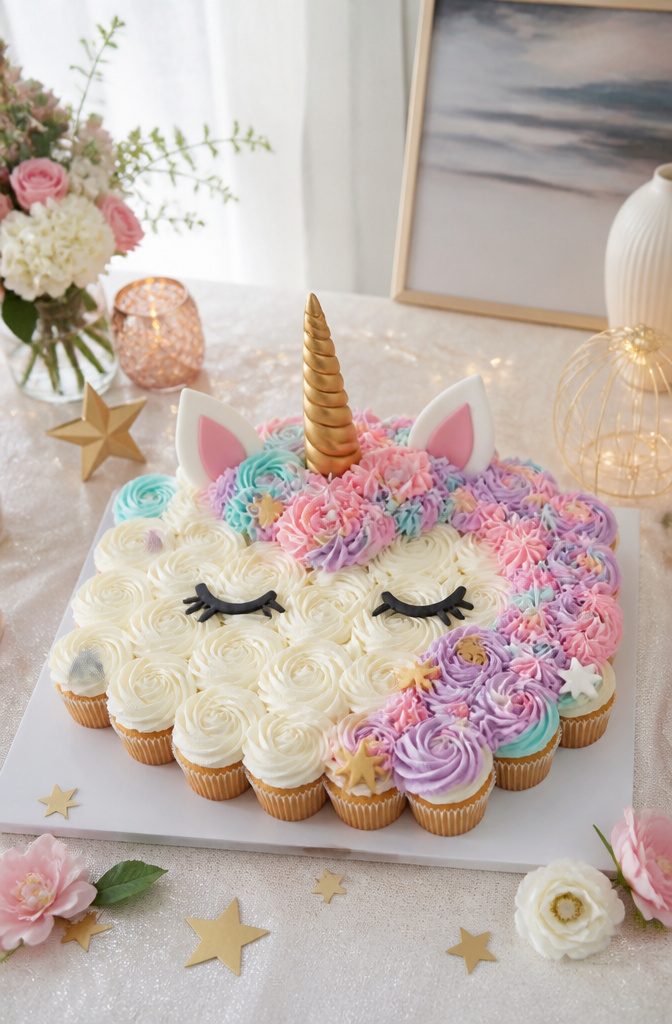
A unicorn cupcake cake reads as magical from across the room because the design depends on a horn that actually projects upward, not just a piped swirl flat against the surface.
The body forms from a grid of cupcakes frosted as one continuous shape, with the mane built from contrasting buttercream colors piped in rosettes or star bursts along the neck and forehead.
The horn itself is where most home bakers add a separate element, a fondant cone or a molded sugar piece pressed into the center cupcake before frosting the surrounding area smooth.
I would skip the all-frosting approach for the horn; it collapses under its own weight and the spiral detail gets lost.
Frosting handles the magical wash of color across the body and mane, but the structural pieces need something that holds its shape.
For the eyes and nostrils, a dab of black gel icing on the surface cupcakes keeps the whole thing edible without extra decorations that read as clutter.
The pull-apart construction means a guest grabs a single cupcake and the horn stays standing for the next hand, which is why this format works better than a standard cake.
Frequently Asked Questions
What are the cupcake trends for 2026?
These designs emphasize continuous frosting surfaces, color contrast, and arrangements that read as unified images from a distance.
What are some simple cupcake design ideas?
Simple options include the fish pull-apart, which needs only a rounded body and triangular tail with piped scales, and the Very Hungry Caterpillar built in a straight line with color blocks.
The sunflower also rates as easy: arrange cupcakes in tight circles with yellow outer frosting and a brown center. Cookie Monster works well too since the grass-tip fur texture hides seam imperfections between cupcakes.
How do you make a cupcake cake look fancy?
Push cupcakes close enough to share one continuous frosting surface rather than decorating individually; this reads as a polished single cake. For the ranunculus, pipe dense spiraled petal layers in four graduated shades of buttercream.
The princess dress builds height by setting bodice cupcakes on a lifted round. Mirror-symmetry on butterfly wings and precise color boundaries, like the sunflower’s sharp yellow-to-brown transition, also signal craft.