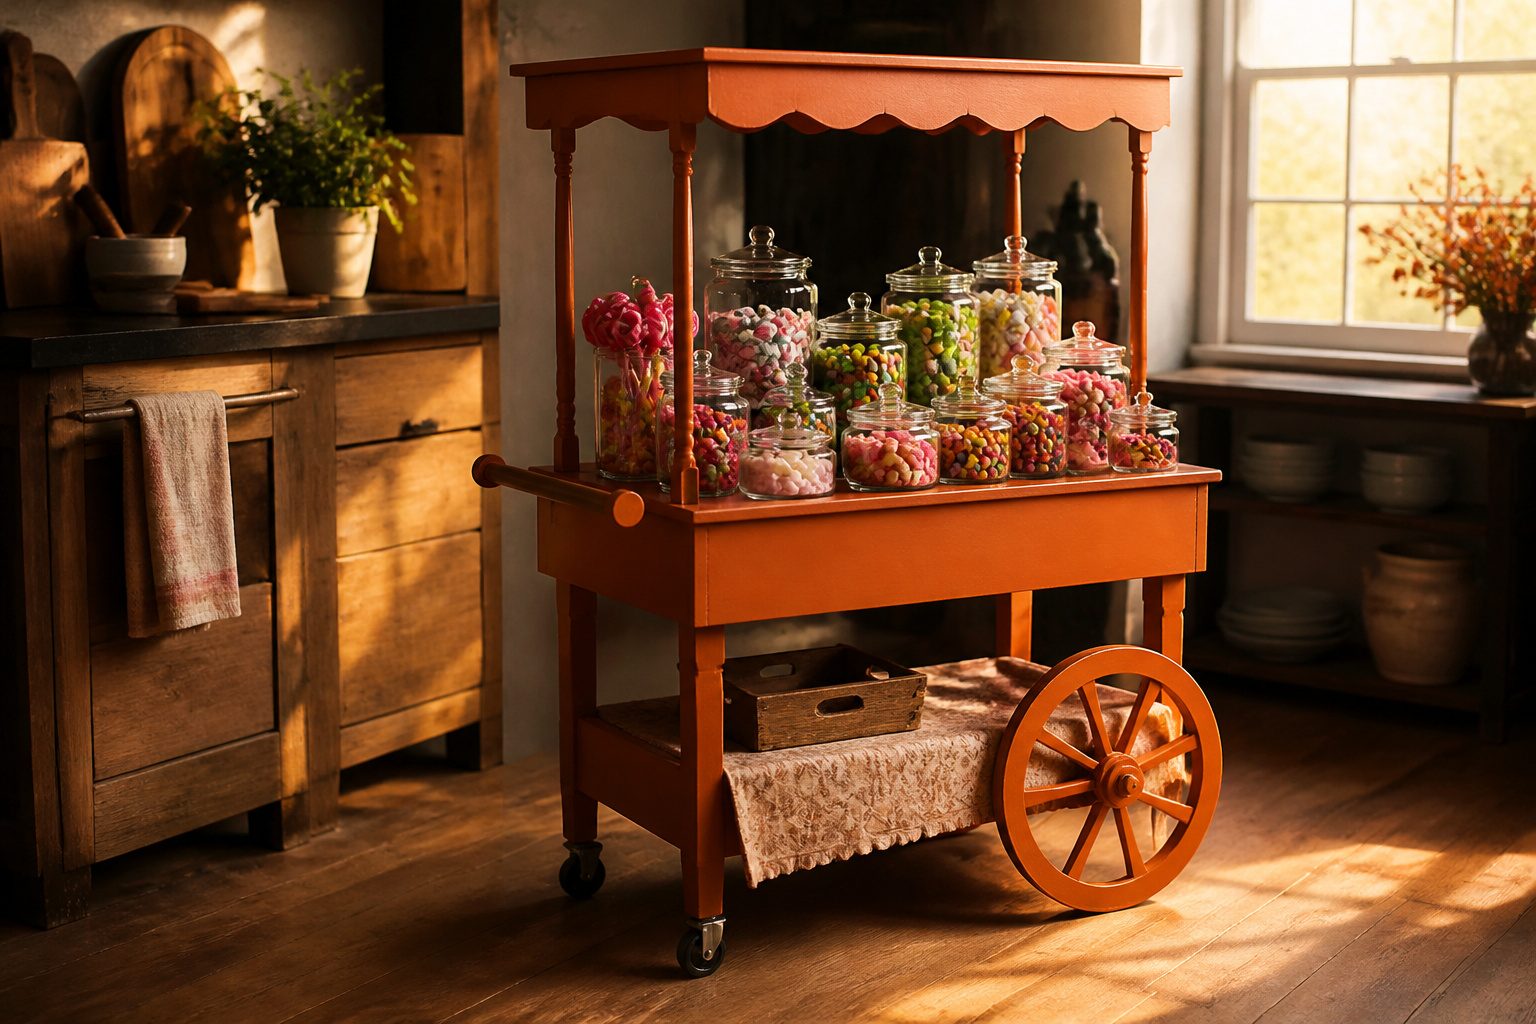
A finished candy cart runs about $30 in paint and fabric if you repurpose a utility cart you already own, or a Saturday in the garage with 3/4-inch plywood and a cut list that starts at 54 by 30 inches.
Most builds fail at the wheels: a cart that cannot roll to the kitchen for refills or out of the way when the floor clears becomes a shelf you overpaid for.
The 23-inch decorative wood wheel on the front sells the illusion, but it is the caster wheels on the back legs that do the actual work.
1. DIY Dessert Cart for Kids’ Parties
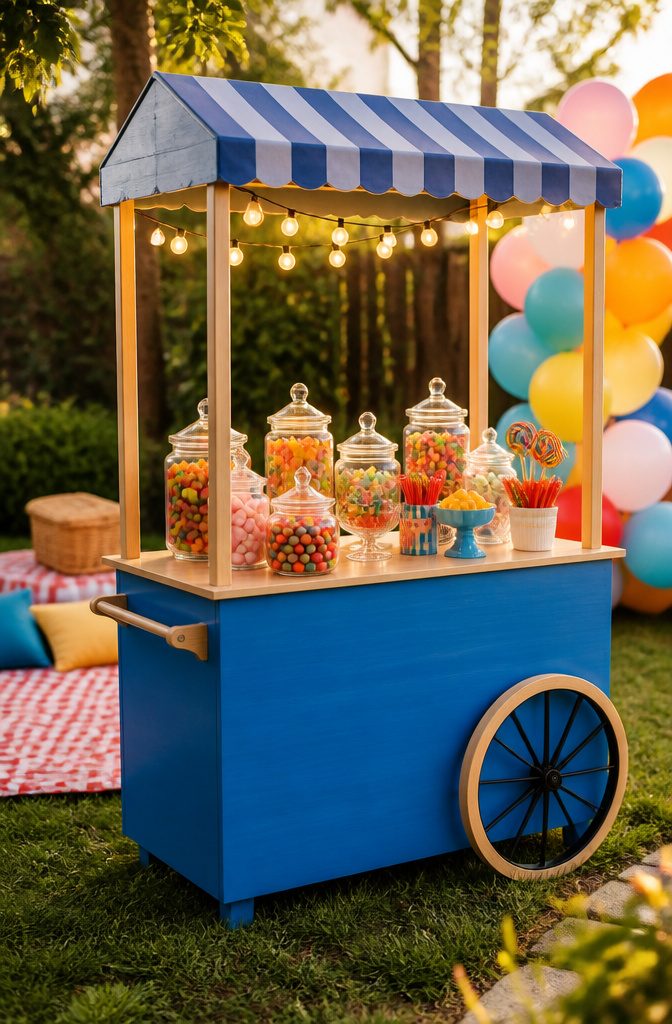
A kids’ party cart needs to survive being climbed on and still look good in photos, which is why 3/4 inch thick plywood for the base is the right call over the thinner stuff some builds use.
The cut list is straightforward: a 54 by 30 inch front piece, 20 by 30 inch sides, and a 54 by 20.5 inch bottom form the box. The countertop runs 57 by 24 inches to give a little overhang, and the topper frame sits at 52.5 by 20 inches.
For the canopy structure, 1.25 inch diameter wood dowels drop into closet rod holders, eight total, mounted at the corners of that topper frame.
The 1×5 lumber builds the topper frame itself, with scallop wood trim for the decorative edge. Assembly is glue and screws throughout; a nail gun speeds up the 1×5 framing if you have one.
The 23 inch wood wheel on the front is the visual hook that sells the cart as a cart, not a table with ambition.
Caster wheels on the back legs let you roll it out and level it on uneven patios.
String lights threaded through the dowels or around the topper frame keep the party going past sunset. Paint it bright, let the kids pick the color, and the thing becomes part of the event before any candy hits the counter.
2. Party Treat Cart from a Utility Cart
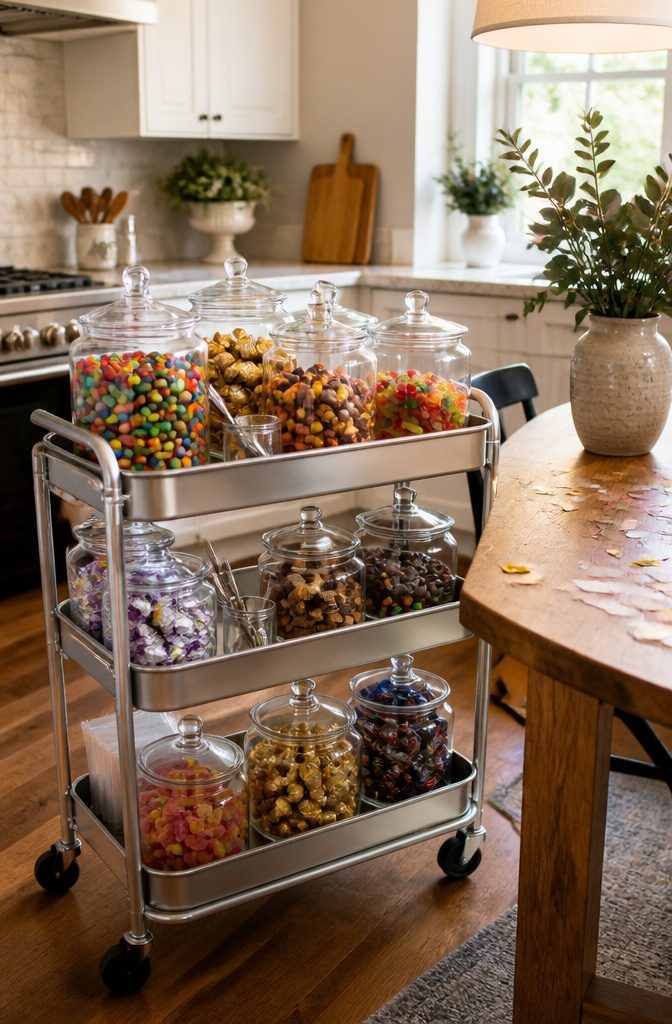
A three-tier utility or bar cart with wheels is the fastest route to a working candy cart, and mobility is the advantage that justifies the choice.
You roll it to the kitchen for refills, to the living room for halftime, or out of the way when the floor needs clearing. No lifting, no disassembly.
The cart arrives with its structure finished, so you skip the full woodworking process entirely.
That leaves your effort for decorating: fill glass jars with SNICKERS, M&M’S, and SKITTLES, letting the branded wrappers do the color work, or pour loose candies into clear canisters so guests scoop their own mix.
A bar cart reads more formal, with railings that hold trays steady; a utility cart is lighter and harder to dent if a child bumps it.
Either works. The wheels matter more than the metal finish, since a stationary cart is just a shelf you paid extra for.
3. Concession Cart for Weddings
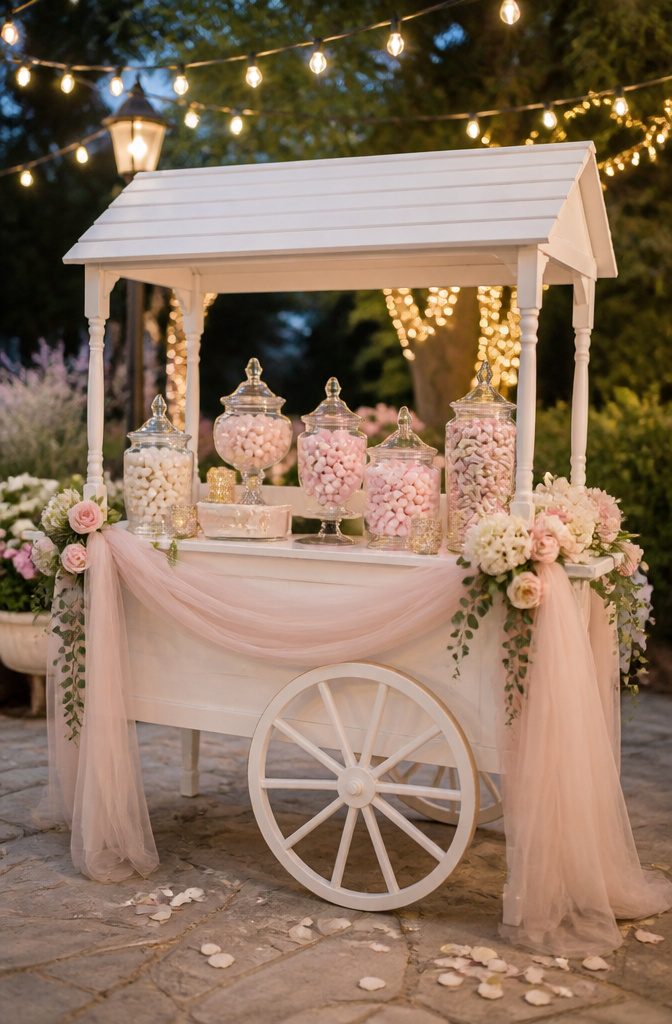
A wedding candy cart starts with the same wood frame you’d use for a birthday party, but the finish work changes everything.
Paint the cart in the wedding colors first; that base coat does more to signal "formal" than any accessory you add later. From there, fresh flowers and tulle draping move it firmly out of backyard territory.
I would skip the plastic garlands that read playful and instead wire in blooms that match the bridal bouquet, or cluster a few stems at the corners where the eye lands first.
Soft white twinkle strings work better than colored bulbs for evening wedding receptions. Fabric matters too: a sheer panel across the front rail hides storage bins underneath and gives you that layered texture you see in formal dessert displays.
The same cart structure handles both jobs; the difference is maybe $30 in paint and fabric versus the cost of building something separate. That reuse is the practical win here, especially if you already own the cart from a previous event.
4. Ice Cream Cart
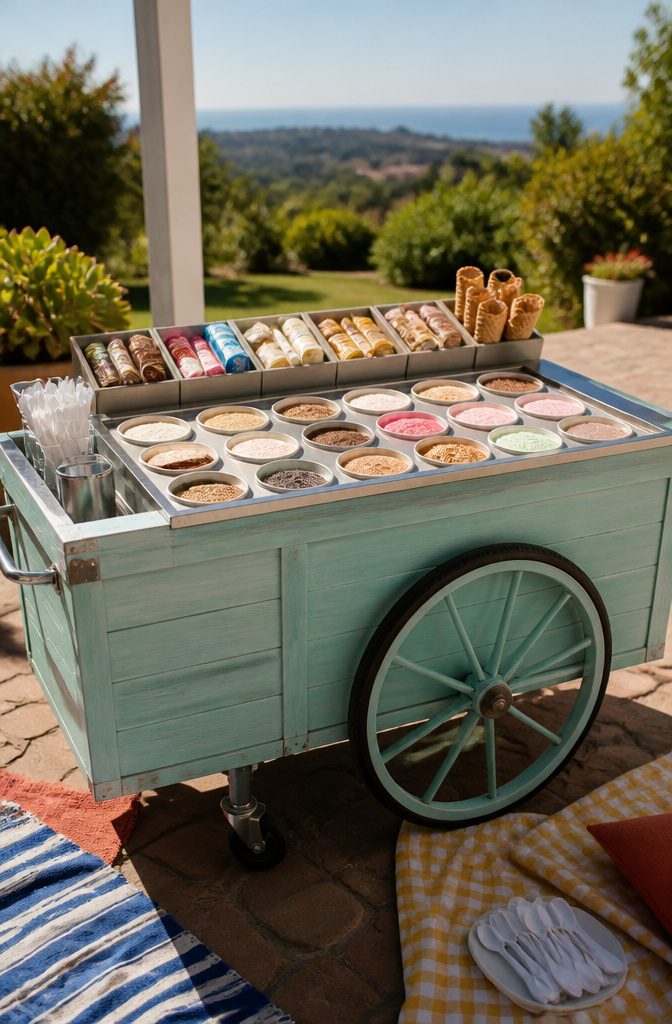
An ice cream cart needs to solve cold storage first, and the cart shape follows from that choice.
Most builds I see use a wide, shallow deck rather than the tall, narrow shelves that work for wrapped candy. Tubs of ice cream need horizontal space, and novelty boxes stacked flat stay intact longer than they would wedged upright.
Insulated coolers set into the cart body buy you two to three hours of safe serving time in moderate weather.
For longer events, dry ice layered below the product keeps things frozen solid, though you will need tongs and gloves to handle it safely.
The simplest setup I have watched work is a cart parked within quick walking distance of a kitchen freezer, with a runner swapping in fresh tubs as the display empties.
That arrangement skips the dry ice entirely and keeps the build lighter.
A full ice cream setup is heavy, so decide whether you need to wheel it around or can park it in one spot.
A cart heavy with insulation and ice does not roll easily across grass or gravel, so plan the wheels and the route before you plan the paint color.
5. Movie Night Snack Cart
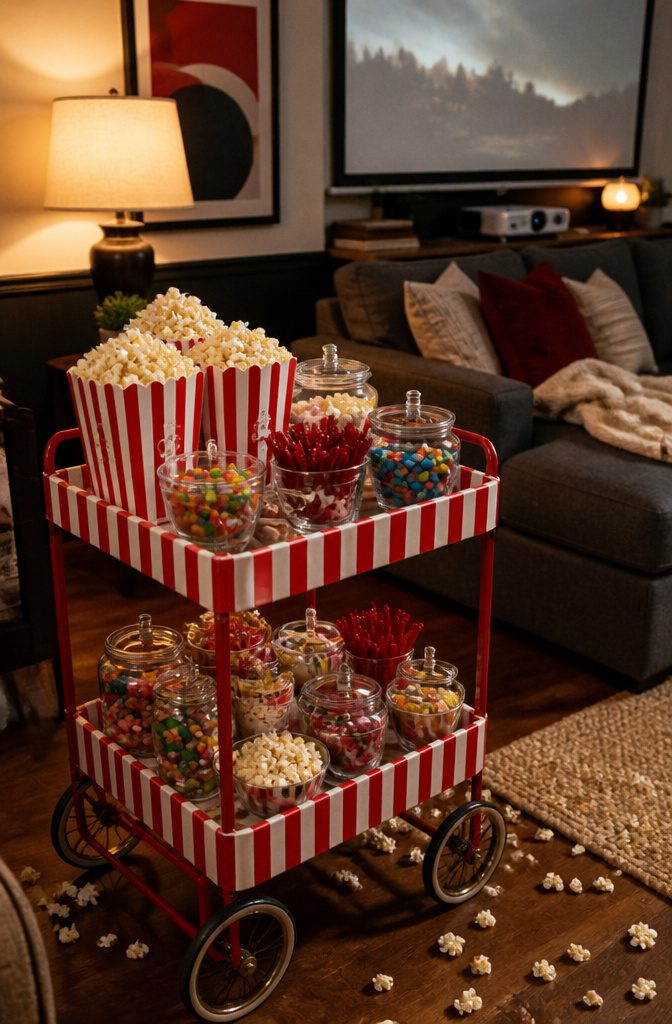
A movie night cart lives or dies on whether it reads as cinema before anyone touches the snacks.
Red and white striping does that heavy lifting: wrap the cart frame in wide striped paper or fabric, and the eye goes straight to popcorn-box nostalgia.
I like to stack actual popcorn containers, the tall red-and-white striped ones, at varying heights rather than laying everything flat. It builds a concession-stand silhouette that photographs well and guides guests to the salty stuff first.
Ticket stubs work better than printed labels here. Tear a pad of admit-one tickets in half and tape the jagged edge to glassine bags or small bowls.
The torn edge matters; clean-cut looks like office supplies, not a box office. For indoor setups, keep the cart narrow enough to slide beside a sofa without blocking the screen.
Backyard projections give you more room, but wind becomes the enemy. I weight the base with a hidden sandbag and skip anything lightweight like paper straws or loose confetti.
The same cart transitions between both settings if you plan for it.
Striped fabric rolls up for storage, popcorn containers nest, and ticket stubs store flat. The only piece that changes is lighting: battery-operated marquee letters for indoors, nothing that needs an extension cord for the yard.
6. Themed Party Cart
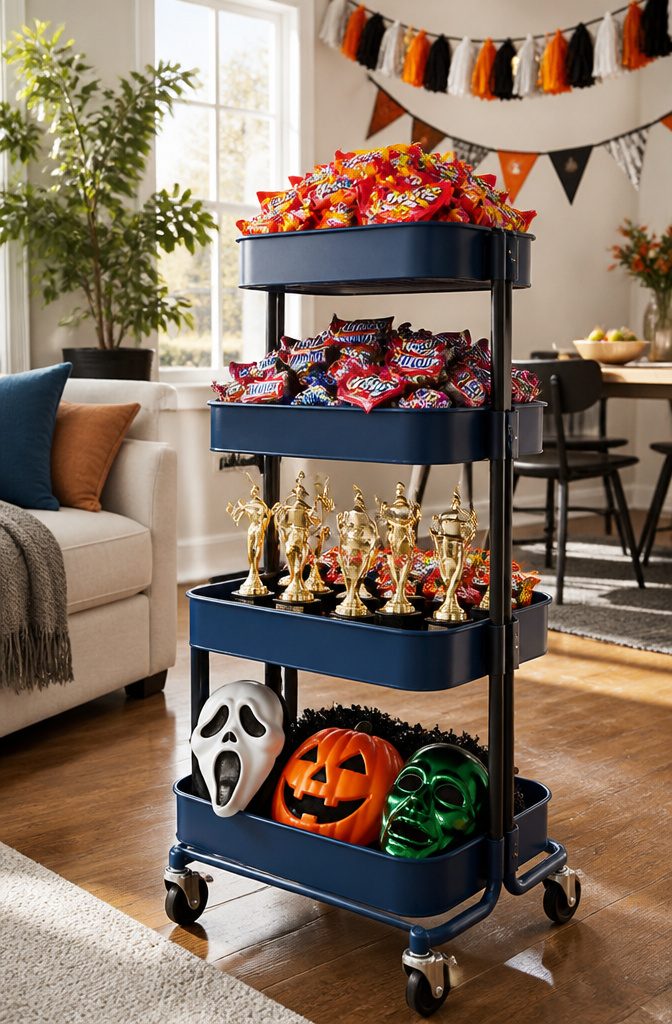
The same cart base carries a sports party, a Halloween bash, or a Valentine’s dinner without rebuilding anything. Paint and props do the shifting, and the candy selection seals the impression.
For a sports party, I would repaint the cart in the team colors, then stock the top tier with SNICKERS®, SKITTLES®, and M&M’S® in matching wrappers.
The bold packaging reads instantly from across the room, and guests recognize the theme before they reach the cart.
A Halloween version swaps the palette to orange and black, adds a few appliques, and fills the bins with the same boxed candy in seasonal packaging.
Valentine’s Day calls for softer tones, maybe tulle or a small garland, with the candy leaning toward the reds and pinks already on shelves that time of year.
Choose candy whose packaging already matches your scheme. Manufacturers have already done the color work, so skip custom labels or printed wrappers.
A utility cart with three layers and wheels makes this even simpler, since you roll the whole display into storage after the event and wheel it back out repainted for the next one.
The investment stays in the base. The theme lives in the top layer of stuff you will eat or throw away anyway.
Materials and Tools
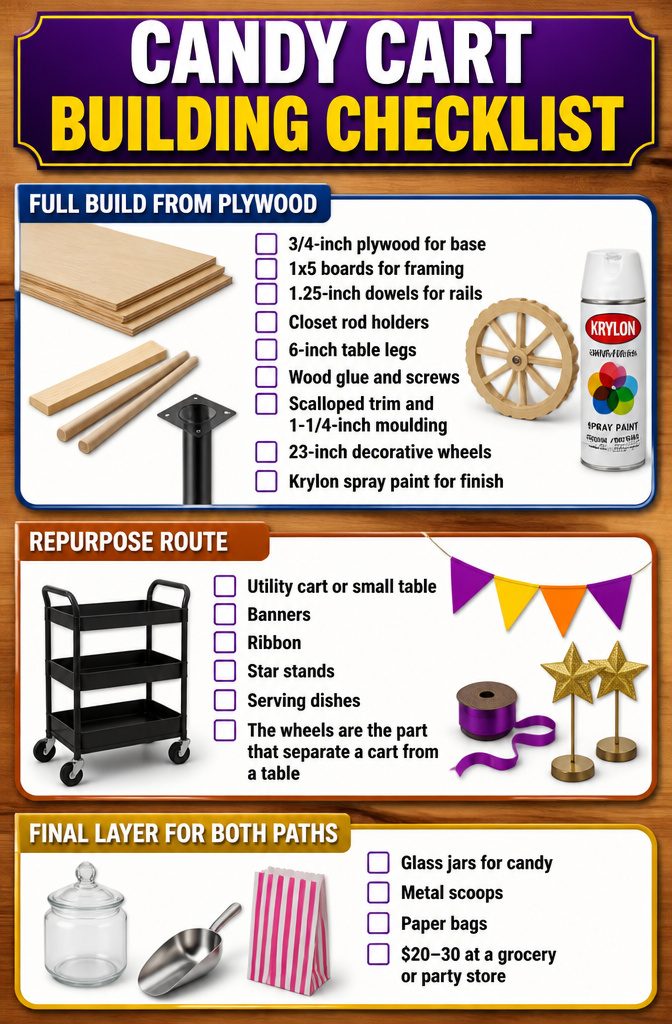
A full build from plywood needs 3/4-inch stock for the base front, sides, bottom, and countertop, plus 1×5 boards for framing and 1.25-inch dowels for the canopy rails.
Closet rod holders, 6-inch table legs with top plates, wood glue, and screws hold it together. One plan calls for scalloped trim and 1-1/4-inch moulding, plus 23-inch decorative wheels from a craft store and Krylon spray paint for finish.
The repurpose route skips most of that. A utility cart or small table already has wheels and a frame, so the shopping list shrinks to banners, ribbon, star stands, and serving dishes that fit the event.
The wheels are the part that separate a cart from a table, so check that they roll before you buy.
Both paths need the same final layer: something to hold the candy. Glass jars, metal scoops, and paper bags run about $20–30 at a grocery or party store, and they move to the next theme without another build.
How to Customize Your Cart
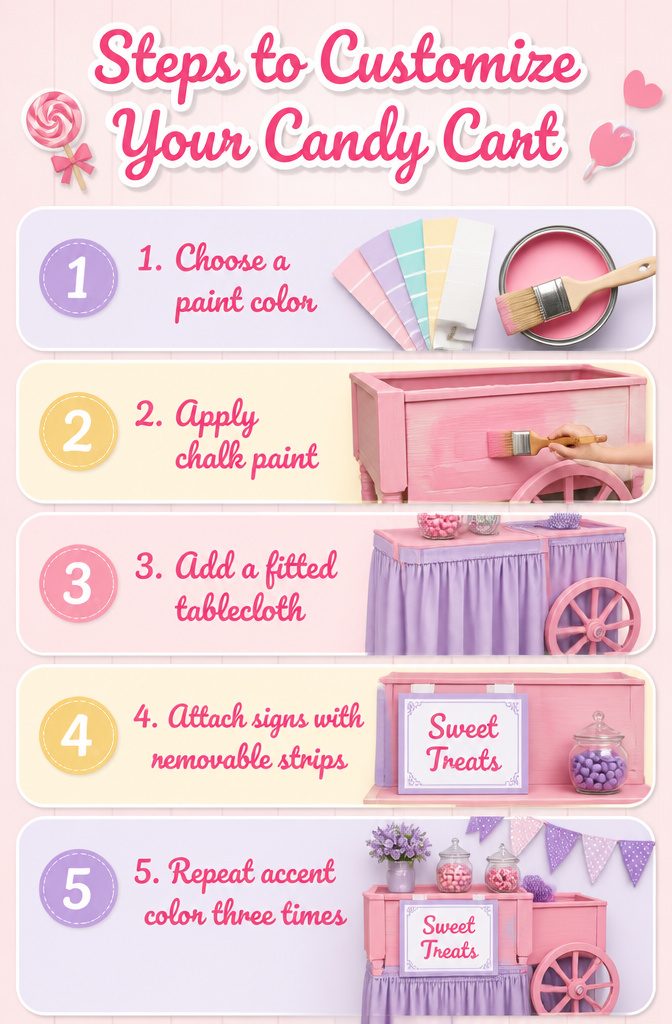
A candy cart that clashes with the room looks like furniture that wandered in from another party, so the paint job is where I start.
Chalk paint sticks to wood, metal, and most laminates without sanding, and a quart covers roughly 150 square feet, enough for a small cart with primer to spare.
I like matte finishes for vintage themes and satin for anything modern; gloss shows every fingerprint from sticky hands.
For fabric, a fitted tablecloth or a skirt with hook-and-loop tape along the top edge lets you swap colors between events without commitment.
I attach signs with removable poster strips or small clamps rather than screws, especially on rental pieces or anything I might resell.
Command strips rated for a few pounds hold lightweight wooden lettering fine; heavier pieces need a small easel propped against the cart instead.
The one detail that elevates a cart from decorated to deliberate is repeating one accent color three times: once on the cart, once in the fabric, once in the signage.
It reads as intentional even when the decorations themselves are simple dollar-store finds.
Using Your Cart for Different Events
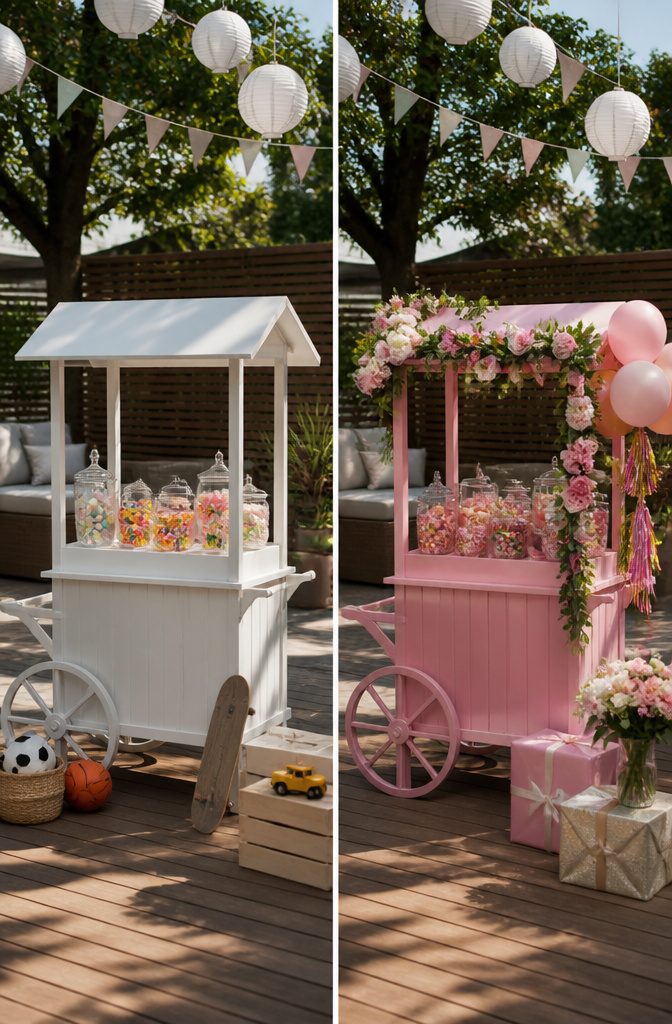
A candy cart built for one event usually works for another with a few swaps. Kids’ parties call for lower shelf heights so small hands can reach, plus brighter colors and individually wrapped treats that won’t melt in a backyard.
Weddings flip the script: taller display tiers, glass jars with scoops, and a neutral palette that reads as dessert table rather than concession stand.
Movie nights are the simplest conversion, since a dark room hides most of the cart and the focus lands on popcorn boxes and boxed candy rather than open bowls.
Seasonal gatherings, Halloween especially, are where I think the cart earns its keep. Pile in orange and black wrapped sweets, add a few plastic spiders, and the same structure feels purpose-built rather than recycled.
The only real limit is weight. A cart loaded with glass apothecary jars and bulk candy gets heavy fast, so I plan the heavy displays for events where the cart stays put and keep the mobile setups lighter.
Frequently Asked Questions
Could I add wheels to this so it rolls?
Yes. Caster wheels on the back legs let you roll the cart out and level it on uneven patios, and a utility or bar cart already comes with wheels so you skip the build entirely.
The wheels are what separate a cart from a table with ambition, so check that they roll before you buy.
Could I add lights to this somehow?
Yes. String lights threaded through the canopy dowels or around the topper frame keep the party going past sunset, and for evening weddings soft white twinkle strings work better than colored bulbs.
Battery-operated marquee letters suit indoor movie nights, while outdoor setups skip anything that needs an extension cord.
What sweets do you put on a sweet cart?
Glass jars filled with SNICKERS, M&M’S, and SKITTLES let the branded wrappers do the color work, or you can pour loose candies into clear canisters so guests scoop their own mix.
For ice cream carts, tubs need horizontal space and novelty boxes stacked flat stay intact longer than wedged upright. Pick candy with packaging that matches your colors and you can skip custom labels.
What are some creative names for a candy cart?
Call it a candy cart, an ice cream cart, a dessert cart, or a sweet cart; the name shifts with what you stock and the event you are hosting.
A concession cart reads backyard or movie night, while a dessert cart signals weddings and formal showers. The structure stays the same no matter what you name it.